
Go to your Facebook Ad Manager
For this you'll need an active Facebook business page. For those who already have a page, go here to create your facebook pixel. If you don't already have a business page, go here to create one. Once you've done that, click the first link.
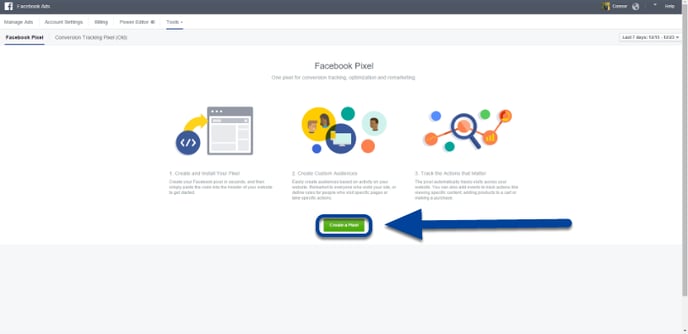
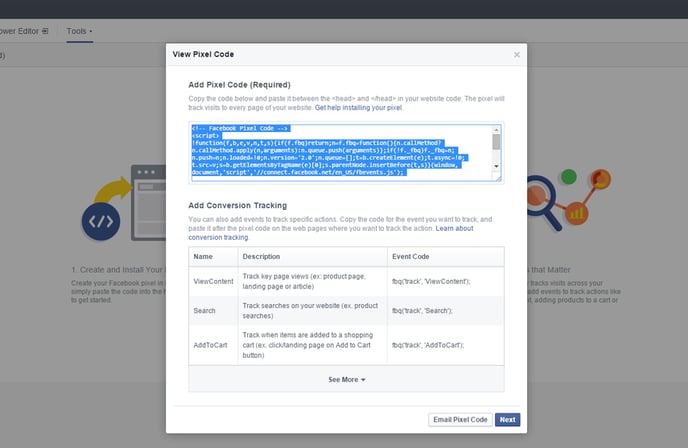
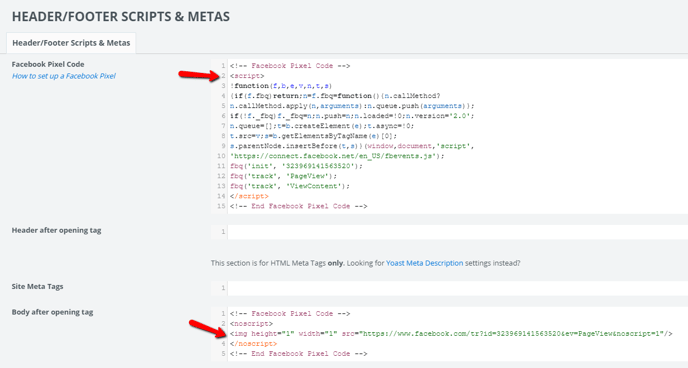
Copy the Facebook pixel code.
In your admin panel, go to Settings > AgentFire Settings > Header/Footer Scripts & Metas
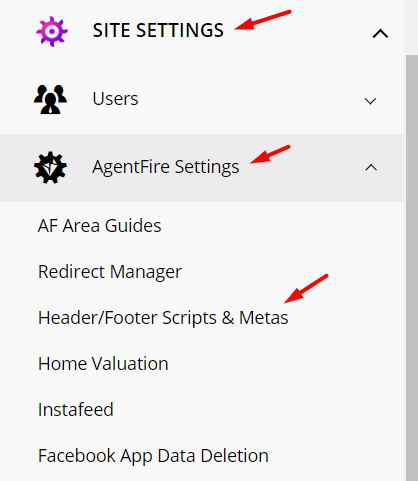
Here's the actual link if you want to just type it in once you're signed into your site: yoururl.com/wp-admin/admin.php?page=scripts-metas
Paste the code in the "Facebook Pixel" section and hit "Update"
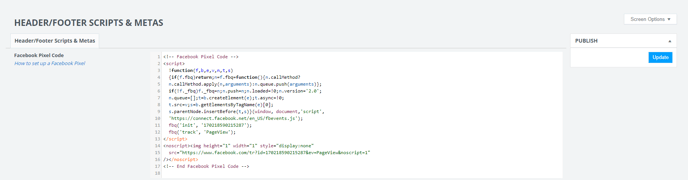
Then cut the <noscript> part of the code out, and place it into the body after opening tag
The reason you need to separate the <noscript> part of the Facebook Pixel Code is explained here. (This is a more "techy explanation")
Short explanation - the <img> tag is within the <noscript> tag, will break the <head> if it remains there.
Edit The Code
Normally in the pixel there is only: fbq('track', 'PageView');
Copy and paste the below where the above code is, replacing the original "PageView" piece of code, with the below piece of code which is tracking "ViewContent". This is to ensure all of your ad campaigns run smoothly.
fbq('track', 'PageView');
fbq('track', 'ViewContent');
Congratulations. You did it! :)