How To Set Up Conversion Tracking

In this tutorial, we're going to show you how to set up Google conversion tracking and much more.

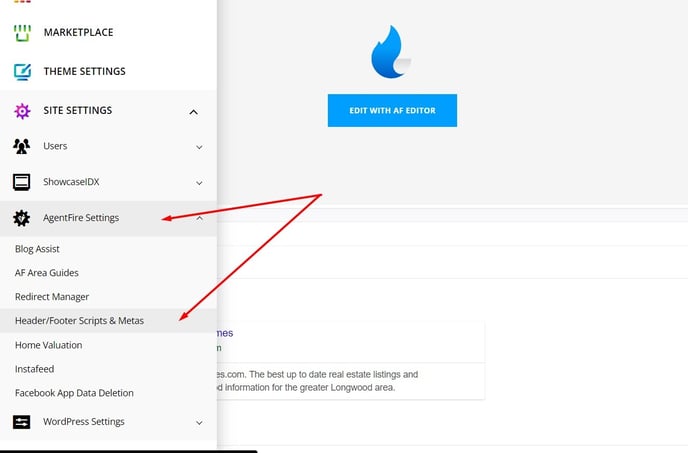
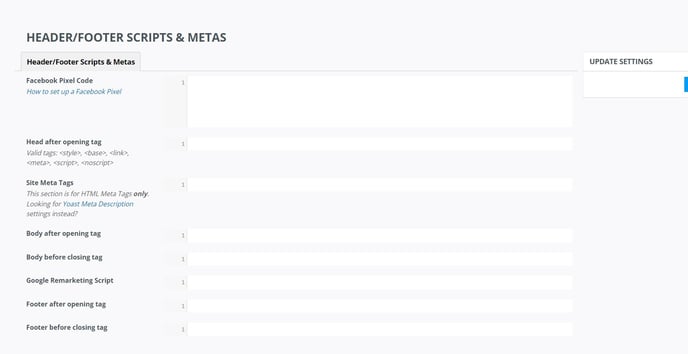
For global tracking codes you should use Header and Footer Scripts & Metas, you can find here:

1-Nov-30-2023-08-49-46-6539-PM

2-3

If you want to set tracking for a specific event, you should edit your page in Yoast SEO mode (classic WordPress page editor) like this:

3-Nov-30-2023-08-50-07-1781-PM

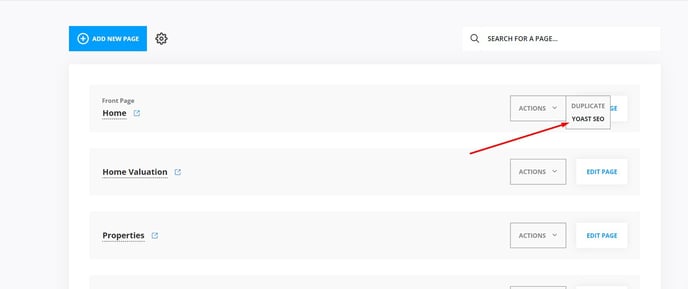
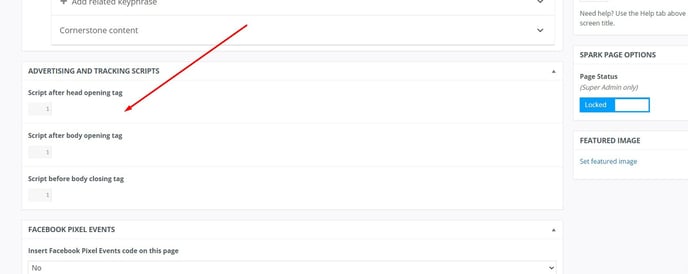
Find this section under and place your event code:

4-3

If you do not see this box - the plug-in used for tracking may not be active. In that case, send an email to support@agentfire.com

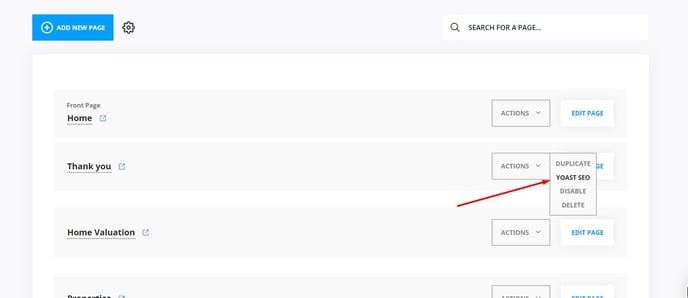
Similarly, you can set up your tracking code for your Thank you page

Go to your "Thank You" Page

5-3

If you don't have a "Thank You" page or don't know how to make one, check out this article which explains the entire process.

Insert your conversion tracking code into this box.

6-3

If you do not know how to get a google tracking code - check out this tutorial.

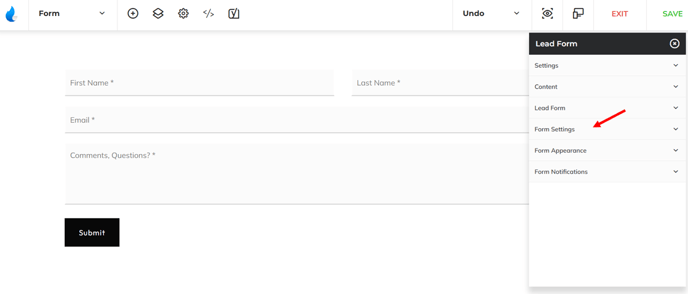
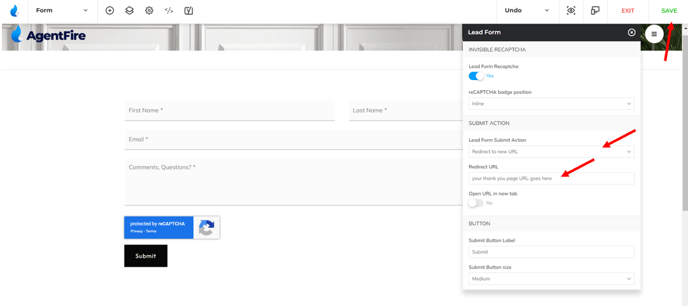
In order to set your Lead form to forward to your Thank you page after submitting, just go here:

7-Nov-30-2023-08-51-59-2242-PM

8-Nov-30-2023-08-52-08-2027-PM

How to set Gravity Form to forward to a Thank you page

From your AgentFire Dashboard - Open your "Gravity Forms" section.

9-Nov-30-2023-08-52-17-7736-PM

Choose the form you want to track.

10-Nov-30-2023-08-52-29-7217-PM

In this example we are just going to use the Contact form.

(The forms in the picture may not be the same as in your dashboard.)

Click "Confirmations" from within the "Form Settings" tab


Click "Edit" on the Default Confirmation

12-Nov-30-2023-08-52-37-5176-PM

You will have to hover your mouse over the top where the arrow is pointing in order to see "Edit". If you do not have a Default Confirmation, just click "Add New" create one and then proceed to edit.

Select the option "Page" and choose your "Thank You" page from the drop-down menu.

13-Nov-30-2023-08-52-46-1948-PM

After setting the Confirmation Page, simply click "Save Confirmation".