
Table of Contents:
What You Can See & Set Up on the Admin Side
In this article, you will learn how to set up listing alerts on your AgentFire IDX.
Setting up listing alerts through AgentFire IDX is a quick task to do; however, first, we must make sure that the client has signed up and created an account with AFIDX.
Signing up for AFIDX
Clients can sign up for AFIDX in three different ways:
a. Click the sign in/ sign up button on the header:
b. Make a search on the /properties/ page: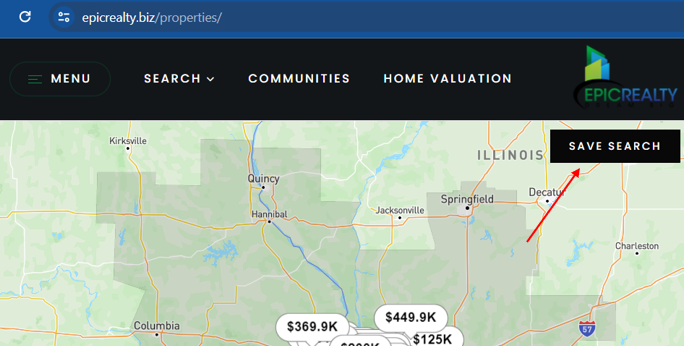
c. Save a listing that they're interested in: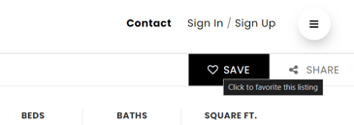
All the above actions will prompt new leads to create an account: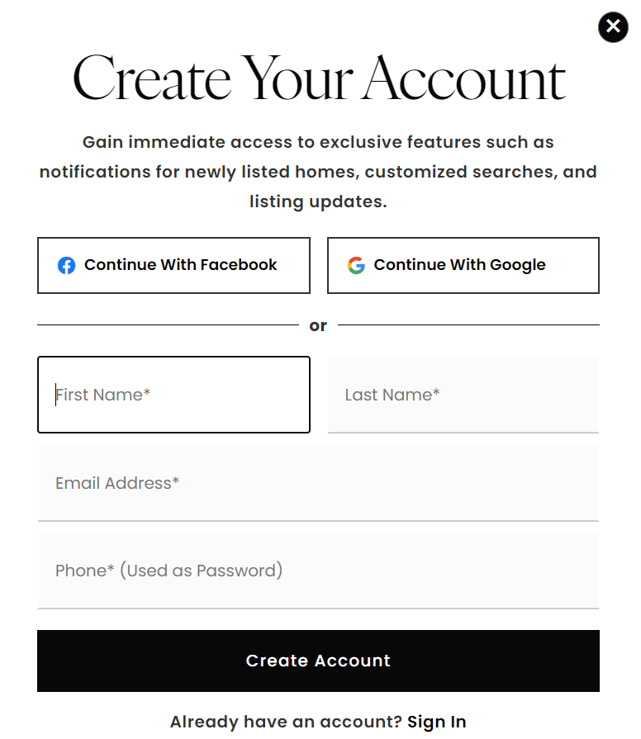
Note: if you have already captured the lead's information and you have their approval, you can go ahead and create an account for them following any of the above to be able to send them listing alerts.
What you can see and Set Up on the Admin side:
Now that your new lead has created an account or you have created an account for them, head to the Lead Manager. If you have a CRM connected, then you can access it on your Dashboard - Burger Menu - Lead Manager - View All Leads: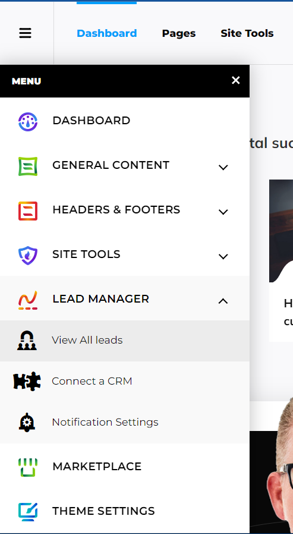
Or access the shortcut link if you haven't connected a CRM yet: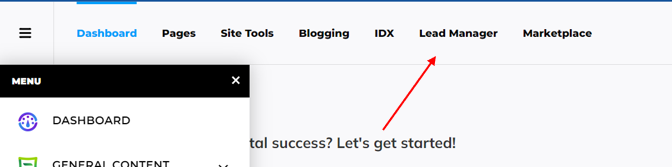
Click on any lead and you should see three tabs on their profile: Activity, Submission, and Properties. Click on the Properties tab: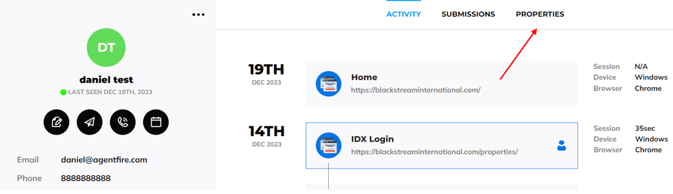
Over here, you'll be able to see what searches the client has made, the listings they have saved, and listings that they have looked at on your site: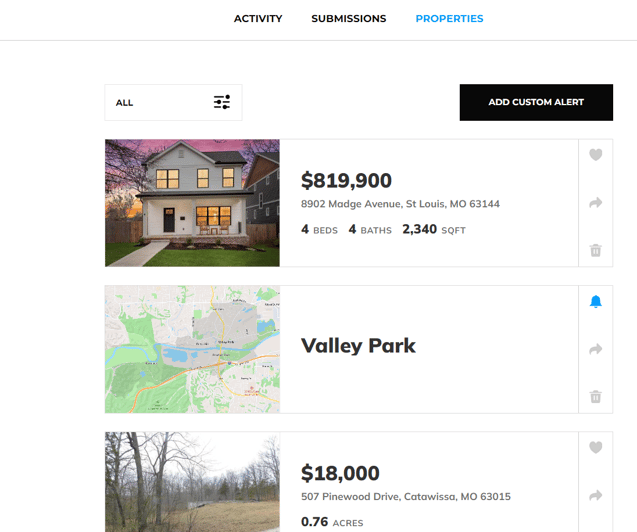
Now, to set up listing alerts, click on the Add Custom Alert button: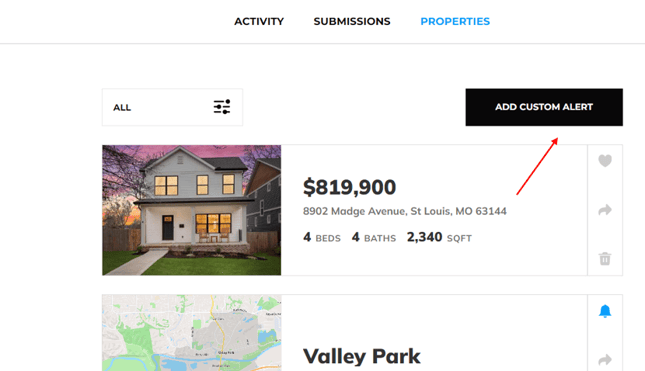
Over there, you can create a new listing alert: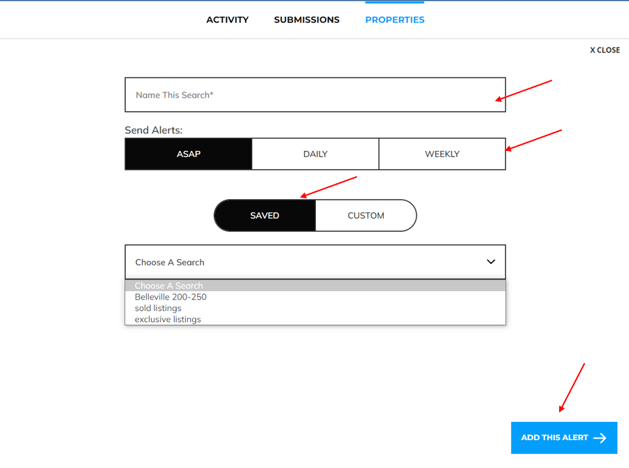
1. You can give it a custom name.
2. You can set a frequency ASAP (as soon as a new listing arrives on the search criteria), Daily (with the ability to choose multiple days of the week), and Weekly (on a specific day of the week).
3. You can choose to choose from the Saved Searches that you made (as shown above) or create a custom search, which will trigger the same filter window when creating a search on the /properties/ page: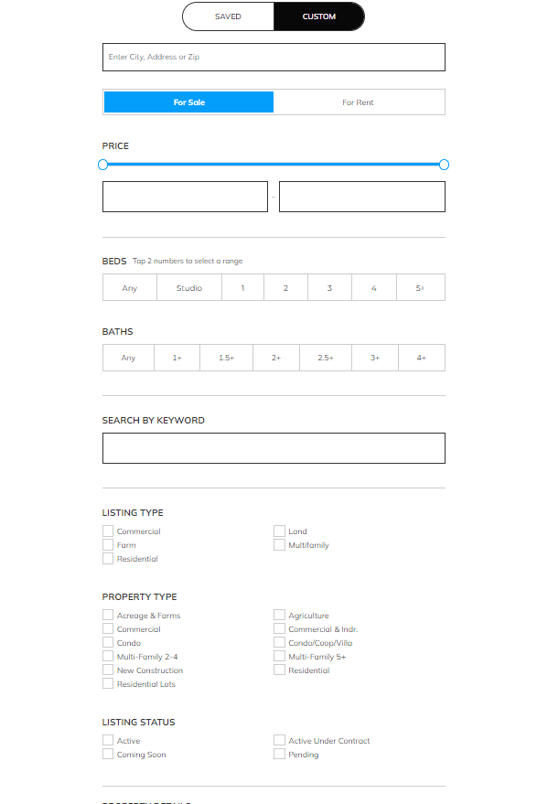
4. Click on Add This Alert.
Update the frequency of listing alerts:
This part of the guide will show you how to adjust the frequency of new listing alerts that you and/or your lead receive from saved searches.
To modify how often listing alerts are sent to a client, go to your Lead Manager and select the client you want to adjust their listing alerts for. Remember, you find it under Burger Menu - Lead Manager - View all leads:
Click on the client and go to the Properties tab, over there click on the bell icon of the Saved Search: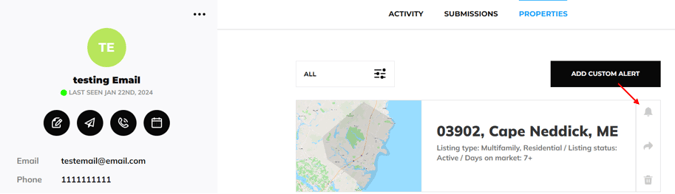
Over there, you can edit the alert frequency as well as rename the search.
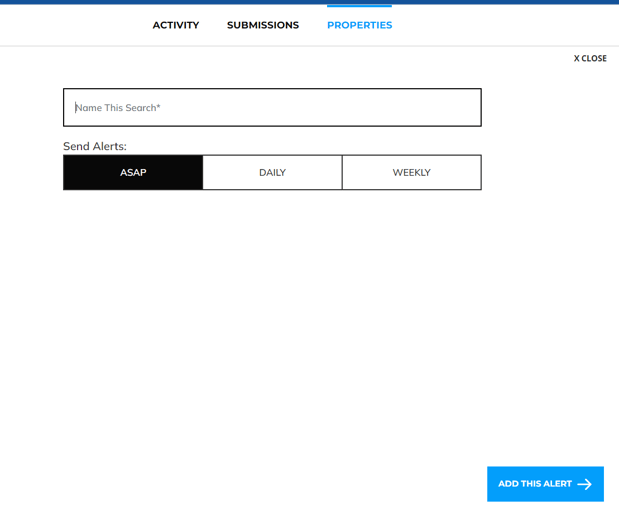
You can click on the X CLOSE button if you don't want to make any changes, and don't forget to click on Add This Alert to save the changes.
Clients can also do this by logging into their profiles and heading over to their Dashboard: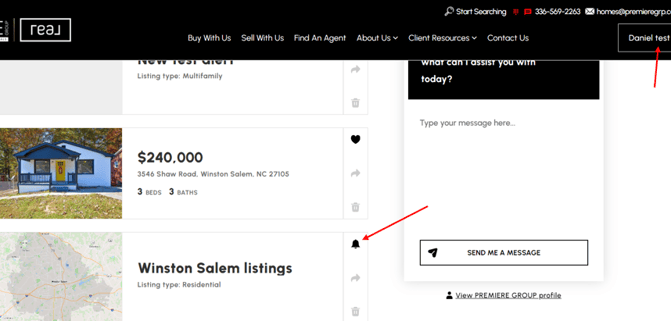
A window will pop up that says UPDATE THIS SEARCH: 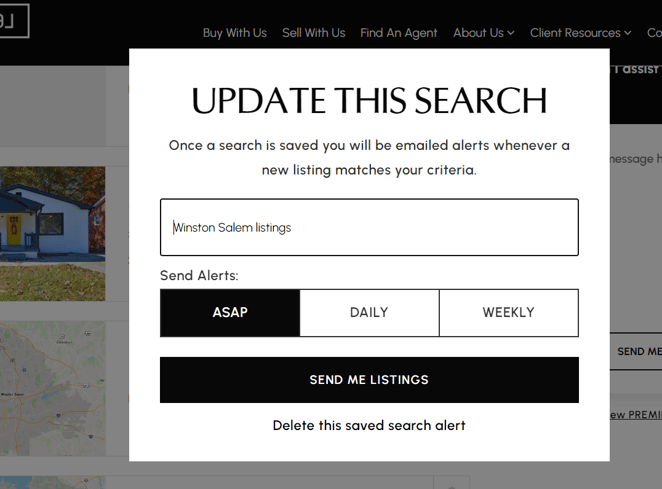
Over here, leads can update the Saved Search name, update the alert frequency, and even delete the alert.
And you're set! That's how you create a listing alert for your clients.
Example of a Property Alert Email

The Property Alert Email is completely templated and must show the Main Contact/Team lead who signed up for the IDX service. If you are on a team, this will always remain the same, no matter which team member is sending it. This is a pretty standard practice with most IDX Property Alerts. We can sometimes change the email and phone number on file, but the name usually cannot be changed for compliance reasons. In certain cases, we can use the Brokerage details in the template, but that is not allowed with all MLSs. If you want to confirm your available options, you can reach out to our Support team to check.
If you still have further questions on this topic, you're welcome to email our support staff at support@agentfire.com.