
With every listing you create, it's easy to enable visitors to register or pre-register for the open house you have scheduled.
Open houses can be a great way to attract potential buyers and build relationships that can lead to additional transactions. They are also a valuable part of showing the seller your determination to get their home sold. When you have an upcoming open house, it's easy to enable online registrations for a listing using our Open House capabilities!
Important Notes:
The open house registration component can be used for both pre-registration ahead of the open house and on-site registration on the day of the open house. Below, we'll outline how to set up and deploy your open house, as well as how to use it on-site.
If you're looking to perform onsite registrations, you can just configure the open house registration settings below and then continue through the registration page instructions shown.

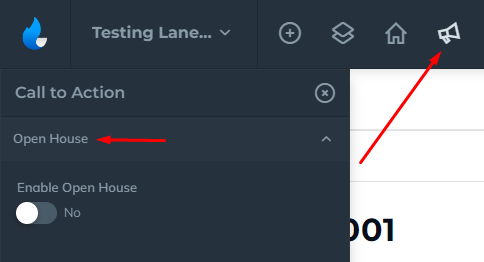
Start by navigating to the Call to Action tab in an existing listing by clicking on the Megaphone Icon:

(NOTE: If you're using our updated listing template, then you can access the Open House tab from the Call To Action button in the top menu.)
Process for Marketing the Open House ahead of time:
Go to the Open House Tab and click Enable Open House.
Open the Open House Details category to enable the signup options.
You will see all the available editing options once you enable the Open House feature. You will have an option to add different Open House Dates by clicking the Add Open House Date button:

Set the date of your open house:

With your open house date entered, your open house modal is instantly available on the page. You'll see a new red button appear next to your contact information in the top bar.
You can have more than one Open House Date. Just click the button to add additional dates.
Open House Display Options:
Certain template designs may display the open house directly on the page. If you don't see the Open House details displayed on your page and you would like them to, please reach out to our Support team.
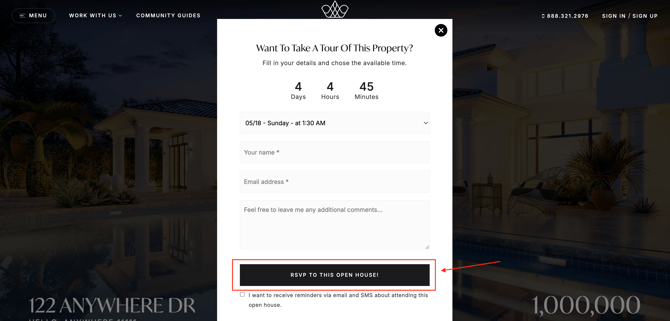
The main purpose of setting up the Open House details is to display a pop-up form when someone visits the page with a countdown showing the day, hour, minutes, and seconds until the date of the open house.
If you have the Open House option enabled and you are displaying your listings in a slider with the status showing it will also show that the property has an open house.

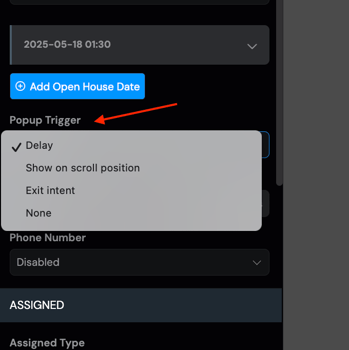
Next up, we'll head to the Open House Popup settings. Here, we can control how the modal appears for users.
There are four open house trigger options:
Show on Scroll Position: This trigger displays the modal after a user has scrolled down a specified percentage of the page
Exit Intent: This trigger displays the modal after a user has moved their mouse/cursor outside of the browser window (Example: To reach for the back button).
None: You can choose not to trigger the Open House Pop-up
Select a trigger option from the available choices:
Last, we're going to configure the Registration page settings. This is a separate page overlay available for use with a tablet, laptop or other electronic device that you want to make available onsite the day of the open house.
Onsite Registration page settings:

To use the registration page, add ?r to the end of your listing url.
(This is not a working link, it is meant to show how you would add it to your domain.)
You don't have to be logged into the dashboard to use this page, you just need to have the link.
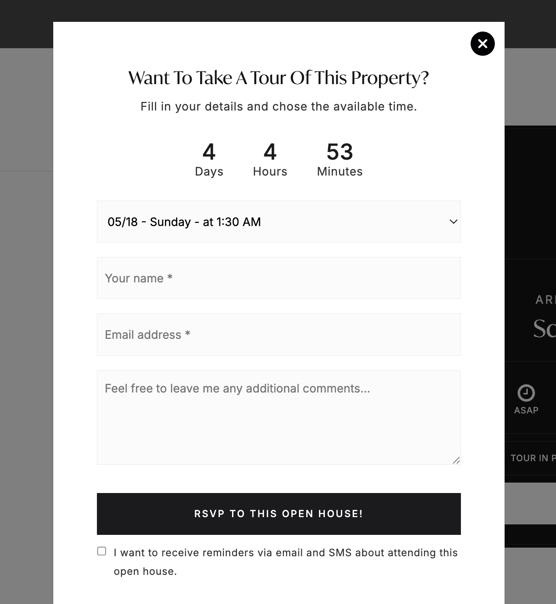
Your page will look something like this:
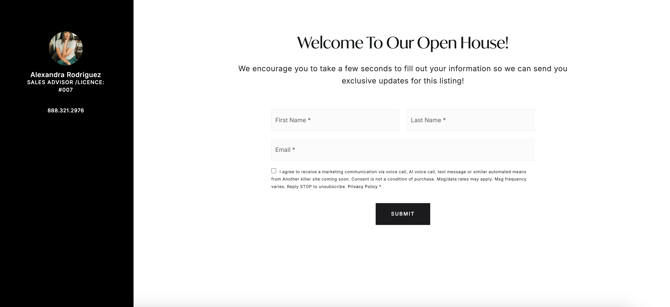
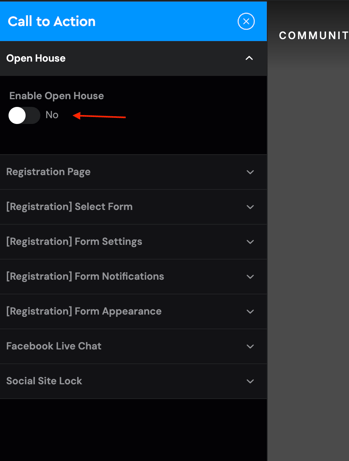
Our Listing Hub update expands on the original Open House Registration page and offers more editing capabilities.
When you open the Call to Action tab you will see 5 Registration tabs that offer various ways to edit and update your Registration page.
As of right now, the assigned agent for the page is the one that will show, but we are working on a future update that will allow you to select a different agent on your team in case someone else is handling the open house.
Their team member's profile image and name will appear on the registration page similar to the example above.
We will go through the different editing options for your Registration Page below:
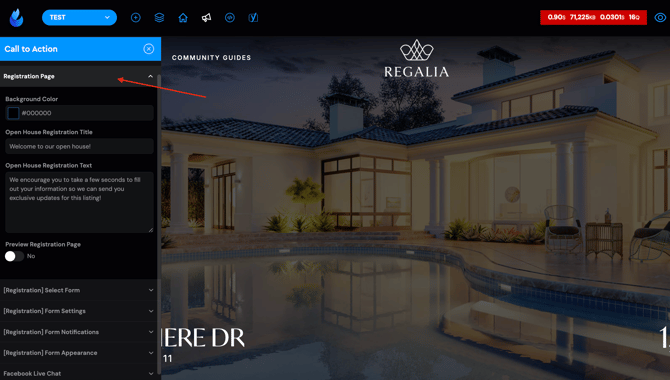
The Registration Page Option is where you can add a background color and Update the Main message:
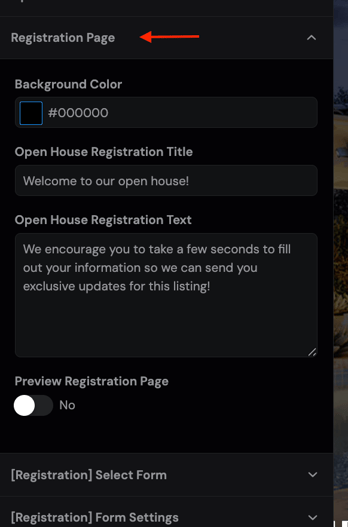
The Assigned Agent's Photo and Information are located in the same section as the Background Color, so their information stands out.
You may save your background color and check the results on the registration page until you have the desired effect. Add ?r to the end of your URL. You can use the "open in new tab" feature in your AF editor to easily view the listing in a separate tab.
The next Tab you will see is [Registration] Select Form:
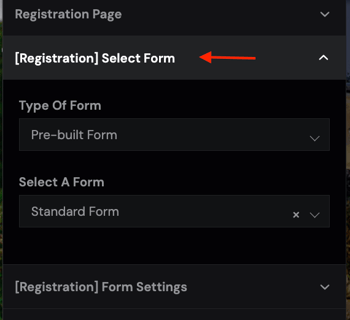
This is similar to what you will see with our other Lead Form sections. You can choose a Pre-Built form or a Custom Form. If you choose Pre-Built, it will let you select the form you want. If you choose Custom Form, you will want to go into the next section to select the Form Fields you want to collect.
[Registration] Form Settings:
Regardless of the type of form you pick, you will probably want to come into this section and confirm some of the form settings. If you choose to build a custom form, the first section will be the Form Fields, otherwise, it will start with the display.
There are a few key spots to check:
- Phone Number: This section is usually disabled, but if you want to collect the phone number, you will want to turn this on.
- Confirmation Message: When someone clicks the Submit button, you can choose to have a Confirmation populate thanking them for filling out the form.


This section is similar to the Form Notifications settings you can do with other Lead Forms on the site. You can add an email in the Add admin CC's to send the lead details to another email in addition to the admin email.
You can also add specific tags that will be associated with all leads that fill out the Registration form to help with organization or to help with certain workflows in your CRM.

[Registration] Form Appearance:
You may not need to use this section, but it offers advanced Form Styling and Advanced Step Title Settings.

As a reminder, once you update the settings for the Registration Page, you can just use the public link to access the page. You don't need to be signed into the Dashboard to access it.