Your listing settings allow you to assign agent roles, configure SEO components, and control sharing options with Facebook and more.
The My Listings plugin has a number of settings available, including assignment of a team member for display of contact information and lead routing purposes, as well as two categories of settings for the listing content and the page content. Where to find these options will vary if you're using a custom template or not.
Default Template
Start by clicking the Actions button on your listing entry:

This will open the settings panel with the available options for you to customize and configure:
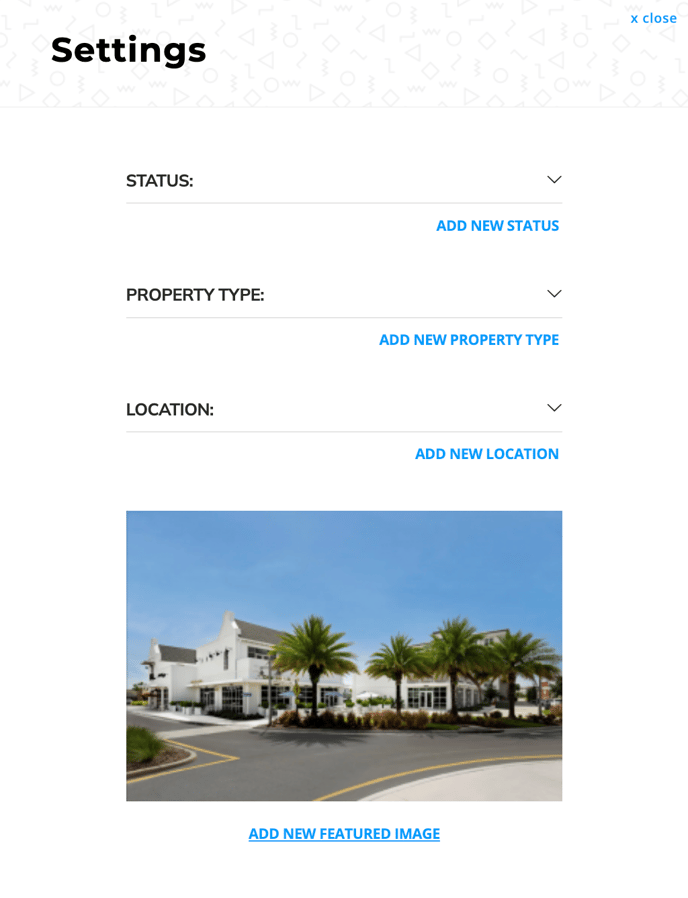
In the property settings area, are some important tags that can be used to help filter groups of your listings in a Listing Feed, which displays a grid view of available listings based on these filters.
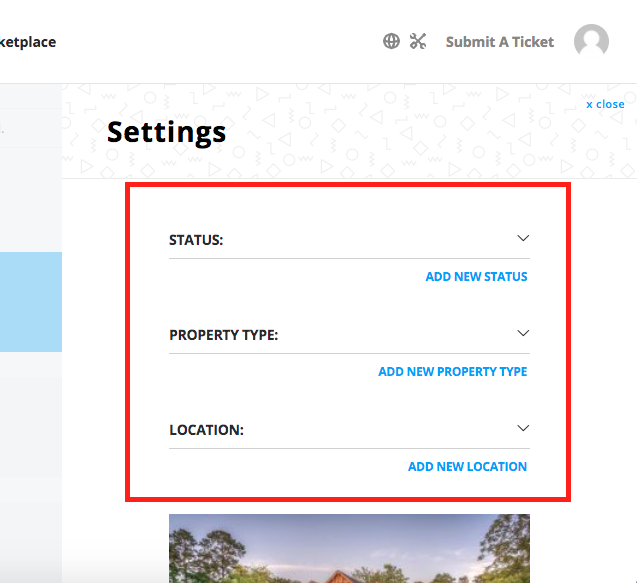
For property status, you may use Active, Pending, Sold or other variations common in your MLS or even uncommon status' your brokerage may use for exclusive properties. (I.E. "Coming Soon", or "Office Exclusive")
Click 'add new status' to create a new status for your listing.
A modal window will open where you can type out the title of your choice. Click Add to include this status in your list of available status filters in the listing plugin.
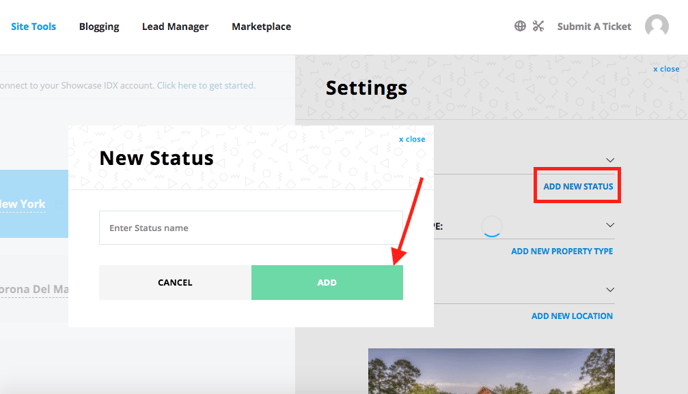
With your status created, this will be available in all listings you create or edit later. You will need to ensure you have selected to use this filter in this listing after it has been created.
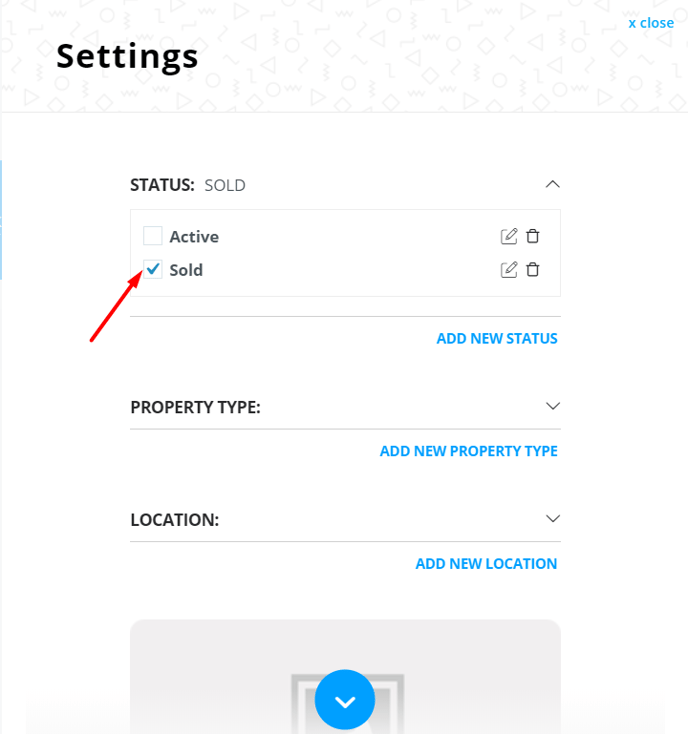
At any time, you may decide to either edit or delete a status. It's important to note that if you delete a status, any listings that used that status will no longer have that status selected.
You may edit or delete a status as needed.
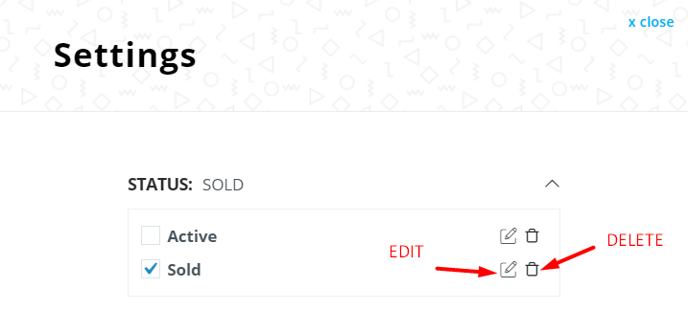
Click 'add new property type' to create a new property type for your listing.
A modal window will open where you can type out the title of your choice. Click Add to include this property type in your list of available filters in the listing plugin.
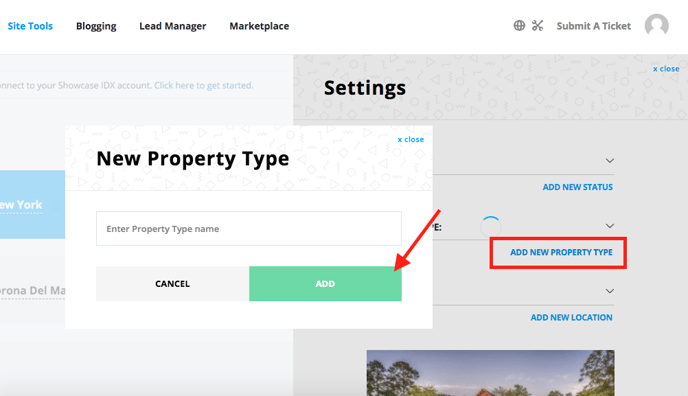
Click the checkmark to use your new property type:
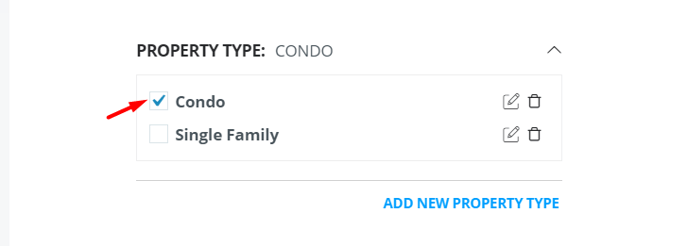
At any time, you may decide to either edit or delete a property type. It's important to note that if you delete a property type, any listings that used that filter will no longer have that property type selected.
You may edit or delete a property type as needed.

Click 'add new location' to create a new location filter for your listing.
A modal window will open where you can type out the title of your choice. Click Add to include this location in your list of available filters in the listing plugin.
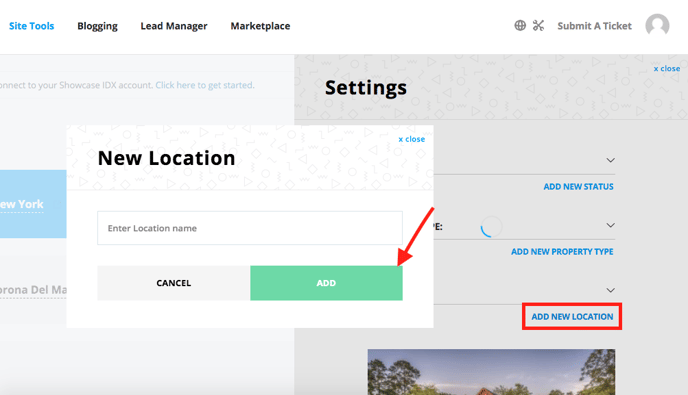
With your new location created, this will be available in all listings you edit later. You will need to ensure you have selected to use this filter in this listing after it has been created.
Click the checkmark to select the location:

At any time, you may decide to either edit or delete a location. It's important to note that if you delete a location, any listings that used that filter will no longer have that location selected.
You may edit or delete locations as well.

If you plan to allow users to share your listing on social platforms other than Facebook and Twitter, or support RSS feeds of your listing content, you will want to add a Featured Image.
Setting a featured Image:
Recommended dimensions for a featured image is to be at least 1200px wide. It should also be optimized for web.
A typical image of this size should be no larger than 350kb, and ideally much smaller than that. Image file size is an important component of your page speed. Resources like https://tinyjpg.com/ can make it quick and easy to scale, crop and web optimize images for use on a website.
Click "Add New Featured Image" to open your media gallery.

The featured image you use will be the one that displays for users whenever they are using a software platform that utilizes meta data to display portions of the page content.
Be sure this image is no smaller than 1200px wide and not larger than 350kb.
Configuring WP Settings

Under the Actions button you can open the listing in the standard WP editor where you can find the Yoast SEO settings.

As the window opens in a new tab, scroll down a bit to Yoast SEO where you can edit the SEO Title, Slug and Meta Description.

Updated Custom Listing Template
You'll notice the title "Using template" if your listings are currently using the updated custom listing template. The Status, Property Type, and Location fields are now located in the Property Terms tab within the editor. Click on the 'Edit Listing' button to find these:
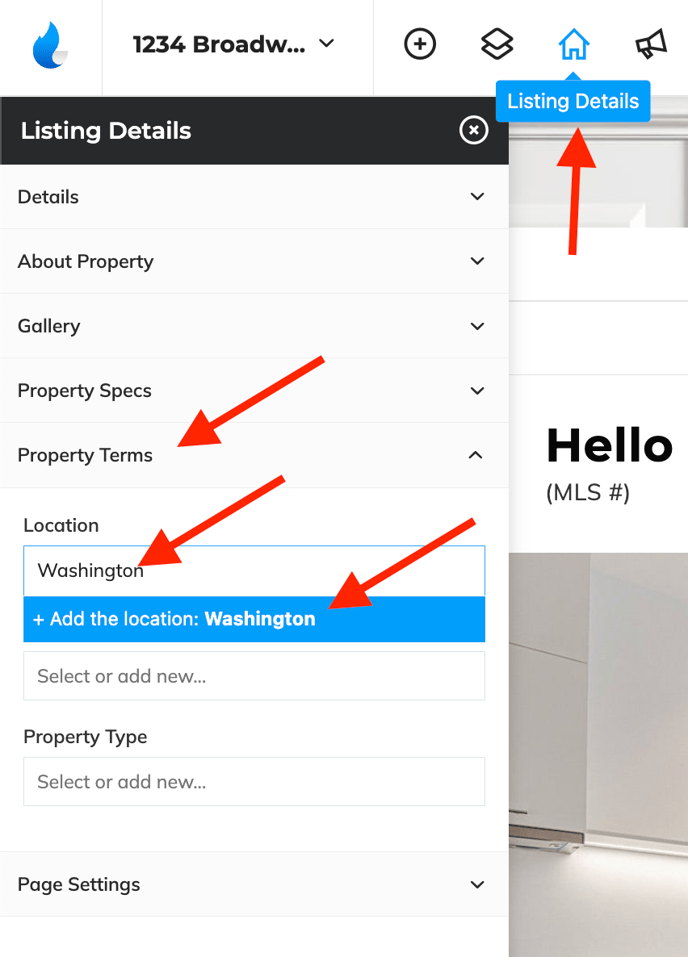
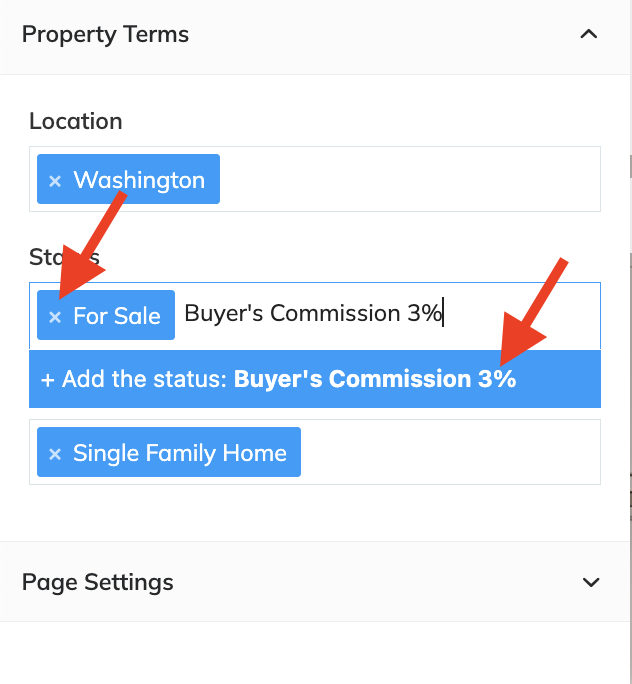
Navigate to the Listing Details section on the top navigation bar, and then head over to the Property Terms tab. Over here you'll find the Location, Status, and Property type tabs. To add the desired ones, simply type in the location, status and property type and click on the blue option that will show up as soon as you type any of these:
