
This guide explains how to create a new listing using the Listings Hub (formerly My Listings) within Site Tools.
Quick Tip: Before adding compensation information to a Listings Hub page, be sure to confirm with your brokerage and local board that it complies with current NAR guidelines and any updated local regulations.
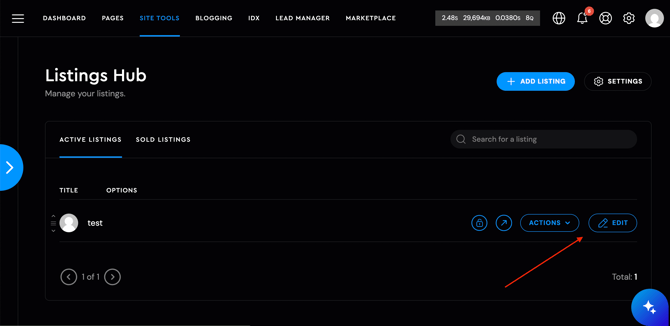
The Listings Hub provides optimized templates for both Active Listings and Sold Listings. When you navigate to Site Tools → Listings Hub, you will see separate tabs for Active Listings and Sold Listings.
How to create a new Listing's Hub page
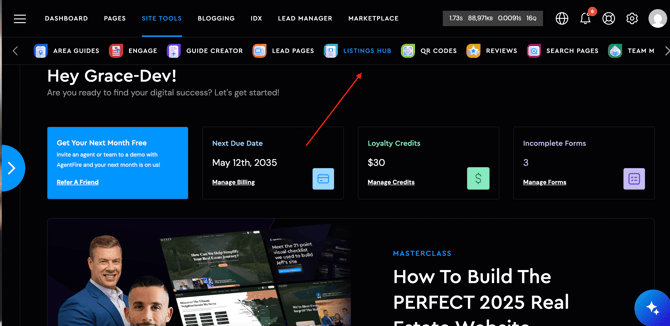
To get started, log in to your site’s backend and navigate to Site Tools → Listings Hub, as shown below:
1. Click on + ADD LISTING
When you click the + Add Listing button, you’ll be prompted to either create the listing manually or enter a live MLS number. The Add from IDX option is available only to AF IDX users; if using other IDX solution, then click on the 'Create Custom Listing' option:

- AgentFire IDX users- when adding either an active or sold listing, select the Add from IDX option. You will then be prompted to enter the listing’s address:

on this prompt, make sure to check on the disclaimer box (this step can't be skipped) otherwise you won't be able to pull the listing's information from the MLS:

After completing this step, you can adjust the listing name if needed. Changing the listing's name will also update the resulting URL.
Please note: depending on your template structure, most listing details will populate automatically. If you are using a more customized template, some information as well as image, video, or map sections may need to be adjusted manually.
2. Create Custom Listing
If you're going to manually create a listing hub page, you'll be first prompted to fill in the address of the active or sold property:


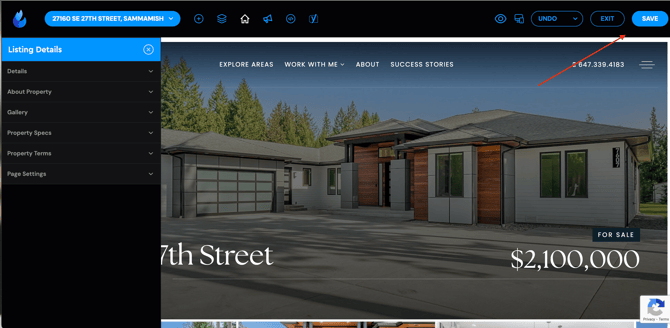
Next, click on the "Edit" button to begin editing the listing page:
3. Editing the Listing's details
- Listing Details tab - this is the most crucial step, most of the listing HUB template whether is an active or sold listing, will be fed from this section:

-
- Details - over here you will input the listing's Address, City, State, ZIP, MLS number (if applies), custom marker position (for new construction properties) price and Compensation Value if needed.

-
- About Property - input the property's description. This space will allow to add more characters than what the MLS allow.

-
Gallery - on this section, you can upload photos to your listing’s gallery, including multiple images at once. Be sure that all images are properly optimized and under 4 MB in size. For more details, please refer to this article. Each Listings Hub page automatically creates its own gallery image folder. You can also add videos to the gallery by including video links. We recommend using YouTube links for the best performance. Once uploaded, images can be easily dragged and rearranged to display the desired order.

-
Property Specs - in this section, you can add and manage the property’s specifications. We recommend placing the most important details within the first three to four tabs for better visibility. The specs can be reordered as needed. When pulling data from AF IDX, additional specifications will populate automatically. You can still add, edit, or remove any details using the Custom Specs section.

-
- Property Terms - this section allows you to define the location, status, and property type terms. These terms are used to filter listings when displayed in sliders or on a custom feed page. The status typically appears on the listing page template and within sliders as a banner, depending on your template design.
To create a new property term, location, or status, simply type it into the designated field. Once the term is attached to a listing and saved, it will become available as a selectable option for future listings.
- Property Terms - this section allows you to define the location, status, and property type terms. These terms are used to filter listings when displayed in sliders or on a custom feed page. The status typically appears on the listing page template and within sliders as a banner, depending on your template design.

-
-
Page Setting - in this section, you can set the listing’s featured image. On most templated designs, this image is used as the page header background and is also displayed when sharing the listing link or when the listing appears in sliders or feed pages.
You can also toggle the global header and footer on or off to give the listing a standalone page layout.
Lastly, this section allows you to assign Area Guide data. This pulls information from your existing Area or Neighborhood Guides to populate relevant data sections on the listing page.

-
4. Save your Changes
Once your listing page is complete and saved, it is ready to be used for marketing. To access built-in promotion tools, add #promote to the end of the listing URL. This will open a modal with quick-launch options, including creating an open house lead page, sharing a locked version of the listing, or generating an open house registration page.
If you are an AgentFire Plus subscriber, you will also have access to drip campaign creation.
5. New Update - Property Term Filters For Listings Hub
When creating new property tags for Location, Status and Property type these will be automatically added as filters for the Listings Feed template:

Next on the 'pages section' look up for the Listings HUB Feed template and toggle on the 'display filters' option:
and you're all set! The filter settings box will appear on the live page:
If you have any questions, feel free to reach out to our support team at support@agentfire.com.