
Requirements

Before beginning setup, please note that use of this plugin requires:
-
A Facebook Business Page
- An Instagram Business Account.
- You can only connect 1 Instagram account to your Website.
In order to ensure you can enjoy the benefits of Instagram content availability on your website, our plugin makes use of Instagram's Graph API. This API has additional restrictions and requirements.
Please make sure you have performed the following:
-
Switch your Instagram Account to a Business Account.
-
Link your Instagram page to a Facebook Business Page.
Link your Instagram page to a Facebook Business Page.
Step 1:
Convert to an Instagram Business Account
Step 2:
Link Instagram to your Facebook Business Profile
Setup
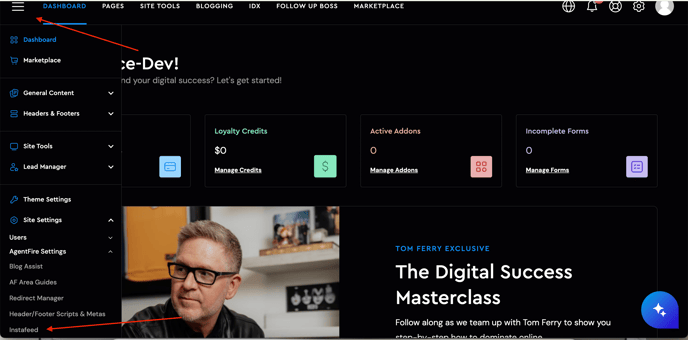
Go to Settings > AF Settings > Instafeed in your admin dashboard
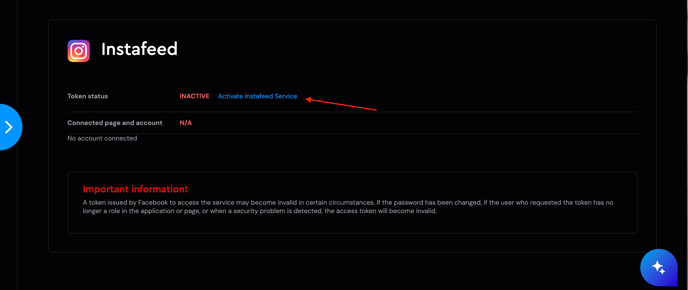
Click Activate Instafeed Service and you will be redirected to the activation page.
Click Log in With Facebook:


Choose your business Page(s) and business Instagram Account(s) under Opt in to current only:
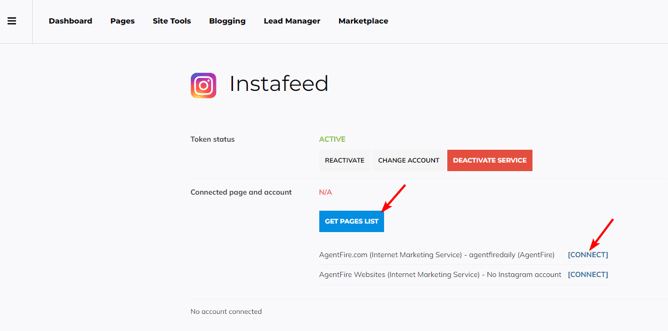
When done, you'll be redirected back to the Instafeed dashboard. Click on "Get Pages List" and connect the desired page:

NOTE: If you don't see your page(s) in the list:
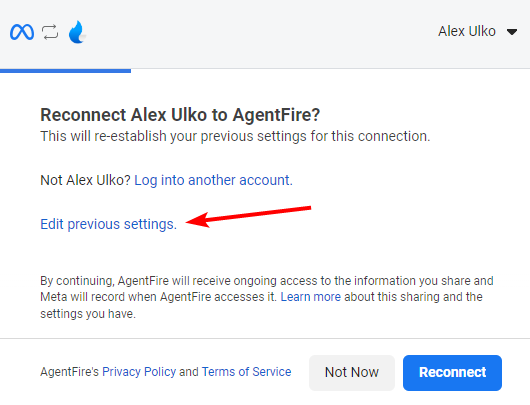
It might be due to your role on that page(s) was added using Facebook Business Manager, and not using a regular page role method. In this case, to list all such pages you'll need to grant the business_management permission to the Instafeed app. To do this - click the corresponding RECONNECT button:
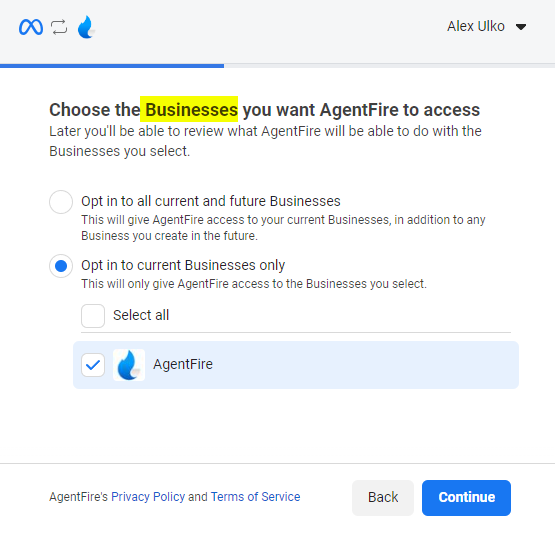
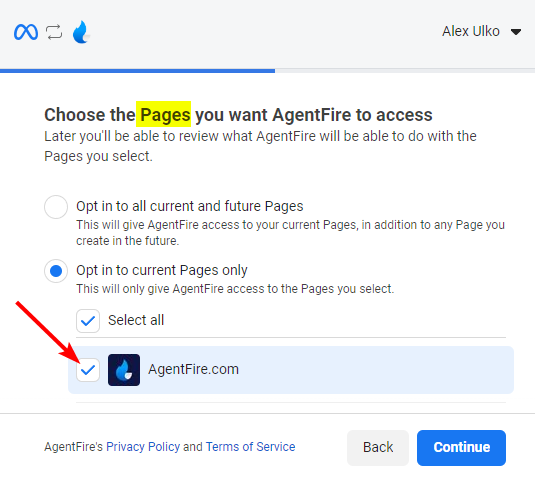
Then click Log in With Facebook as before, but now in the FB auth dialog choose Businesses:
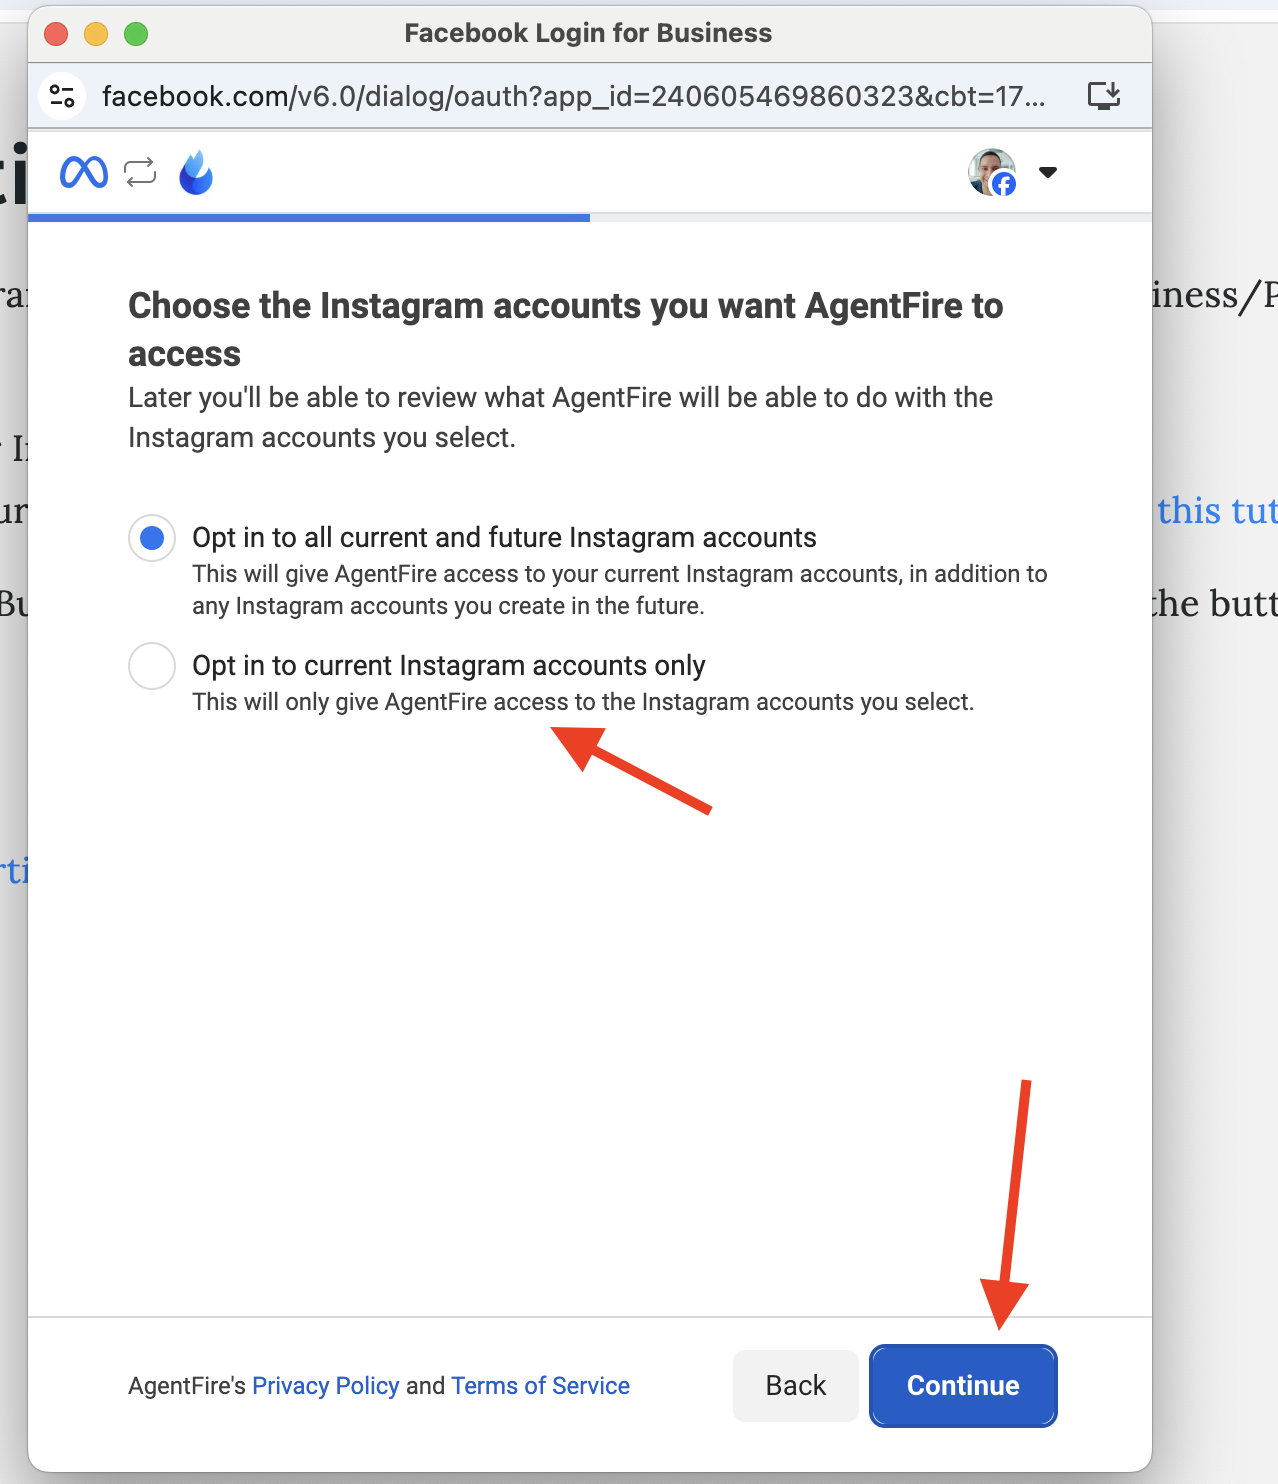
Then choose Pages and Instagram Accounts as before.
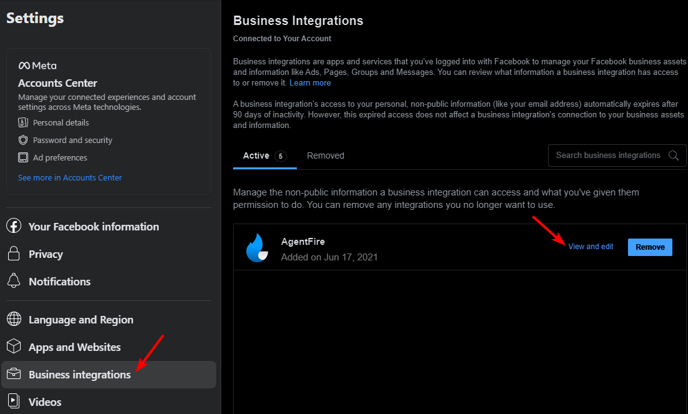
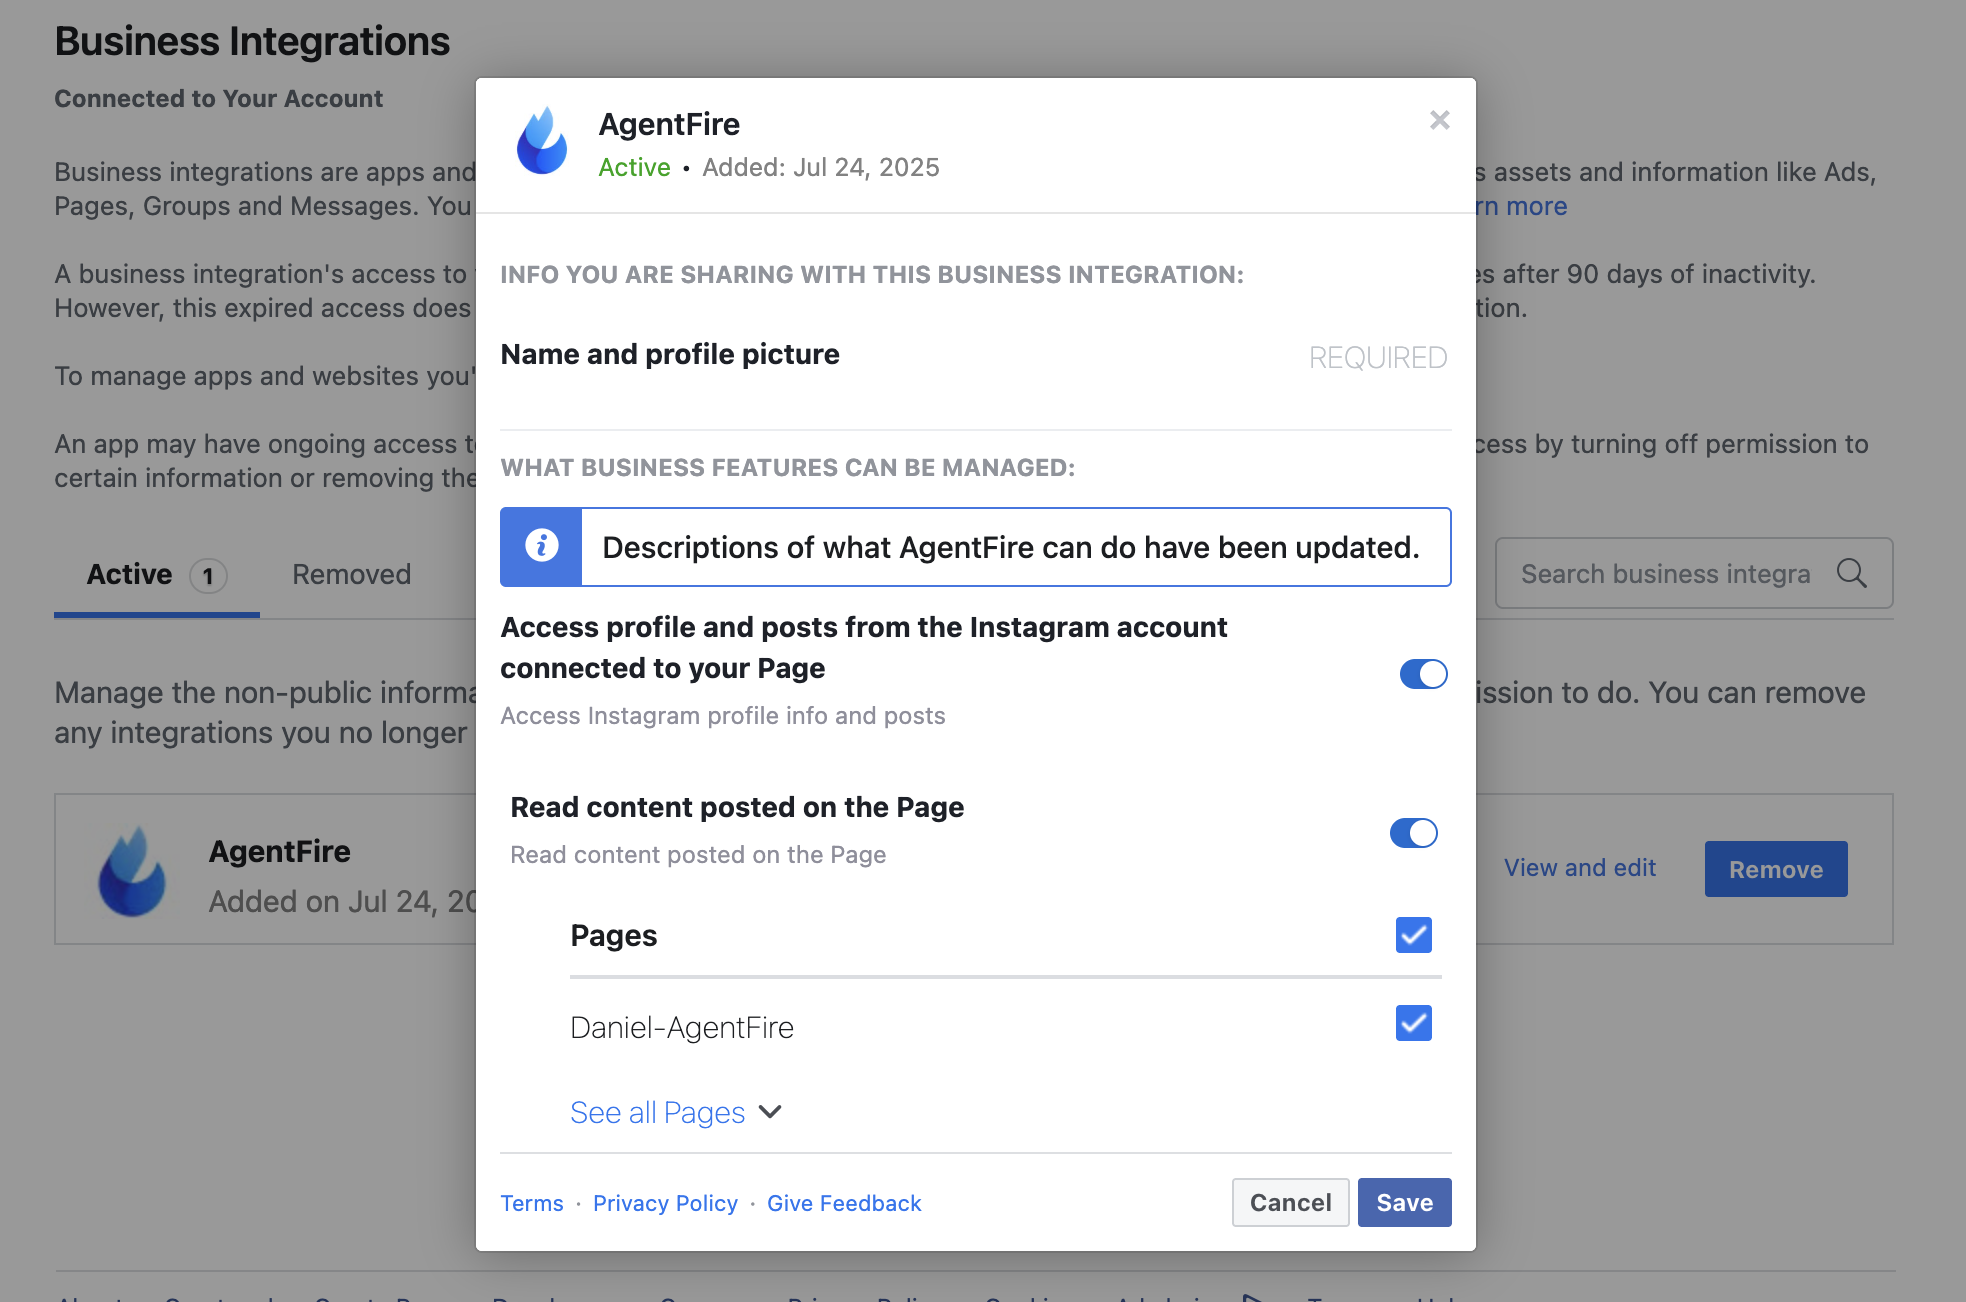
NOTE: Troubleshooting the granted permissions.
You can check permissions for AgentFire app in your Settings > Business Integrations: https://www.facebook.com/settings/?tab=business_tools
Once the selected page is connected, you will see that under the Connection status.
NOTE: The domains are used as access keys for the plugin to operate. That said - any change to the domain itself will disconnect the instafeed plugin from the website, and will have to be reconnected afterwards.
Placing a feed on page - Editor Options
With your account connected, you're ready to display the feed on a page.
Access the editor for your desired page. Click "Add New Block" from the toolbar

Locate "Instafeed" in the block templates

Final Note: If you delete a post on Instagram, it will take an hour before it updates on the site (the feed)
Did this answer your question?😞😐😃