Learn how to easily add Lifestyle Tags to your Area Guide pages.

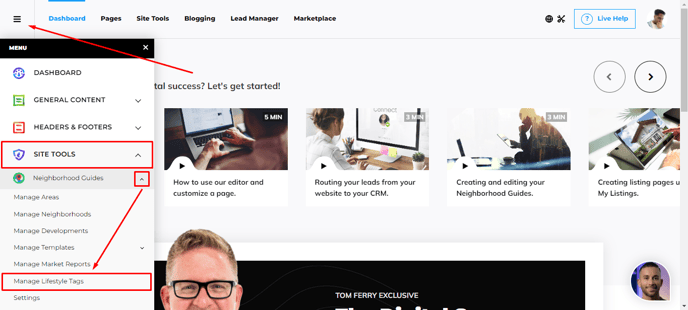
To add Lifestyle Tags to your Area Guide pages, head over to the Advanced Menu (hamburger button) at the top left, then navigate to Site Tools > Area Guides > Manage Lifestyle Tags.
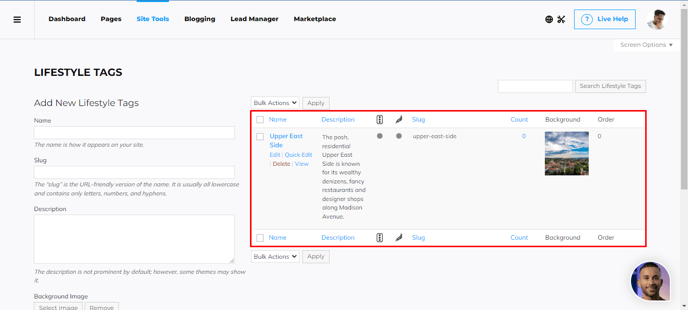
Once you are on the Lifestyle Manager page, if you want to create new Lifestyle Tags, you can start immediately on the left side of the page. Start by naming the lifestyle tag.
For example "Golf County". For the slug, you will want to write the same but separating words with a - symbol, and keeping all letters lowercase, since it has to be URL-friendly. Description is also something you can add at your will.

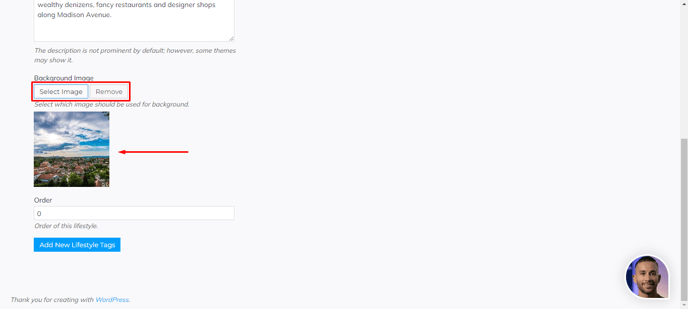
You can also add a background image, and setup the order in which this lifestyle tag will appear. (0 is default, and that will show first)
If you have all this set, click on the Add New Lifestyle Tags button to finish.
Once you have your lifestyle tag created, it will show up on the right side of the page, where you can edit, delete, or view it.
How to assign Lifestyle Tags to an Area Guide page
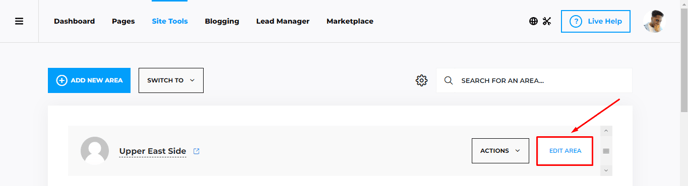
Head over to the desired Area Guide page, and click on the Edit Area page.
Switch to Settings on the panel, and click on the Lifestyle Tags tab.
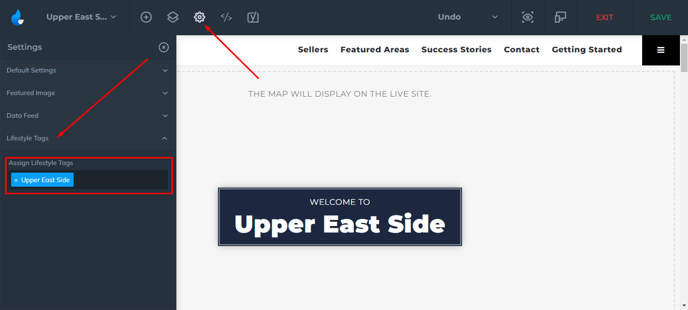
Then you need to click in the field under Assign Lifestyle Tags, where your previously created Lifestyle Tags will appear. Once you have the Lifestyle Tag assigned to the page, feel free to save the changes, and exit the page.
Further Education:
Learn how to Add/Edit Areas, Neighborhoods, Developments, and also understand how to use all the features of the Area Guides: