Welcome to our AgentFire Editor - Spark Creator! If you're here you're learning how to create new pages and customize them in a way to speak to your users! Within this guide you'll learn how to navigate through the Spark Creator and understand some of the features it offers.
| Block | Rows | Columns |
| Rows | Columns | Widgets |
| Design | Design | Design |
| Advanced | Advanced | Advanced |
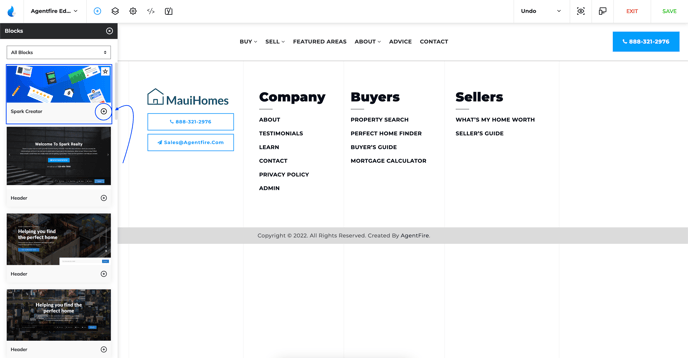
Go into the AgentFire Editor, and click on 'Add New Block'.

Find the Spark Creator and click on the 'Add Block' button.
Once you have the block added, hover over the block, select the edit button and start editing and adding content. First thing you will notice when you select the edit button is the floating modal. Move this around freely to edit your page and view your results in real time.
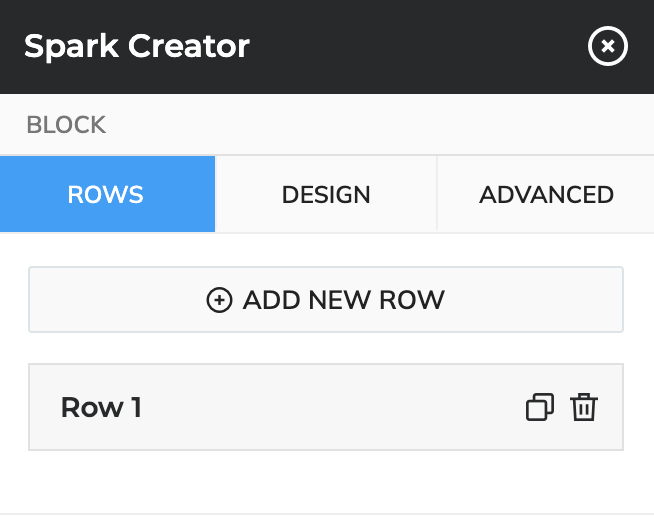
Block
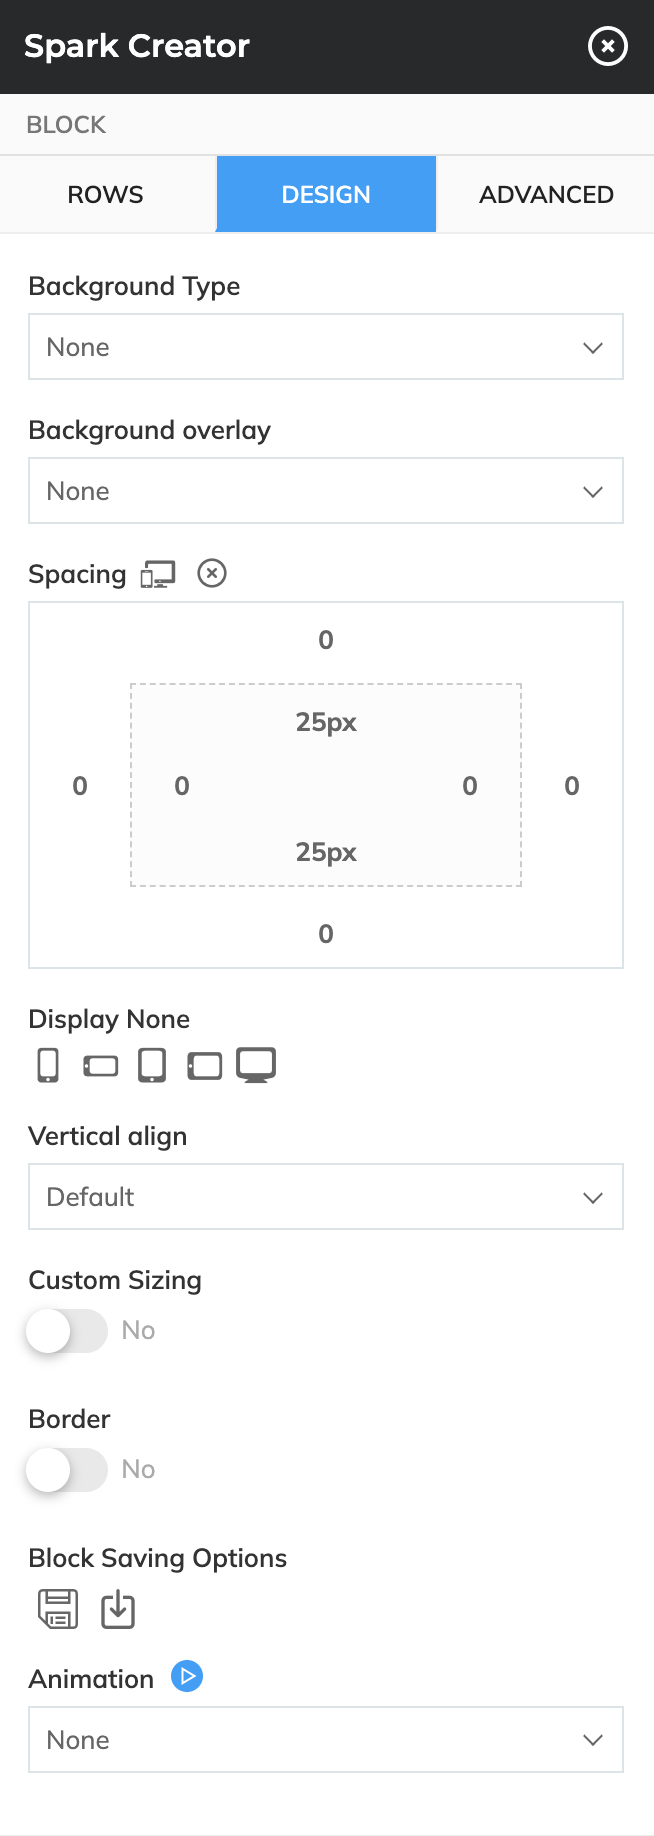
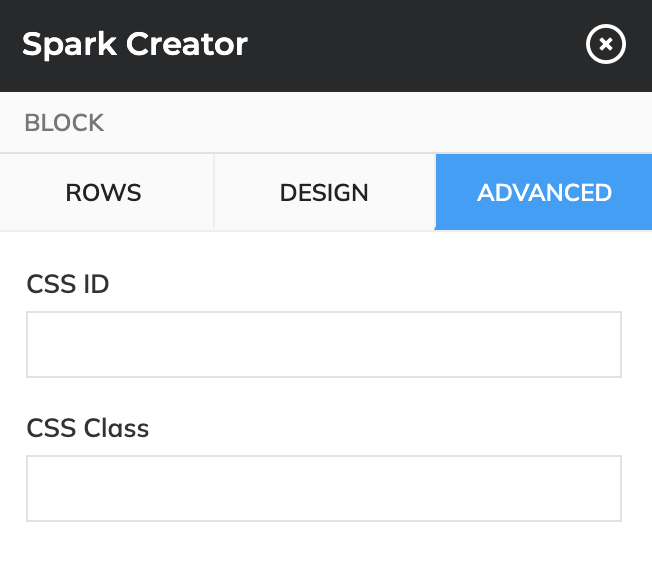
In the modal, you will notice 3 tabs. Rows, Design, and Advanced.
- Rows
Create rows to add content to your page. You can manipulate the rows by devices like mobile and tablet as well as portrait and landscape.

-
Design
Change the style of the block by selecting the design tab. You can adjust things like Background Type, Background Overlay, Spacing, Responsiveness, Display None (Click on the device size to hide the block), Vertical Align, create custom sizing by view height (Ex. 100vh is the entire screen), Borders, Download or save your block to use for later and even add animation to your block!
-
Advanced
Add a custom ID or CSS classes to your blocks to style it even further. (Access to CSS would need to be granted by Agentfire Support - email support@agentfire.com for access)
Rows
First, you will need to add a new row by selecting 'ADD NEW ROW'. (you can have multiple Rows in a Block)
Rows act the same way Blocks in its basic functions. You can delete, duplicate, rename, and re-order. By right clicking the Row name, you can Rename that row.
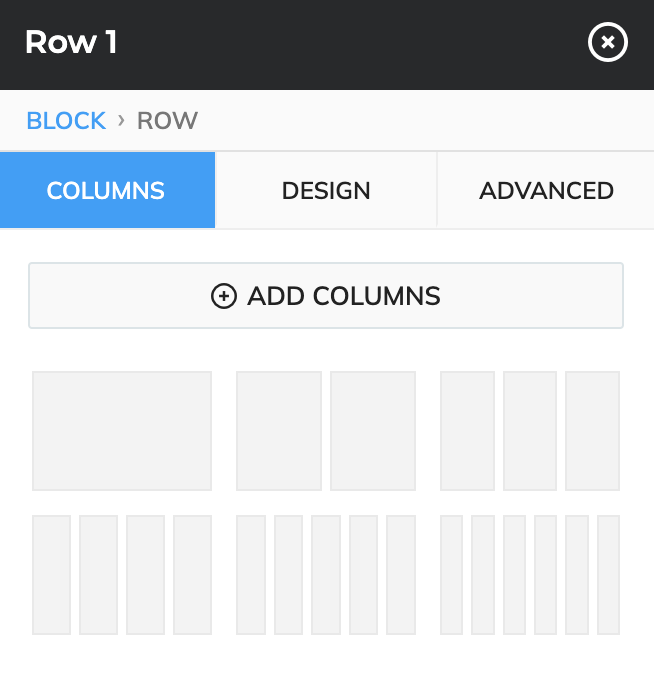
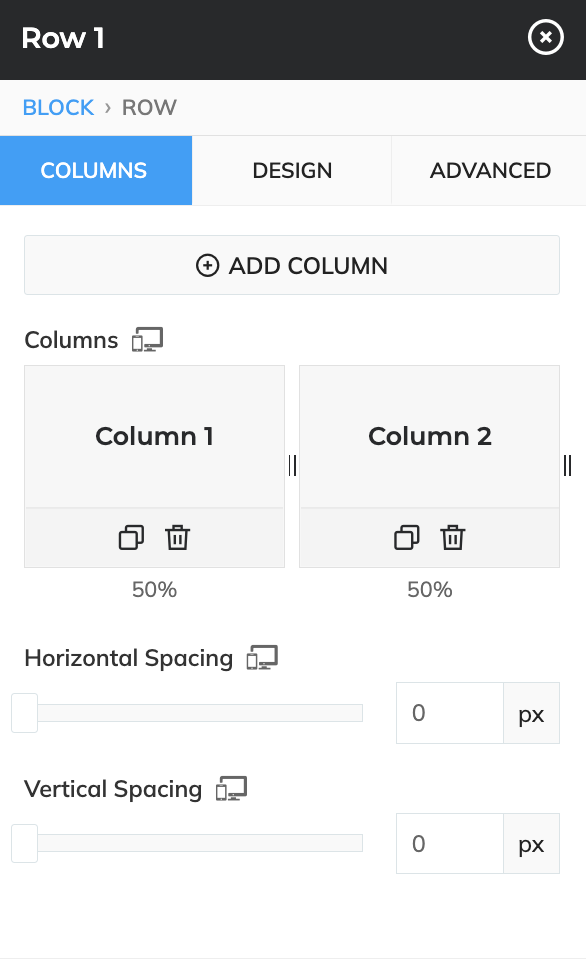
In the modal, you will notice 3 tabs. Columns, Design, and Advanced.
- Columns
When. you select 'ADD COLUMNS', you will be offered layout choices which you can choose from.
Design
Change the style of the row by selecting the design tab. You can adjust things like Background Type, Background Overlay, Spacing, Responsiveness, Display None (Click on the device size to hide the row), Align, Container, create custom sizing by view height (Ex. 100vh is the entire screen), Box Shadow, Borders, and even add animation to your row!
By default, a container is added to the row which adds some styling to it. This gives some spacing on left and right and creates the container in the center of the page.
.container {
  padding-right: 15px;
  padding-left: 15px;
  margin-right: auto;
  margin-left: auto;
}
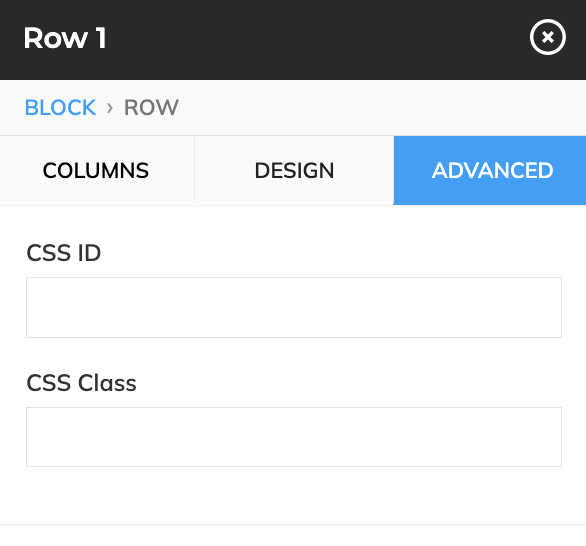
- Advanced
Add a custom ID or CSS classes to your rows to style it even further. (Access to CSS would need to be granted by Agentfire Support - email support@agentfire.com for access)
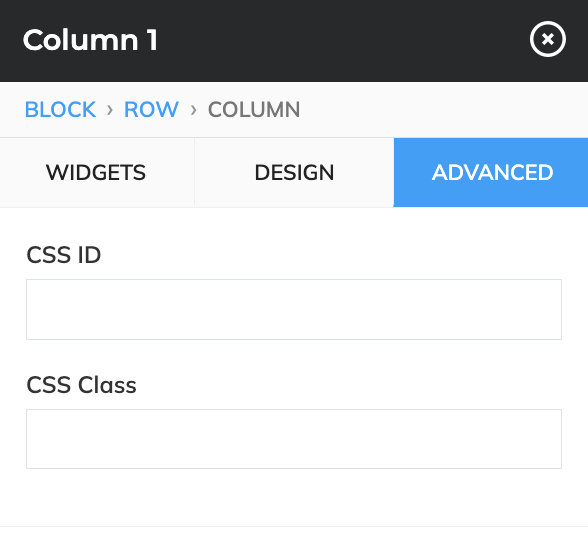
Columns
Second, you will need to add a column type by selecting 'ADD COLUMN'. (you can have as many columns as you can fit content on.)
Columns act the same way as Rows in its basic functions. You can delete, duplicate, rename, and re-order, the difference here is you can adjust the width (Ex. 70%). You can also create Horizontal and Vertical spacing to add some design to your columns. By right clicking the Column name, you can Rename that column.
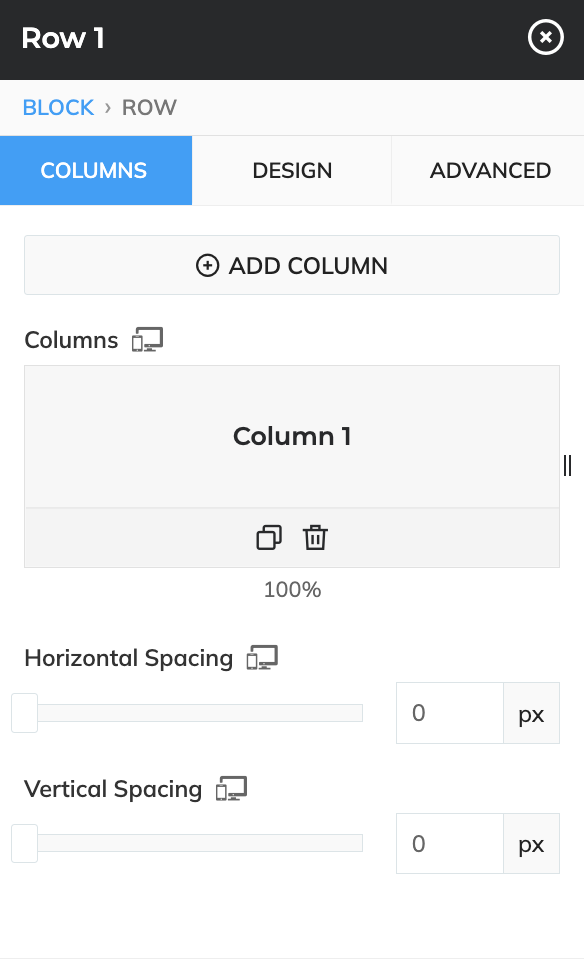
Add more columns by selecting 'ADD COLUMN' and adjust the sizing of the column by changing the percentage below the column.
Add Horizontal Spacing and Vertical Spacing to allow your columns to breathe and give your page better design.
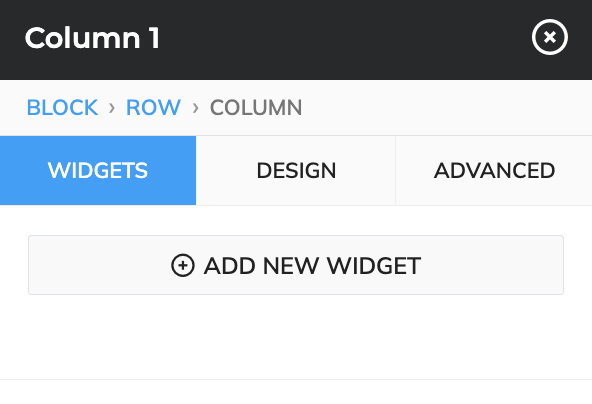
In the modal, you will notice 3 tabs. Widgets, Design, and Advanced.
-
Widgets
In the widgets, section, select from the numerous widgets Agentfire has to offer.
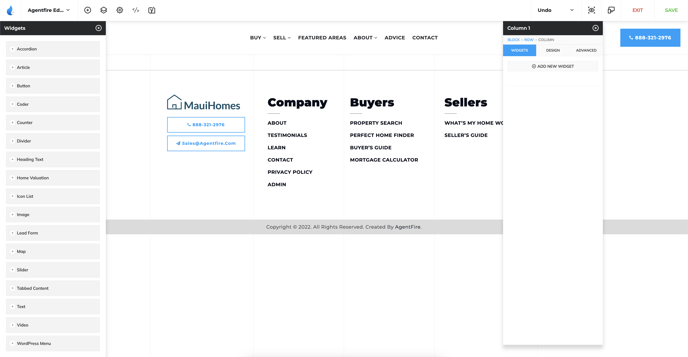
When you select Widgets, you'll be able to see a slider from the left hand side of the screen. The widgets we have to offer on our Spark Creator are:
-
Accordion
-
Article
-
Button
-
Coder
-
Counter
-
Divider
-
Heading Text
-
Home Valuation
-
Icon List
-
Image
-
Lead Form
-
Map
-
Slider
-
Tabbed Content
-
Text
-
Video
-
WordPress Menu
-
Design
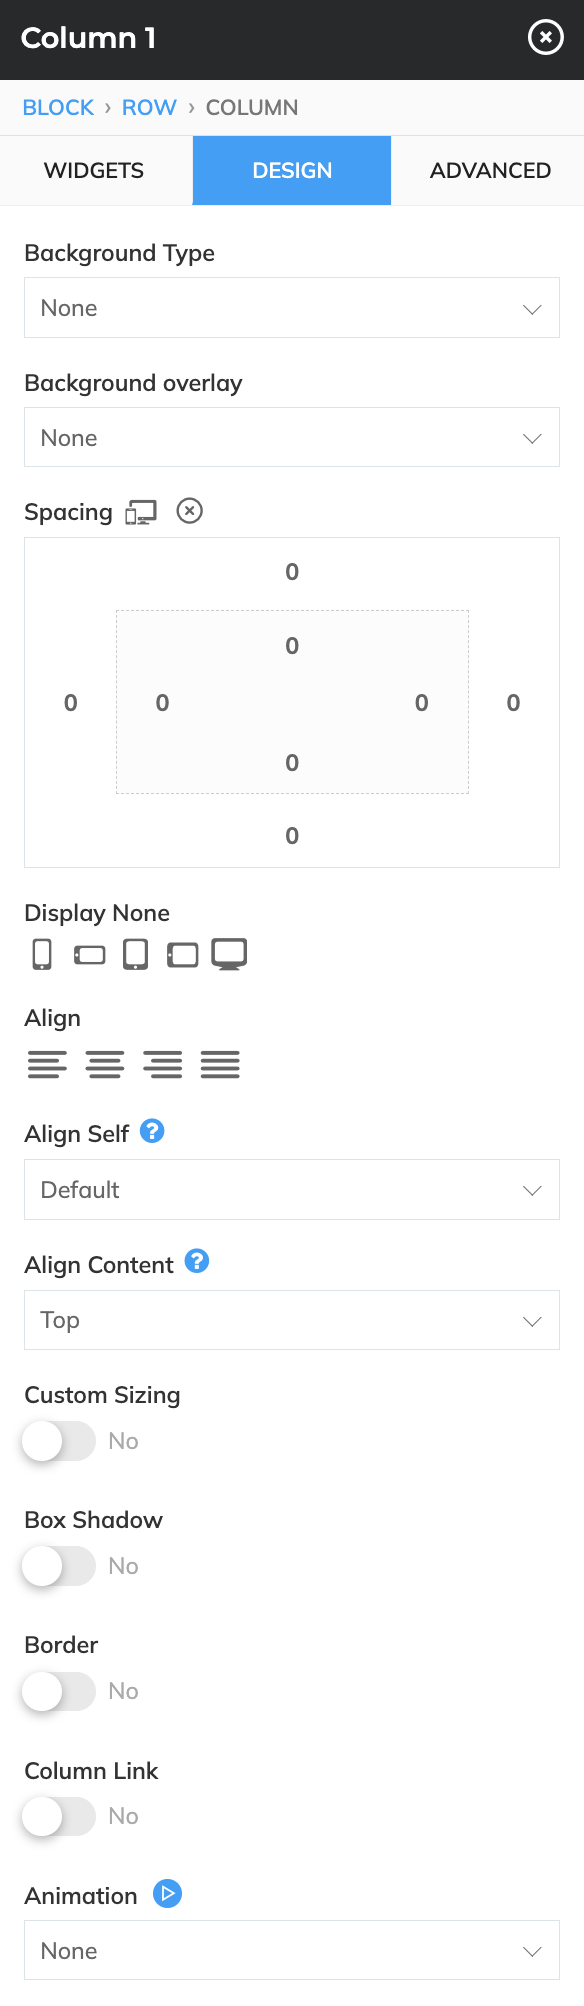
Change the style of the column by selecting the design tab. You can adjust things like Background Type, Background Overlay, Spacing, Responsiveness, Display None (Click on the device size to hide the column), Align, Align Self, Align Content, create custom sizing by view height (Ex. 100vh is the entire screen), Box Shadow, Borders, create a Column Link and even add animation to your row!
Advanced
Add a custom ID or CSS classes to your rows to style it even further. (Access to CSS would need to be granted by Agentfire Support - email support@agentfire.com for access)