How you convert visitors to leads is a careful balancing act of offering convincing value, and ease of access.

Accessing your Lead Form options:
In your AF Editor, choose the Lead Form Tab. There will be three categories of settings available for your Form. They include:
-
Lead Form - This is where you control the form itself, and what it requires users to provide in order to complete a request.
-
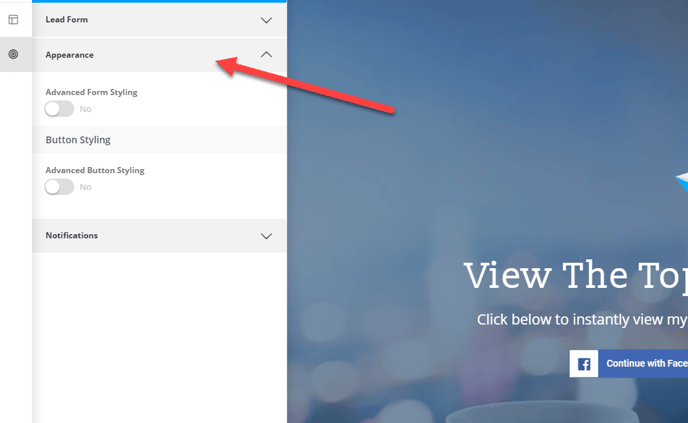
Appearance - This allows for advanced CSS based control over the form body appearance and button styling. This is rarely necessary.
-
Notifications - This controls what end users receive via email if needed. You can learn more about User notifications in our Lead Manager tutorials.
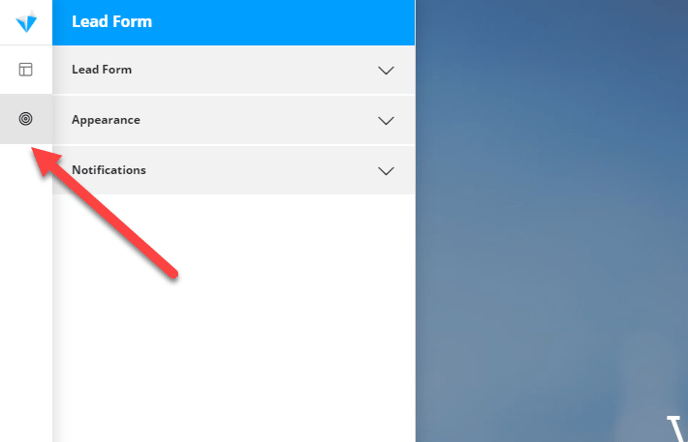
Of these three categories, the Lead Form is the most important, and the first category to open and review.
Choosing your lead form:
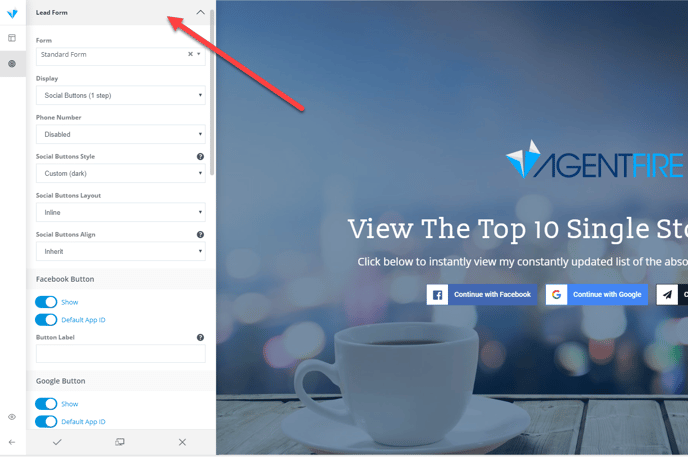
You'll need to select a lead form to use with this ConvertPage. There are many options available to you, including a variety of lead display types and accompanying settings.
Learn more about Lead Forms in detail in our Lead forms tutorials:
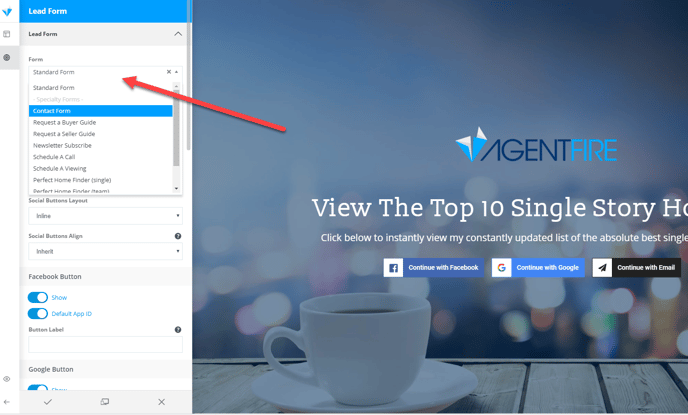
Standard Form VS other Available Forms:
In 98% of cases, the standard form is all you will need for creation of a ConvertPage that directs users to submit basic details for access to a value added item.
The Standard Form: This form includes name, email and phone number options, as well as social and 2 step social display availability. This form style offers low friction methods to end users for quickly accessing your content.
Other Available Forms: Lead Forms powers a variety of areas of your site, including many of your core page offerings, like the buyer and seller guides, the primary contact page and others. These forms can optionally be selected for use on the page if the purpose of the ConvertPage involves offering these services.
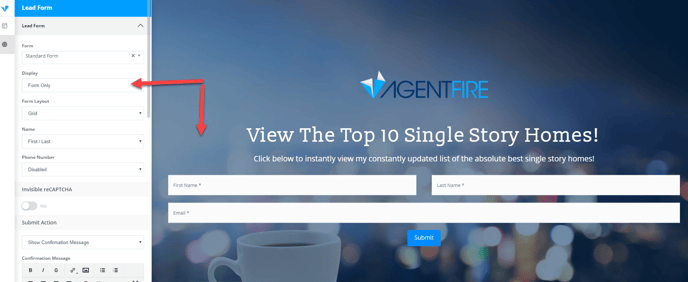
Here you may choose how your form is displayed. Options include:
-
Form Only - This displays only the Email layout options, which by default include first and last name, and email address.
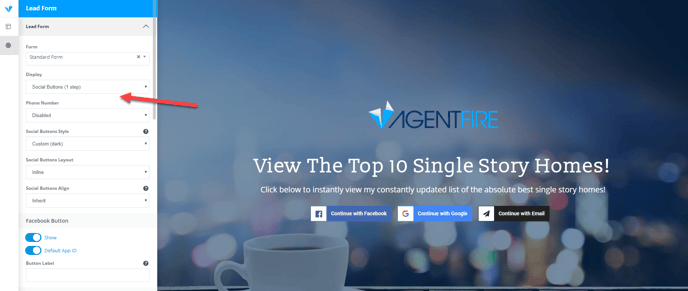
-
Social Buttons (1 step) - This layout option only displays the social conversion options and email fallback. Social conversion options do not capture phone number.
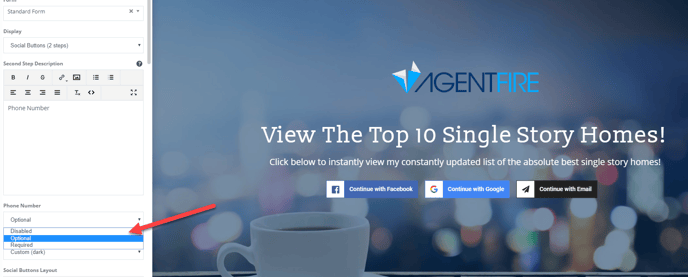
-
Social Buttons (2 step) - This layout option displays social conversion buttons, email fallback - and additionally requests users to provide their phone number in a second step.
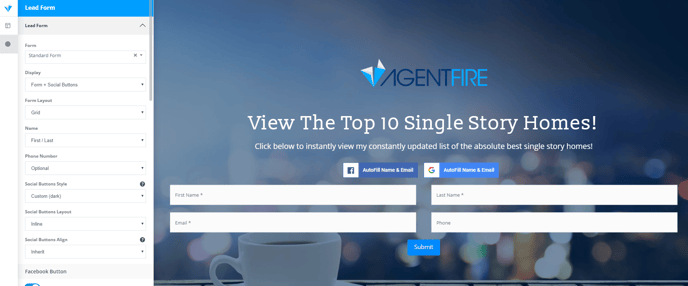
-
Form + Social Buttons - This alternative layout provides autofill options for the form fields shown on the page. This ensures your end users are aware of and can control/edit the contact information they provide.
Form Only Display:
If you do not wish to provide users with social conversion options, a simple on screen form may be used.
Social Buttons (1 step):
This layout will only display the social button options, with an email button fall back. This low friction method allows for quick access to your content.
Social Buttons (2 step):
Using this display allows for you to optionally ask or a phone number, or require a phone number when visitors use social login options.
Note: This does require setting the phone number dropdown to optional or required in order for this to display the second step.
Set the phone number to optional or required as desired.
Form + Social Buttons:
This display puts the email based form fields front end center, and the social conversion buttons provide autofill capabilities to end users for quickly entering data into the fields. This is also a popular display option.
Going in depth with Lead Form Display Options:
Interested in learning more about individual lead form display options? Check out our tutorial series on Lead Forms and discover ways you can customize and control features like what social buttons are displayed, theme colors and placeholder text, and much more!
Other Form Settings:![]()
Other form settings available include options for reCAPTCHA, submit actions, submit button options, and CRM tag integrations.
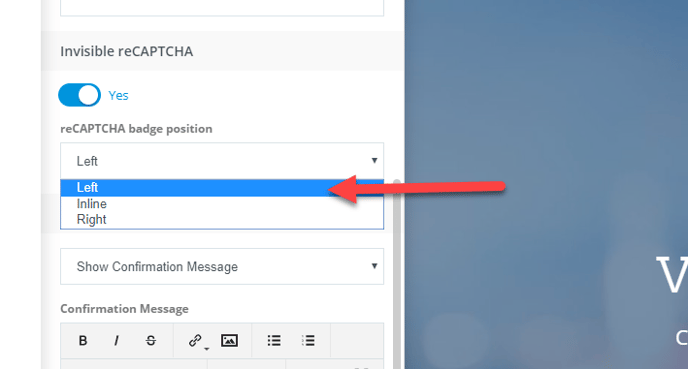
Optionally enable Google Invisible ReCAPTCHA
Google offers their new invisible recaptcha options, which allows for high quality spam filtering without the more problematic issues with the original reCAPTCHA tool.
When we build your website, we added a reCAPTCHA key to your platform. You may utilize reCAPTCHA options by simply enabling the reCAPTCHA on the form, and setting the display location on the page.
You may select from Left, Right or Inline placement. Setting Left or Right will display the captcha in the lower corner of your screen. Setting inline will display the captcha below the form fields.
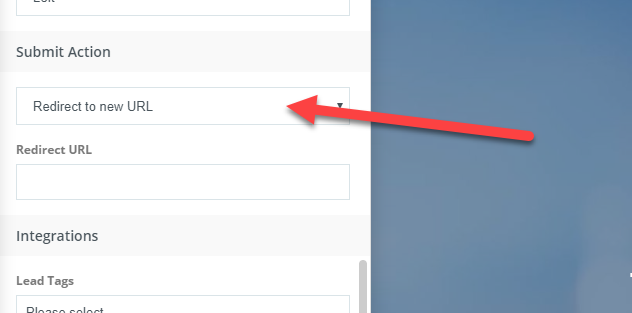
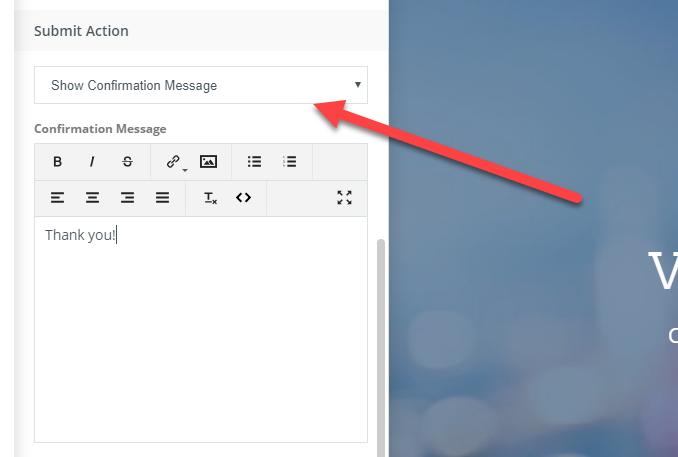
Choose A Submit Action for your button:
Should the end user be redirected to somewhere when they submit the form? Select Redirect to URL and place your hyperlink.
This is the most common submit action method
You may alternatively provide end users with a simple on screen confirmation message if that is all you require.
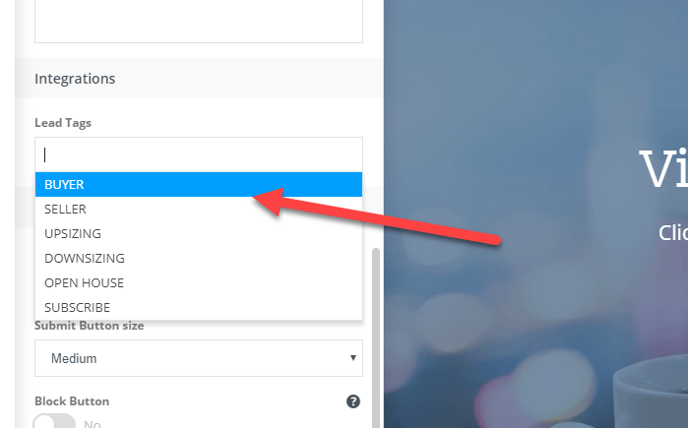
Tags for use with CRM's or Lead Routing
If you want to be able to track sources of lead generation you may benefit from selecting or creating a new tag to use in the lead payload. For a specific ConvertPage, you may be using with PPC or remarketing campaigns, adding appropriate tags here can ensure you are displaying the source in your Lead Manager. These tags are also compatible in your 3rd party CRM or lead routing destinations.
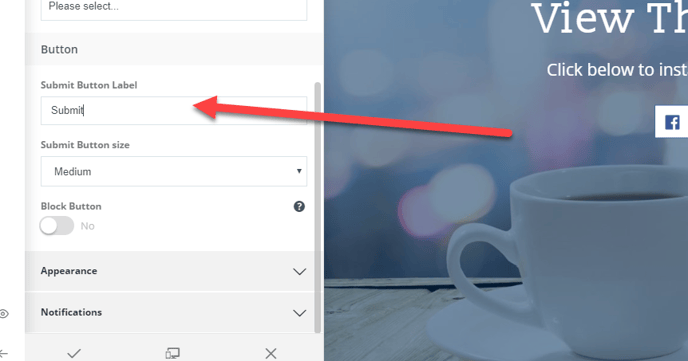
Submit Button Visual Display Options:
You may optionally control the label text, size and block characteristics of the Submit Button. Setting the Button to block will stretch to fill the opening.
Advanced Appearance Options:
Should you need them, advanced appearance options are available which can provide further control over the colors, placeholders, backgrounds and borders of your form, or enable additional control over the button color, background, fill, and hover attributes.
To learn more about Advanced Appearance options with Lead Forms, visit our tutorials on Lead Forms
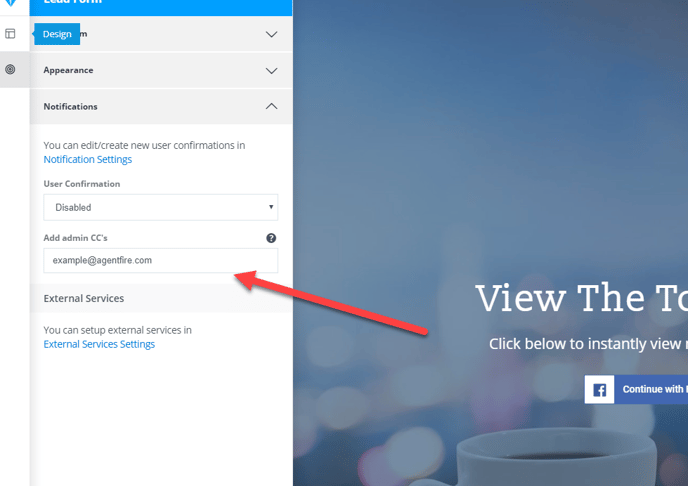
Lead Forms Notification Options: ![]()
While lead forms are typically used for redirecting to existing content within your website, you may optionally offer services, downloads or content found in an email notification to end users.
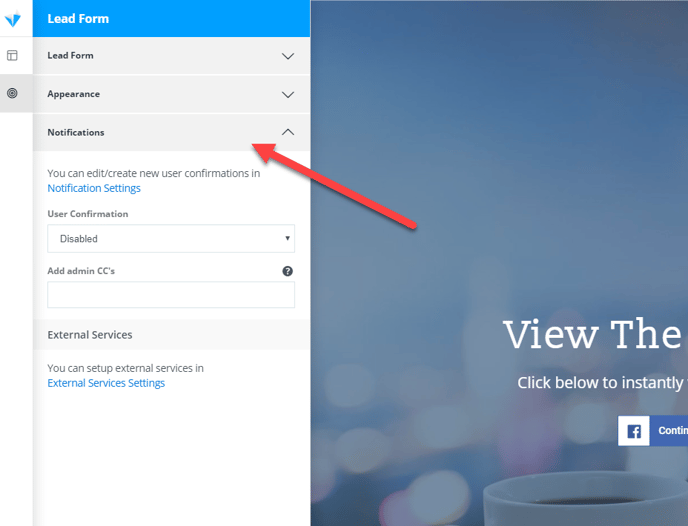
By default user notifications are disabled. You may assign a user notification by opening the available User Confirmation dropdown and selecting one of the choices shown.
It is possible to create new custom notifications in your Lead Manager. Learn more about creating custom user notifications here:
You may optionally add additional Admin CC's to a specific Lead Form.