
With our latest update, creating a blog now works much like creating a new page, giving you more flexibility to design a blog that looks and feels unique. At the same time, we recognize that some users prefer the classic approach, so the traditional blogging experience remains available through one of our templates. In this article, we’ll walk you through both options and show you how to create engaging, content-rich articles using our Content Magic tool.
From your dashboard, navigate to the Blogging section.
Creating a Unique Article
In the Blogging section, click the + New Article button, then select Create Custom Article from the dropdown menu:
A title screen will appear where you can name your blog. As you type, the permalink below will automatically match your title, just like when creating a page or using our Site Tools. Once you’re happy with the title, click on the Create Article button:

Your new blog will now appear in the list as a draft. To begin working on it, click the Edit button next to your blog:

Inside the editor, you’ll see the text “Click here to start writing your blog article…”. Click on it, and the text editor window will open. With the latest update, the full-screen toggle is now easier to spot, allowing you to quickly expand the editor and write, paste, or adjust your content with more space and convenience.

If you’d like to give your article a more customized look, click the Add Block button at the top to browse all available templates:
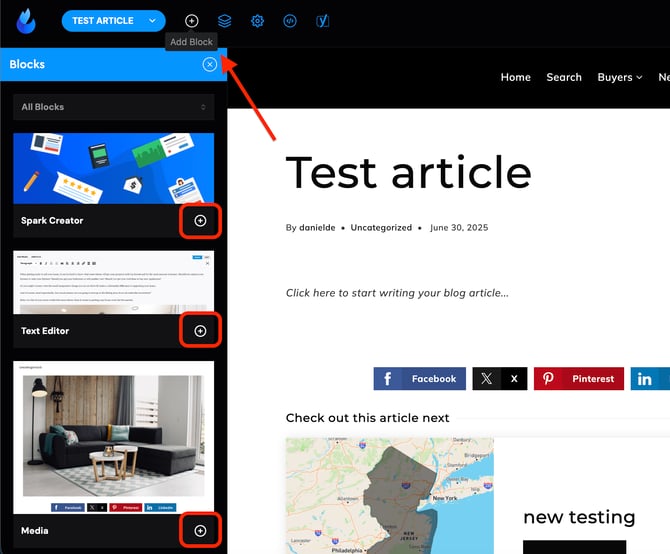
1. Spark Creator
When creating a new blog, you now have access to the Spark Creator template, which gives you endless customization options for your blogs using the same widgets available for pages and other Site Tools:

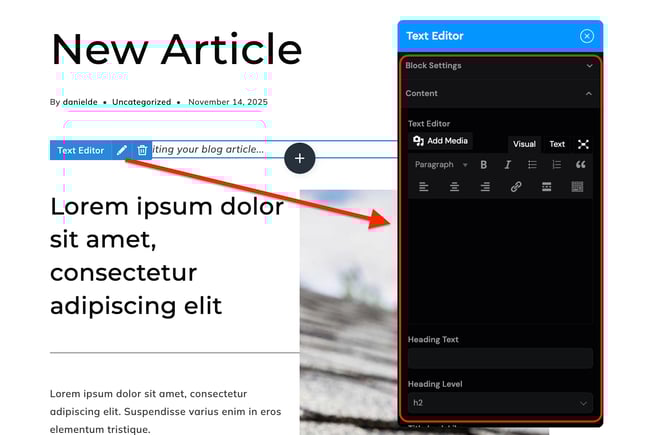
2. Text editor
This template lets you work with the traditional blogging system:
You can enable the full-screen option to expand the view, and it will give the old editor aspect:

3. Media
This template allows you to insert images between blocks within your blogs. Please note that these are not the blog’s featured images:

4. Accessing the blog's settings
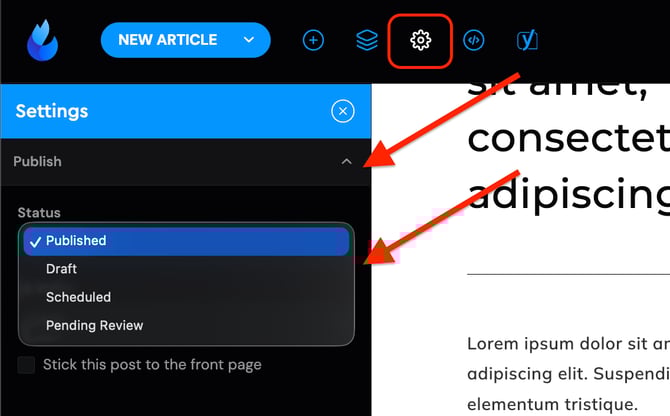
Click on the Gear icon on the top bar to open the Settings tab:

This is where you’ll find all the tools you need to fine-tune your blog:
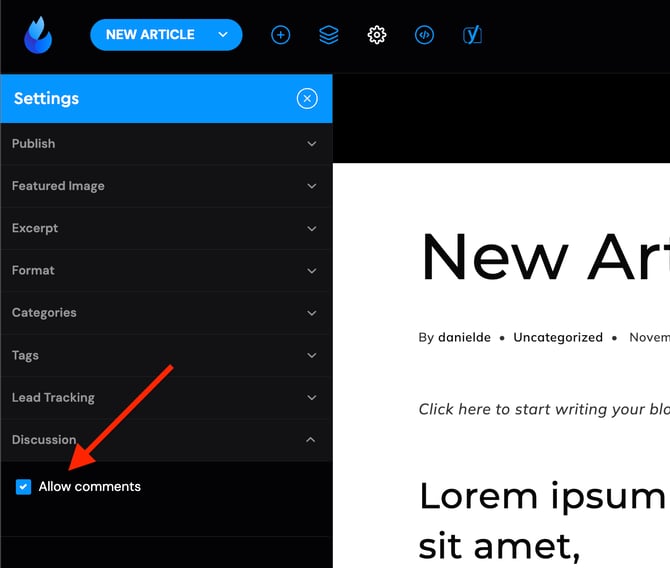
1. Publish: Manage the publication details of your post. You can:
-
Set the post status (Published, Draft, Scheduled, or Pending Review)
-
Choose the visibility (Public, Password Protected, or Private)
-
Enable the option to stick this post to the front page.
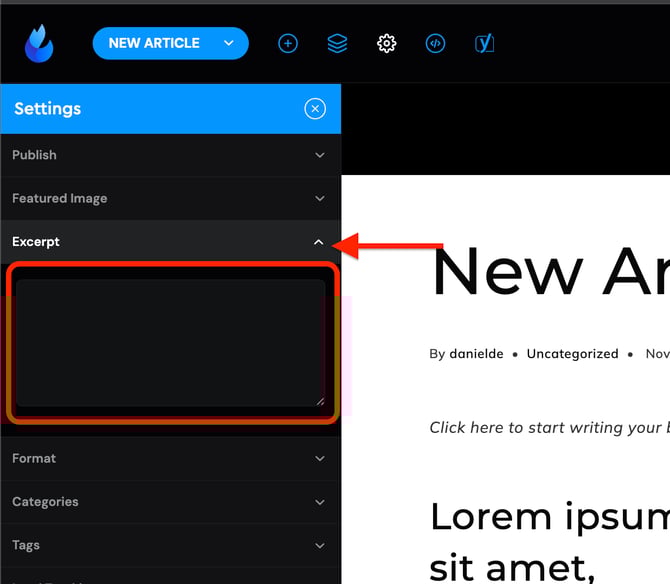
2. Featured Image – Upload the featured image for your post.
-
For best results, use images without text. The system may crop or optimize images to ensure proper display across different screen sizes.

3. Excerpt: Add or edit the post’s excerpt.
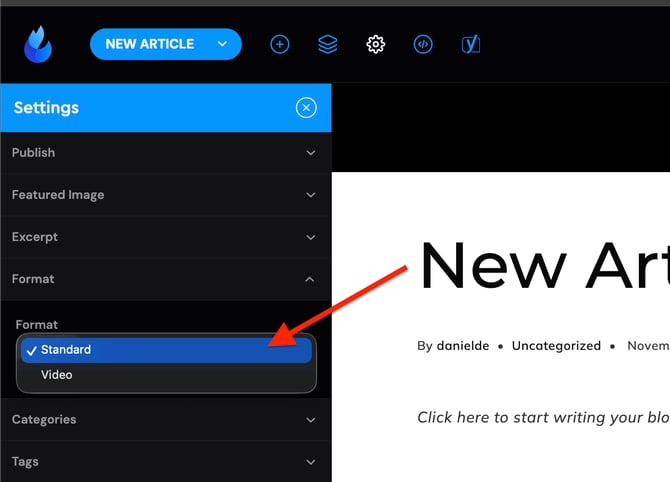
4. Format: Choose between Standard or Video format.
-
When using Video, the system will automatically pull the thumbnail from a video link (e.g., a YouTube URL) and set it as the featured image.
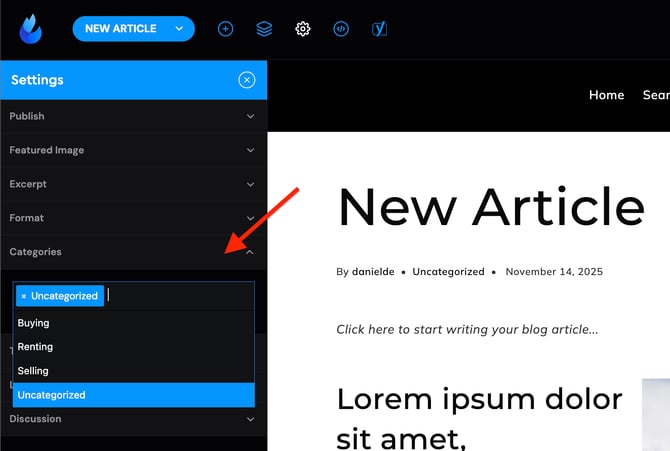
5. Categories – Assign your post to an existing category or create a new one.
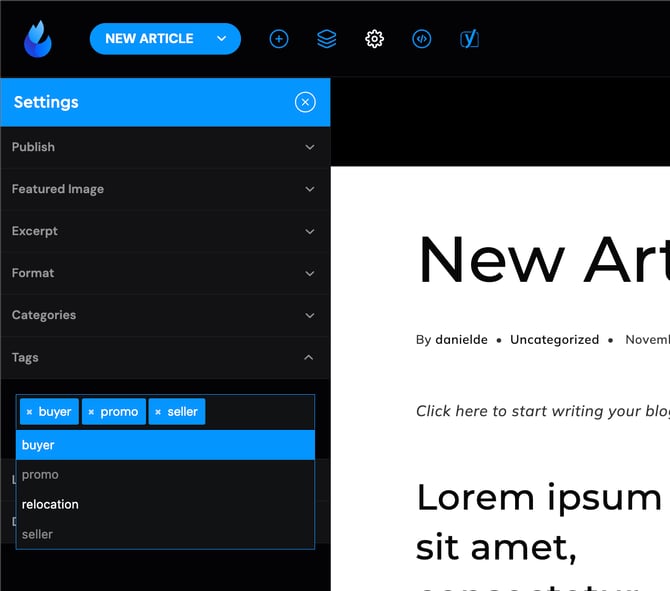
6. Tags – Add or create tags to better organize your post and improve searchability.
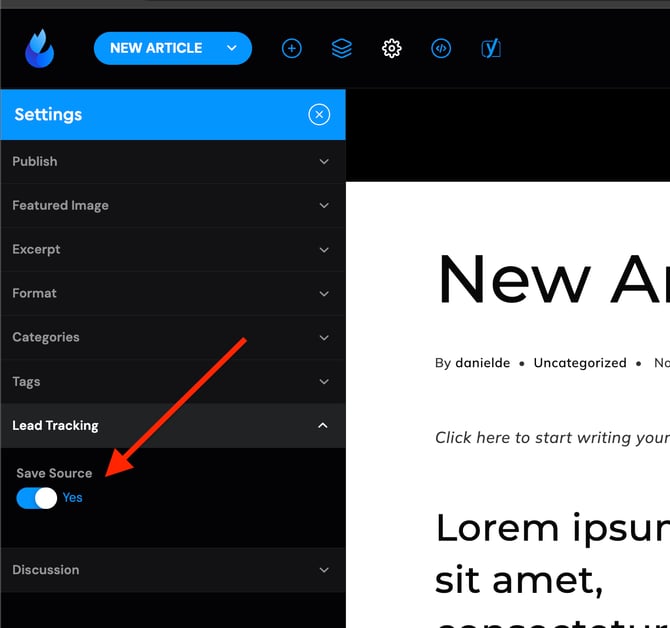
7. Lead Tracking – Toggle the save source option on or off.
8. Discussion – Enable or disable comments on your blog post.
Content Magic: Create an RSS Feed Blog post
Please note: you must acquire the AgentFire plus add-on to unlock this feature. Here's more information on this AgentFire Plus add-on.
Once you’ve acquired AgentFire Plus, starting September 1, 2025, you’ll have 4 Content Magic credits available. Each credit allows you to generate one Content Magic article, designed with rich, keyword-optimized content to boost your blog’s performance.
To learn more, check out this article where Luke, our CPO, explains the tool and provides a live example: How to Create Content Magic Articles Using One Click.
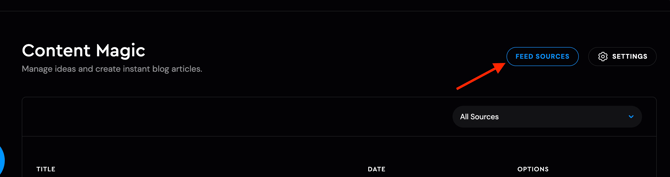
On the blogging section of your dashboard, click on the 'Content Magic' button:

Then click on Feed Sources:
By default, our system will suggest the 5 most popular RSS feeds used by our clients: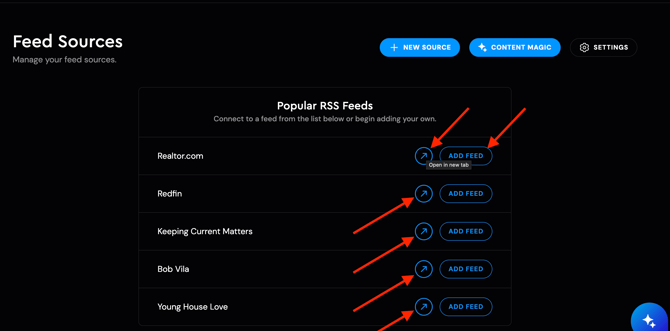
To connect the desired one, you can click on the 'add feed' option; however, we suggest clicking on the arrow icon. This will open the RSS feed site and then, after adding the desired RSS feed, you'll be able to copy and paste the links, allowing you to add more RSS feeds to your Content Magic tool. By clicking on the arrow, you'll open each site's RSS feed link, and you can add them accordingly: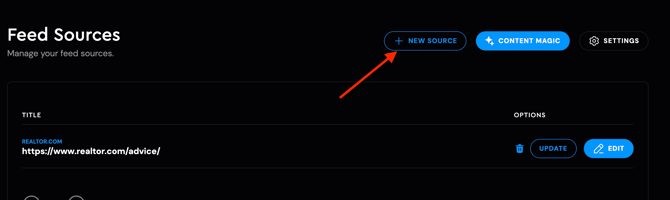
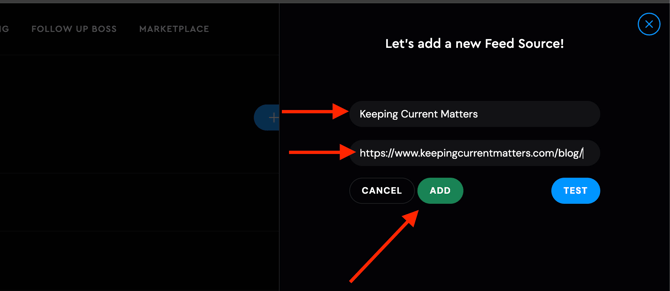
Once you've added the desired source(s), click on the update button: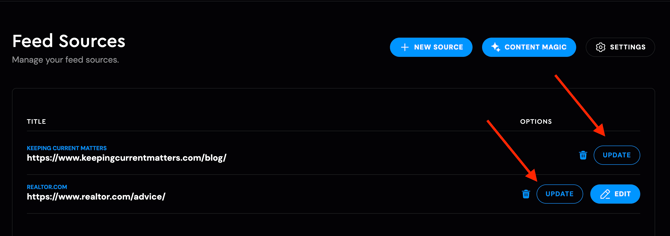
This will pull up the latest posts from your favorite RSS feed(s):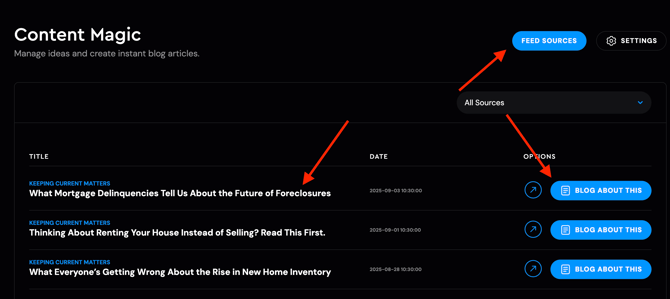
Lastly, as shown above, click on the Feed Sources button. This will open the RSS feed tab, where you can preview articles by clicking on their titles.
Important: once you select the desired article, click the Blog About This button. This action will initiate the Content Magic AI process, and it cannot be undone. The AI will study the article, generate a unique version based on the same topic, and enrich it with sourced links. Completing this step will consume one Content Magic token. Before publishing, you’ll have the opportunity to review the draft and make any desired edits to ensure it’s exactly how you want it before it goes live.
Content Magic: Create an article from scratch
Please note: you must acquire the AgentFire plus add-on to unlock this feature. Here's more information on this AgentFire Plus add-on.
On the blogging section of your dashboard, click on the '+ New Article' button and select 'Use Content Magic':

A new window will open and guide you through three steps:
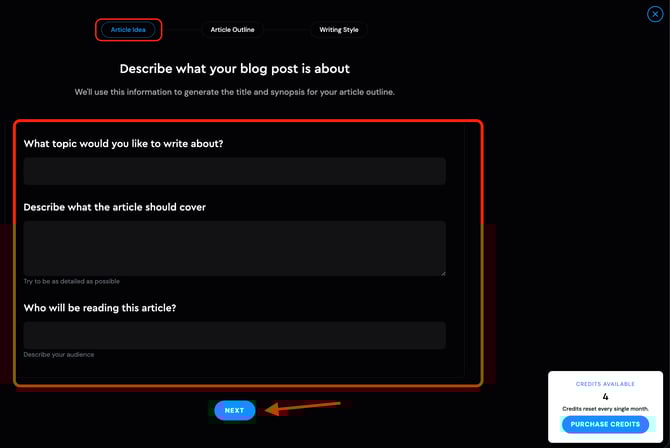
1. Article Ideas
You’ll be prompted to complete a few fields to help the AI understand what your article should be about:
-
Topic – What is the main subject of your blog post?
-
Describe what the article should cover – The more detailed you are, the better the AI’s results will be.
-
Audience – Describe who will be reading this article.
Once these fields are filled out, click Next.
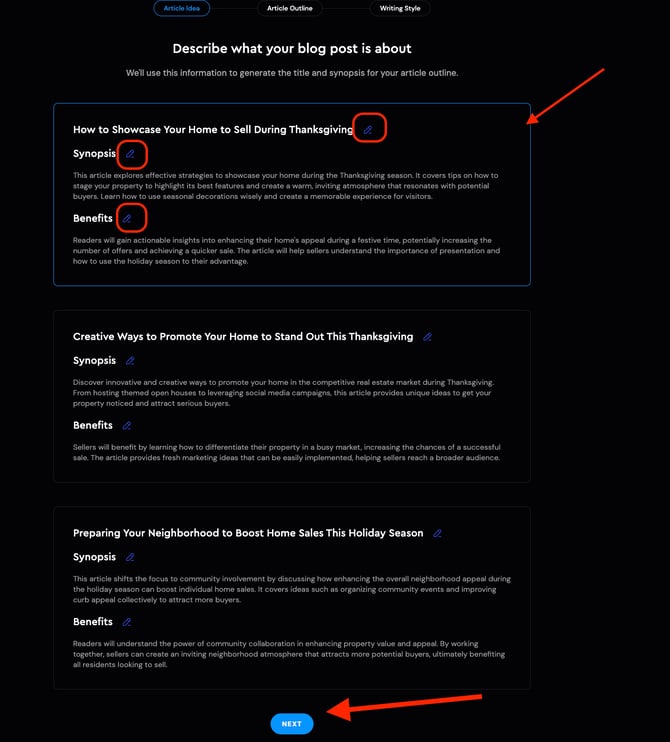
After a few seconds (or up to a minute), the AI will generate three article ideas for you. 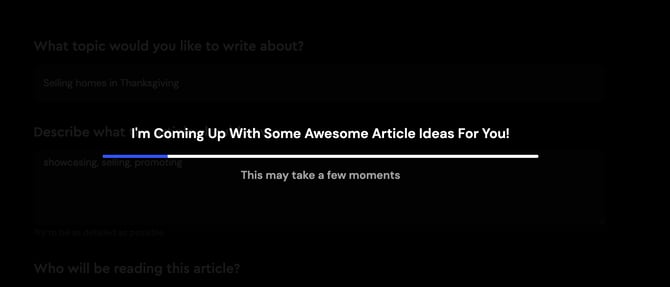
Select the idea you prefer. If you like one but want to adjust it, you can edit the title, synopsis, or benefits before clicking Next:
Please note: generating the outline may take a few minutes:

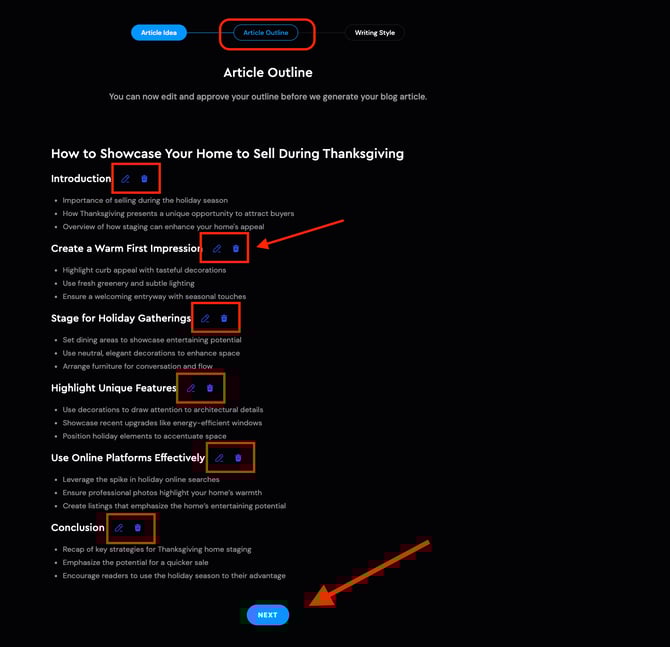
2. Article Outline
In this step, the AI will produce several outline options. You can:
-
Edit any section
-
Add additional bullet points.
-
Delete points you don’t need
Once the outline looks right, click Next:
3. Writing Style
You’ll now choose the article’s tone of voice and writing style:
-
Tone of voice: select among uplifting, compassionate, witty, solemn, passionate, tranquil, mysterious, inspirational, nostalgic, or empowering.
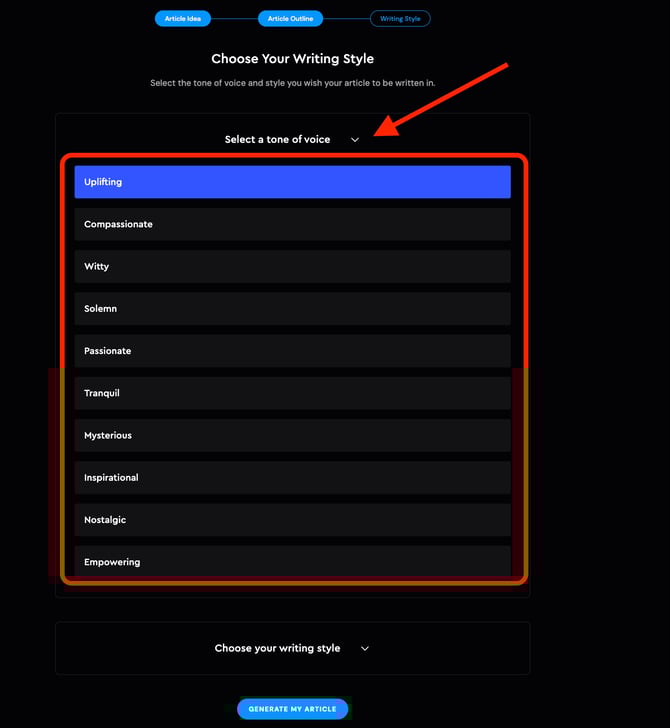
-
Writing style: select among the storyteller, the educator, the scientific analyst, or the motivational coach.
Once both fields are selected, click Generate My Article:

Reviewing Your Article
You’ll be taken back to the Blogging dashboard, where you’ll see a prompt indicating “Generating Article.” Once the article is ready, the title will appear, and you can click Edit to review the full content:

This process may take a few minutes. You can continue working on anything else while the AI completes it. Keep in mind that Content Magic does not generate images, so you’ll need to upload any visuals manually.
Important: A Content Magic credit is only used when the article is published. While an article is being generated, you can also begin creating a new one.
If you have any additional questions or concerns about our Blogging Tool, you can reach out to our Support team at support@agentfire.com.