
This guide will walk you through the process of creating a new Engage CTA (Call to Action) in the Dashboard.
This guide will walk you through the process of creating a new Engage CTA (Call to Action) in the Dashboard.
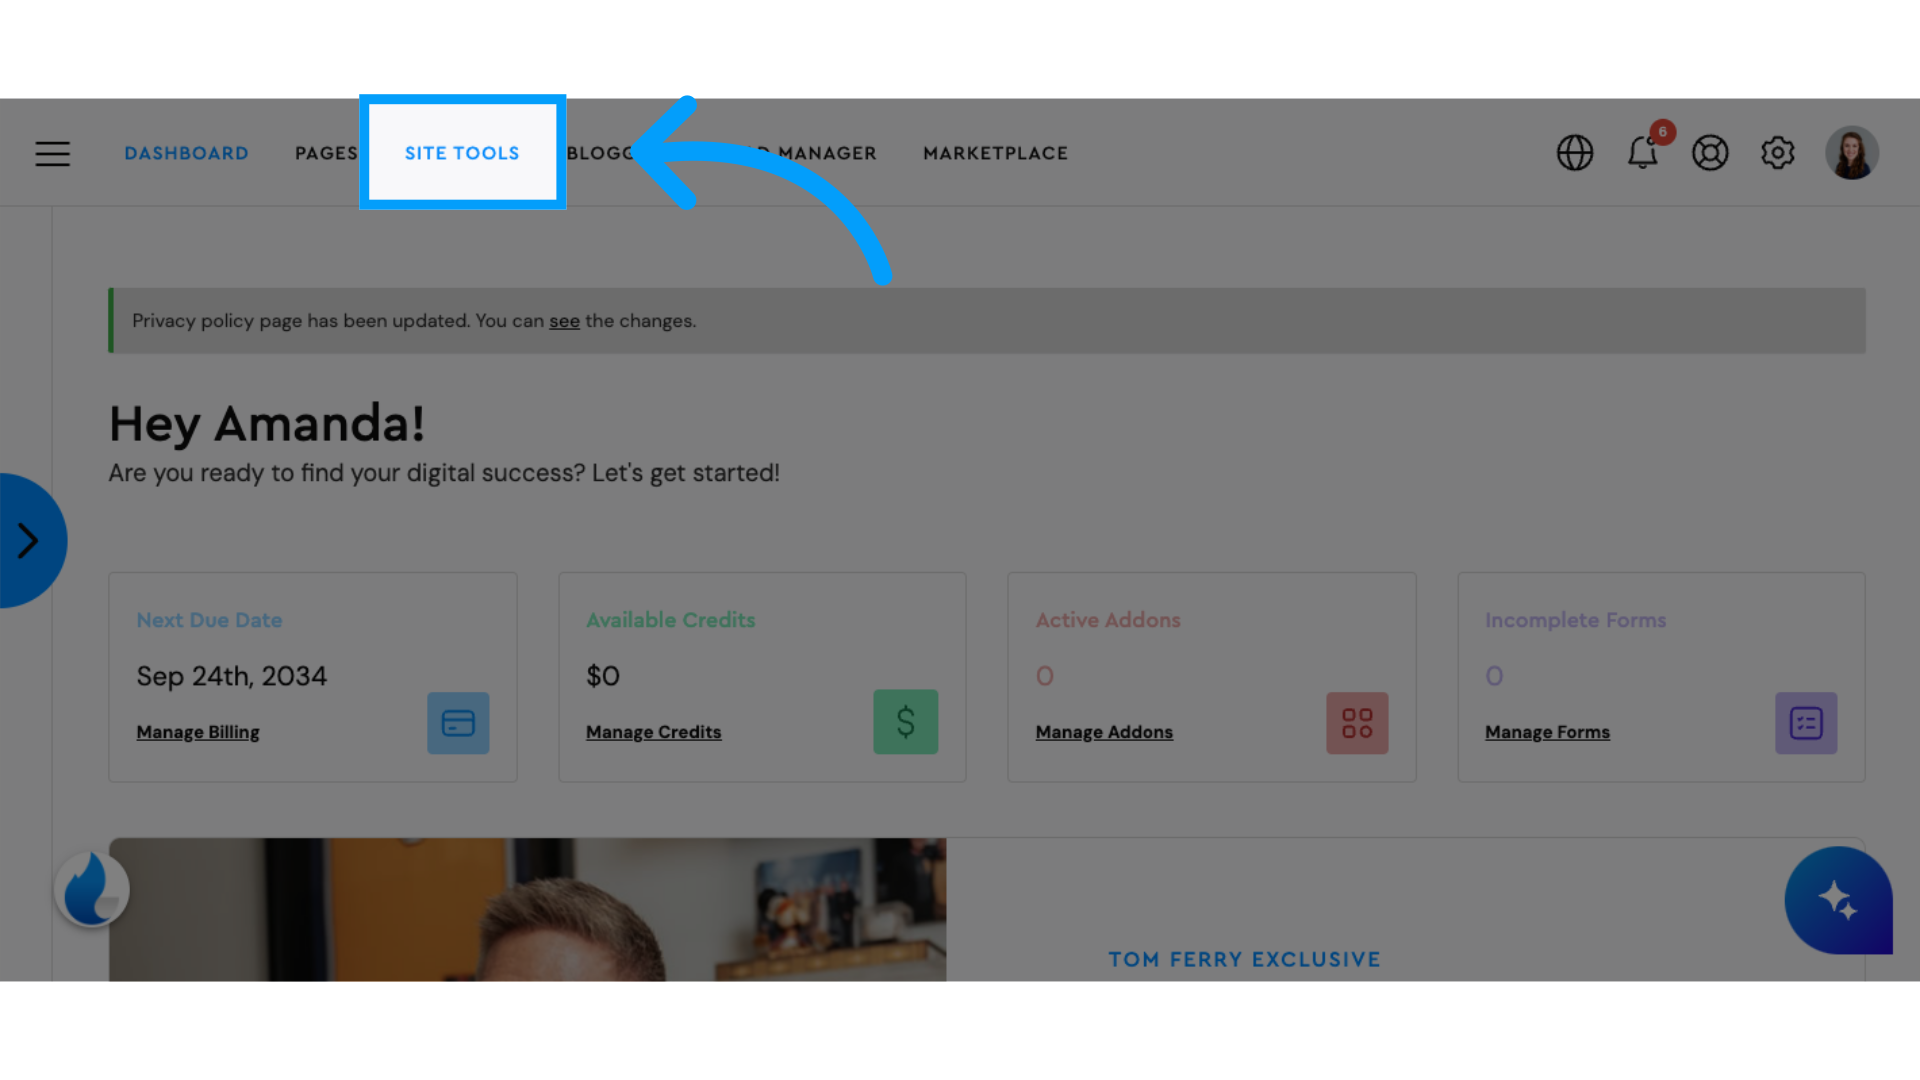
1. Click "Site Tools"
Access the "Site Tools" section at the top of the screen.
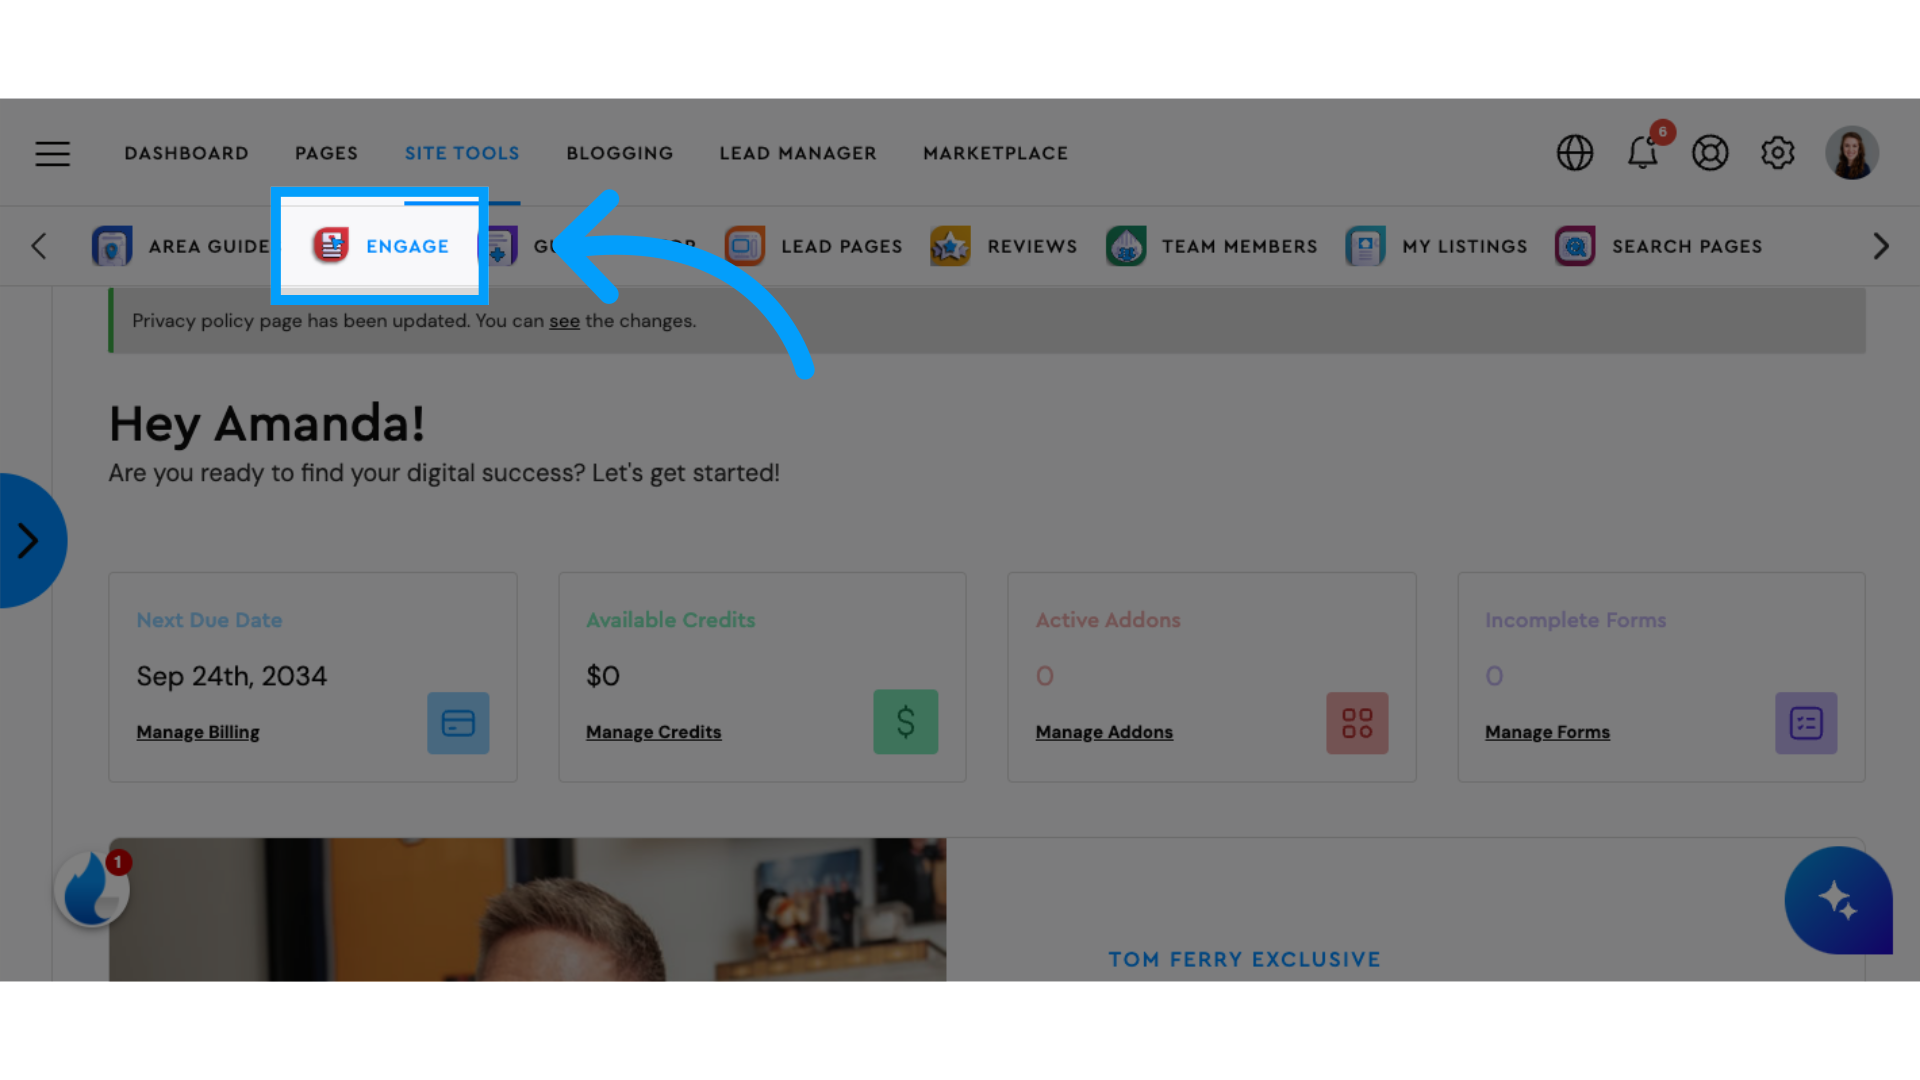
2. Click "Engage"
Navigate to the "Engage" option. The Engage tool is where all of the Call to Action Pop Ups are located.
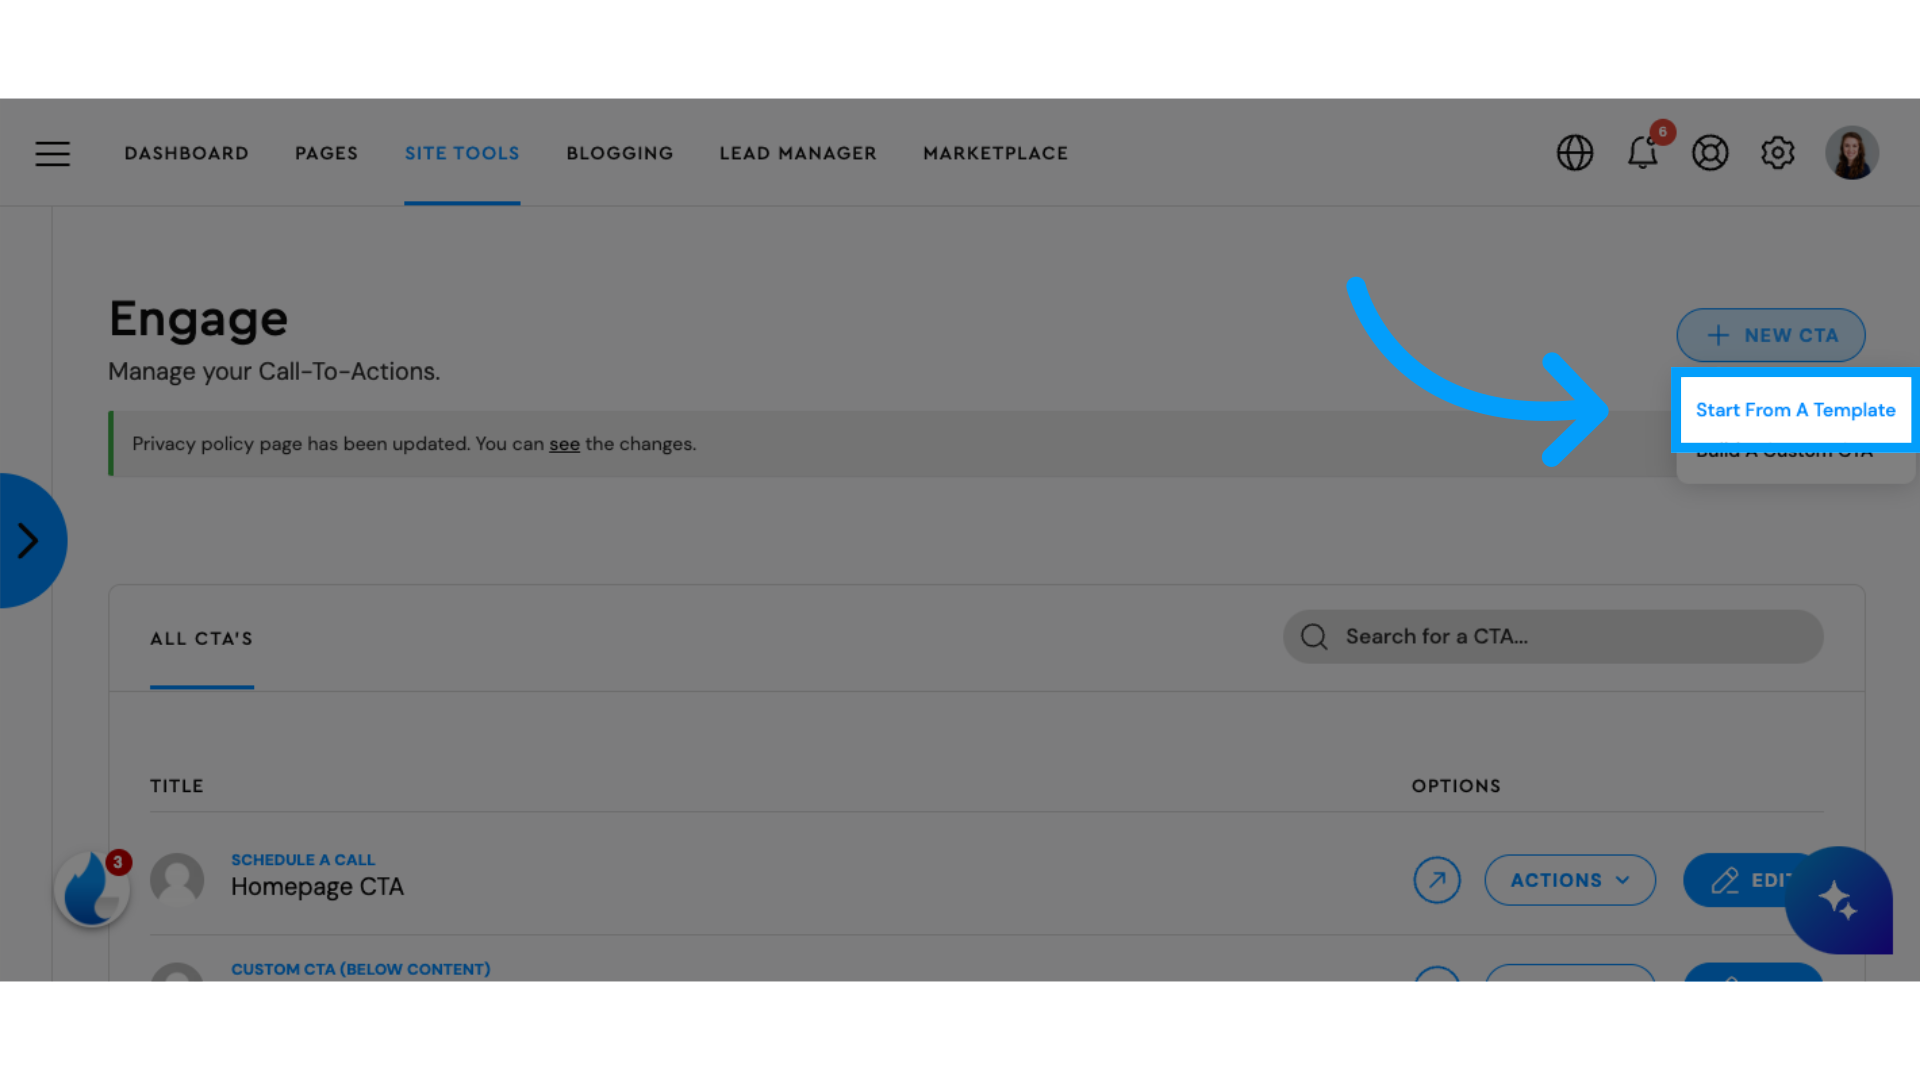
3. Click "New CTA"
Select "New CTA" to create a new Call to Action located in the top right corner.

4. Click "Start From A Template"
Choose "Start From A Template" to begin with a pre-made design. We have quite a few templates to choose from.
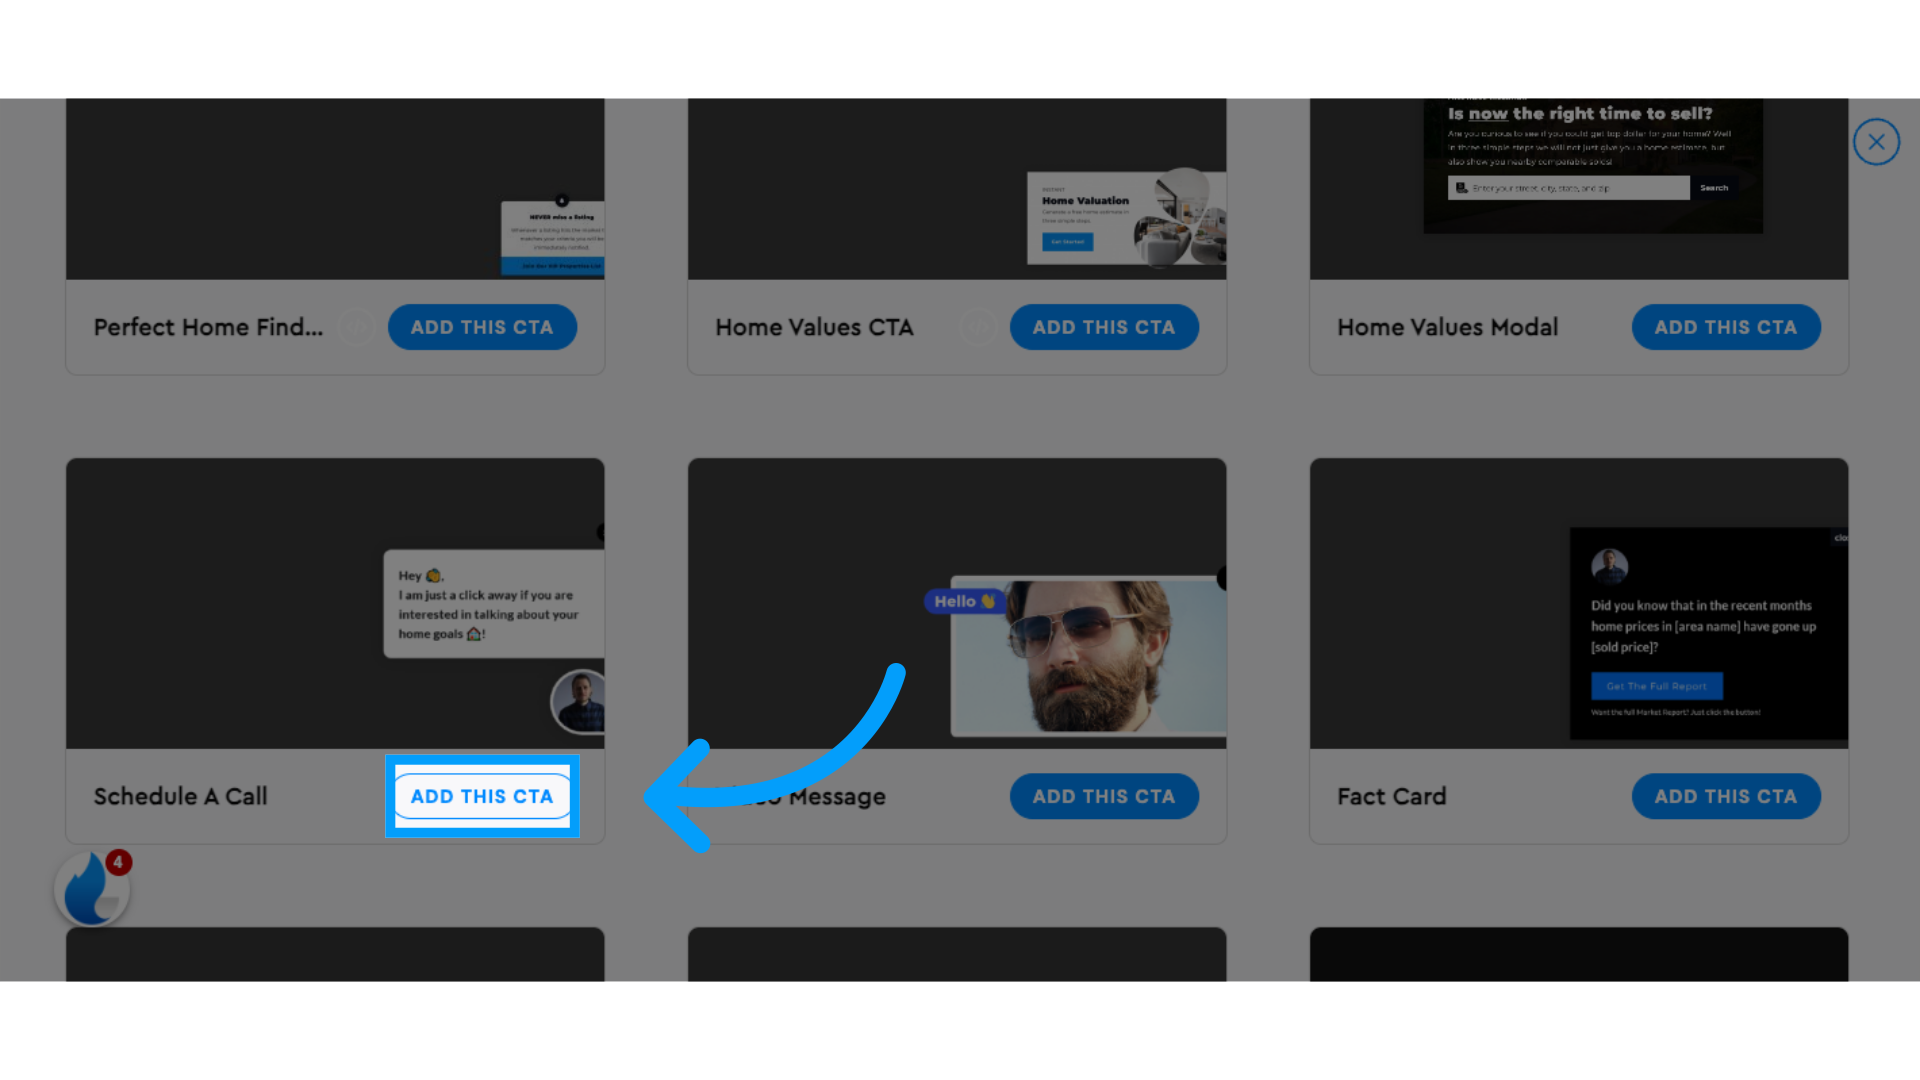
5. Click "Add This CTA"
Find the Call to Action you are looking for and click on "Add This CTA" to start creating your pop-up.
6. Click here
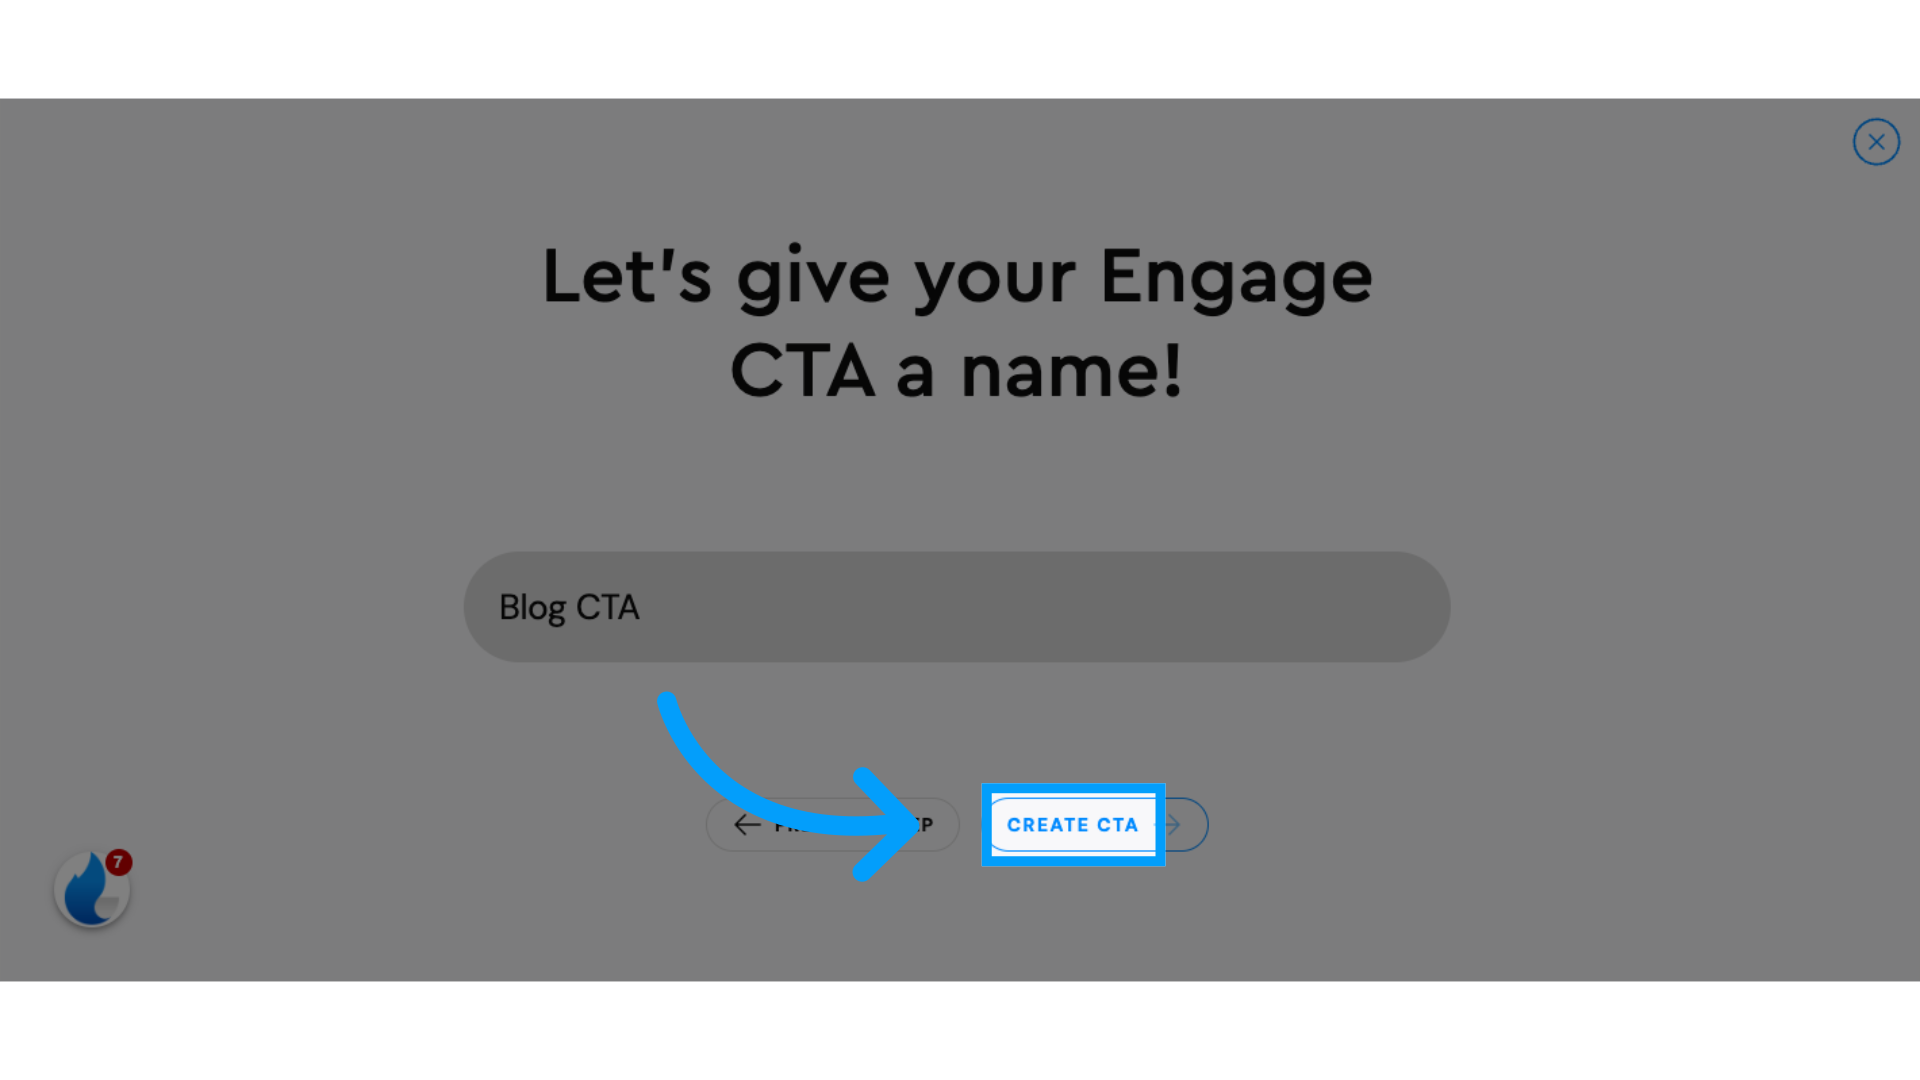
Click into the title box and write your CTA name. This is mostly used for organization purposes so it helps to be specific.

7. Click "Create CTA"
Finalize the process by selecting "Create CTA.
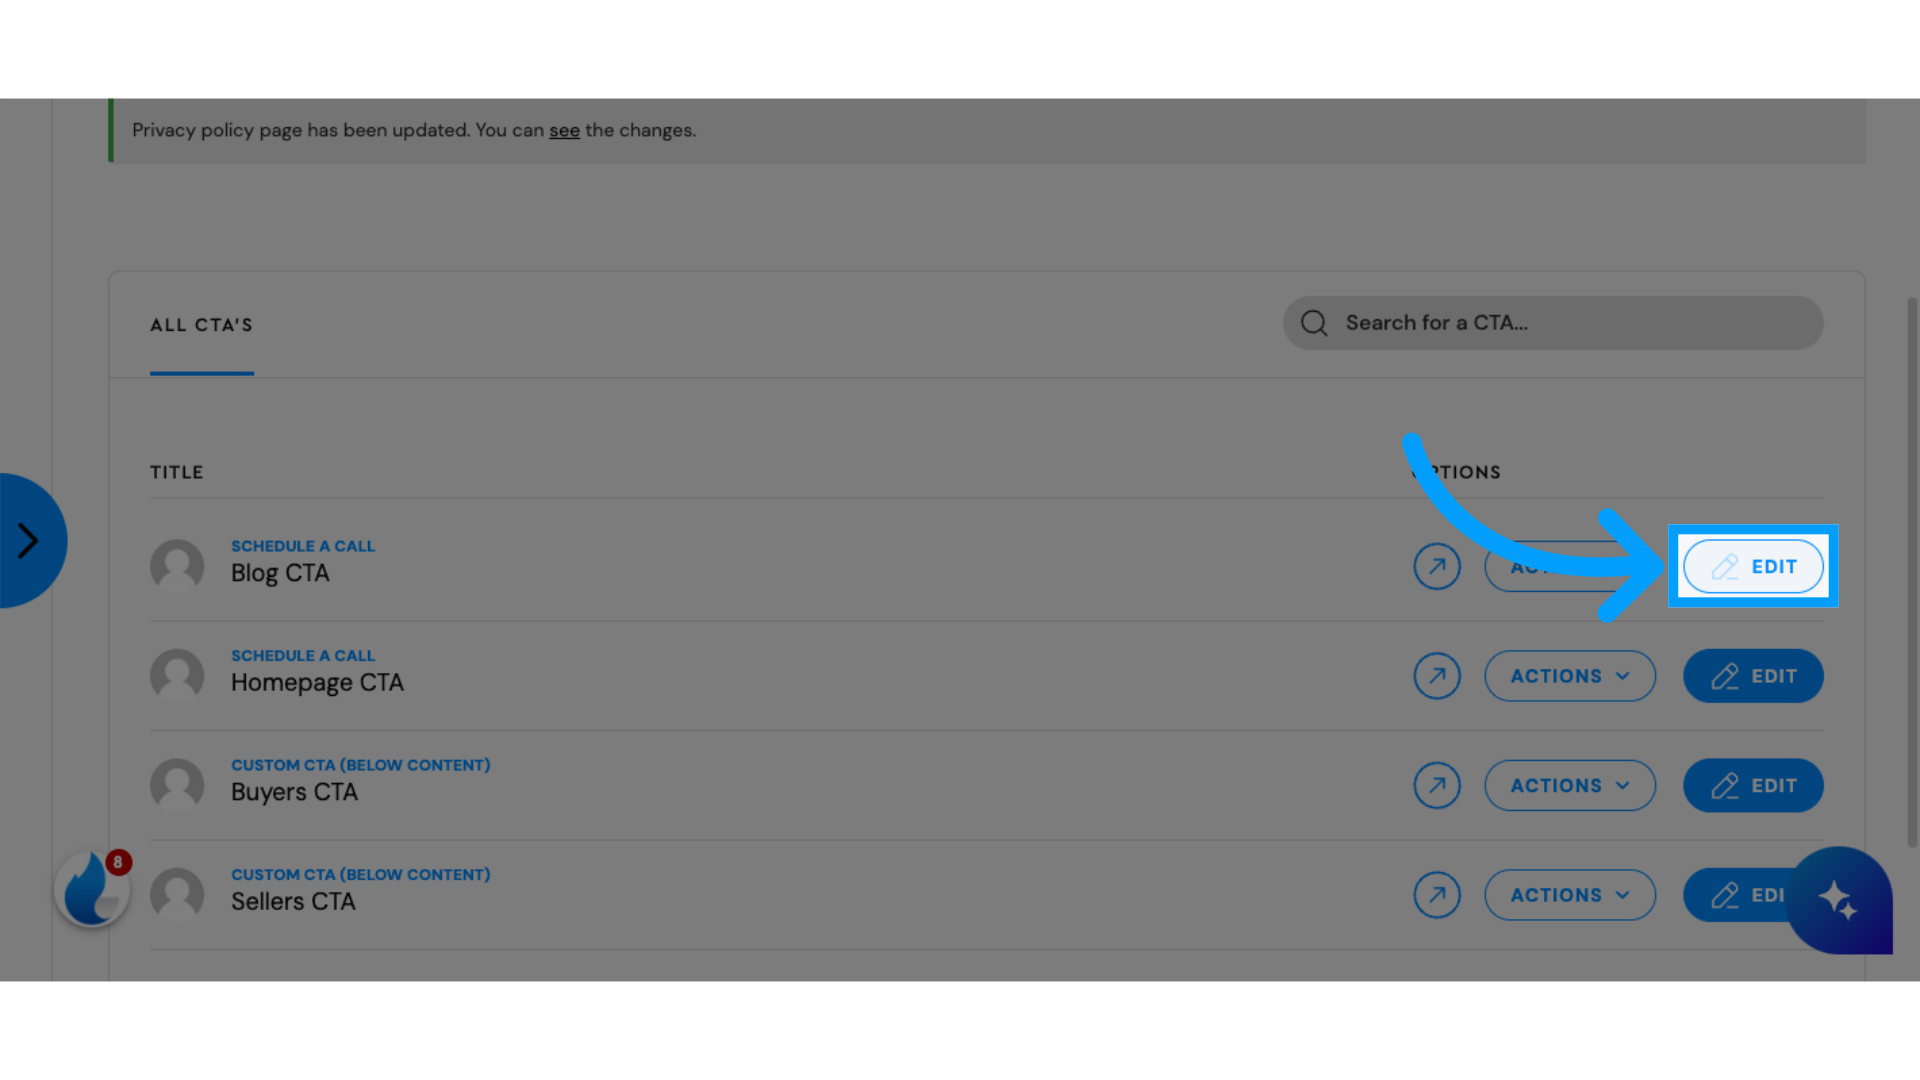
8. Click "Edit"
Now you will see your new Engage CTA in the list. Click "Edit" to make changes.
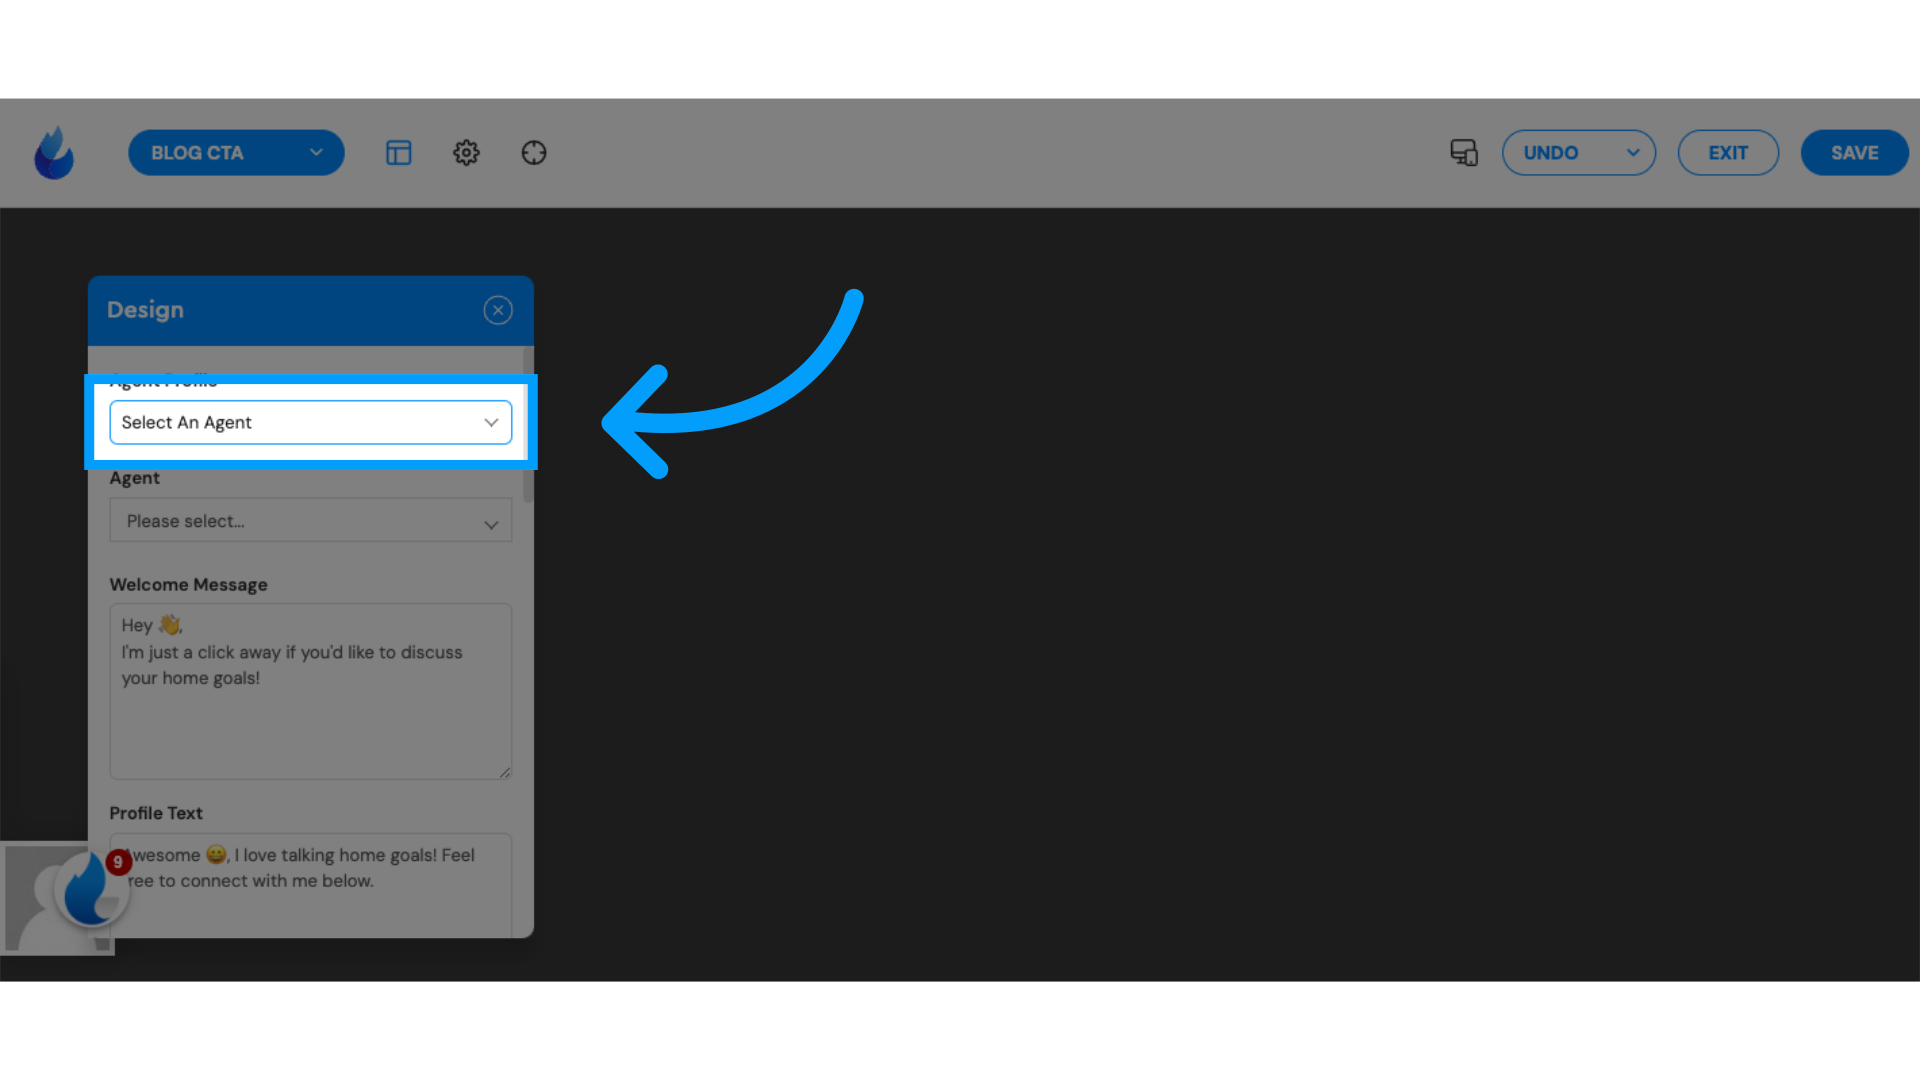
9. Click "Select An Agent Custom Profile"
Each CTA template will have different editing options. In this example, you can click to choose "Select An Agent" or "Custom Profile" to start customizing.
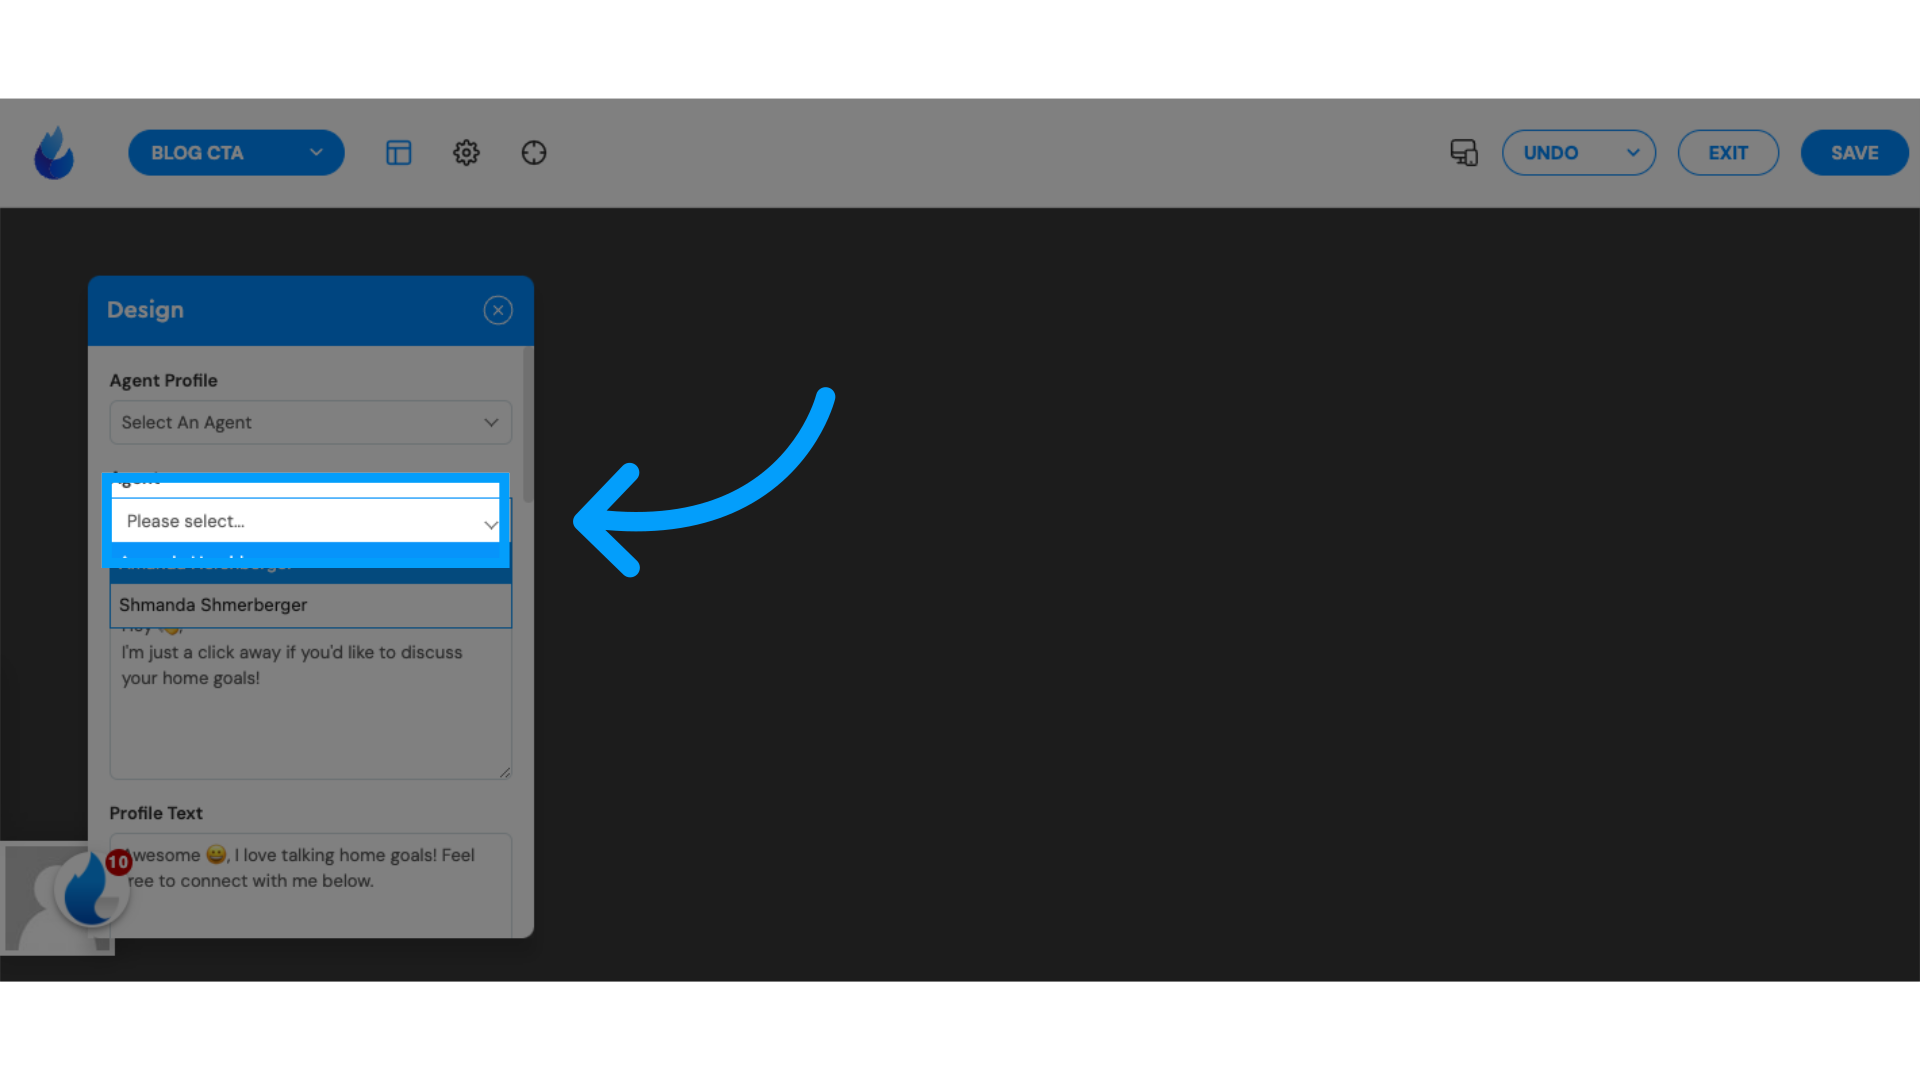
10. Click "Please select..."
If you select the option "Select an Agent" you can then click the box below to choose an agent that has a team member profile.
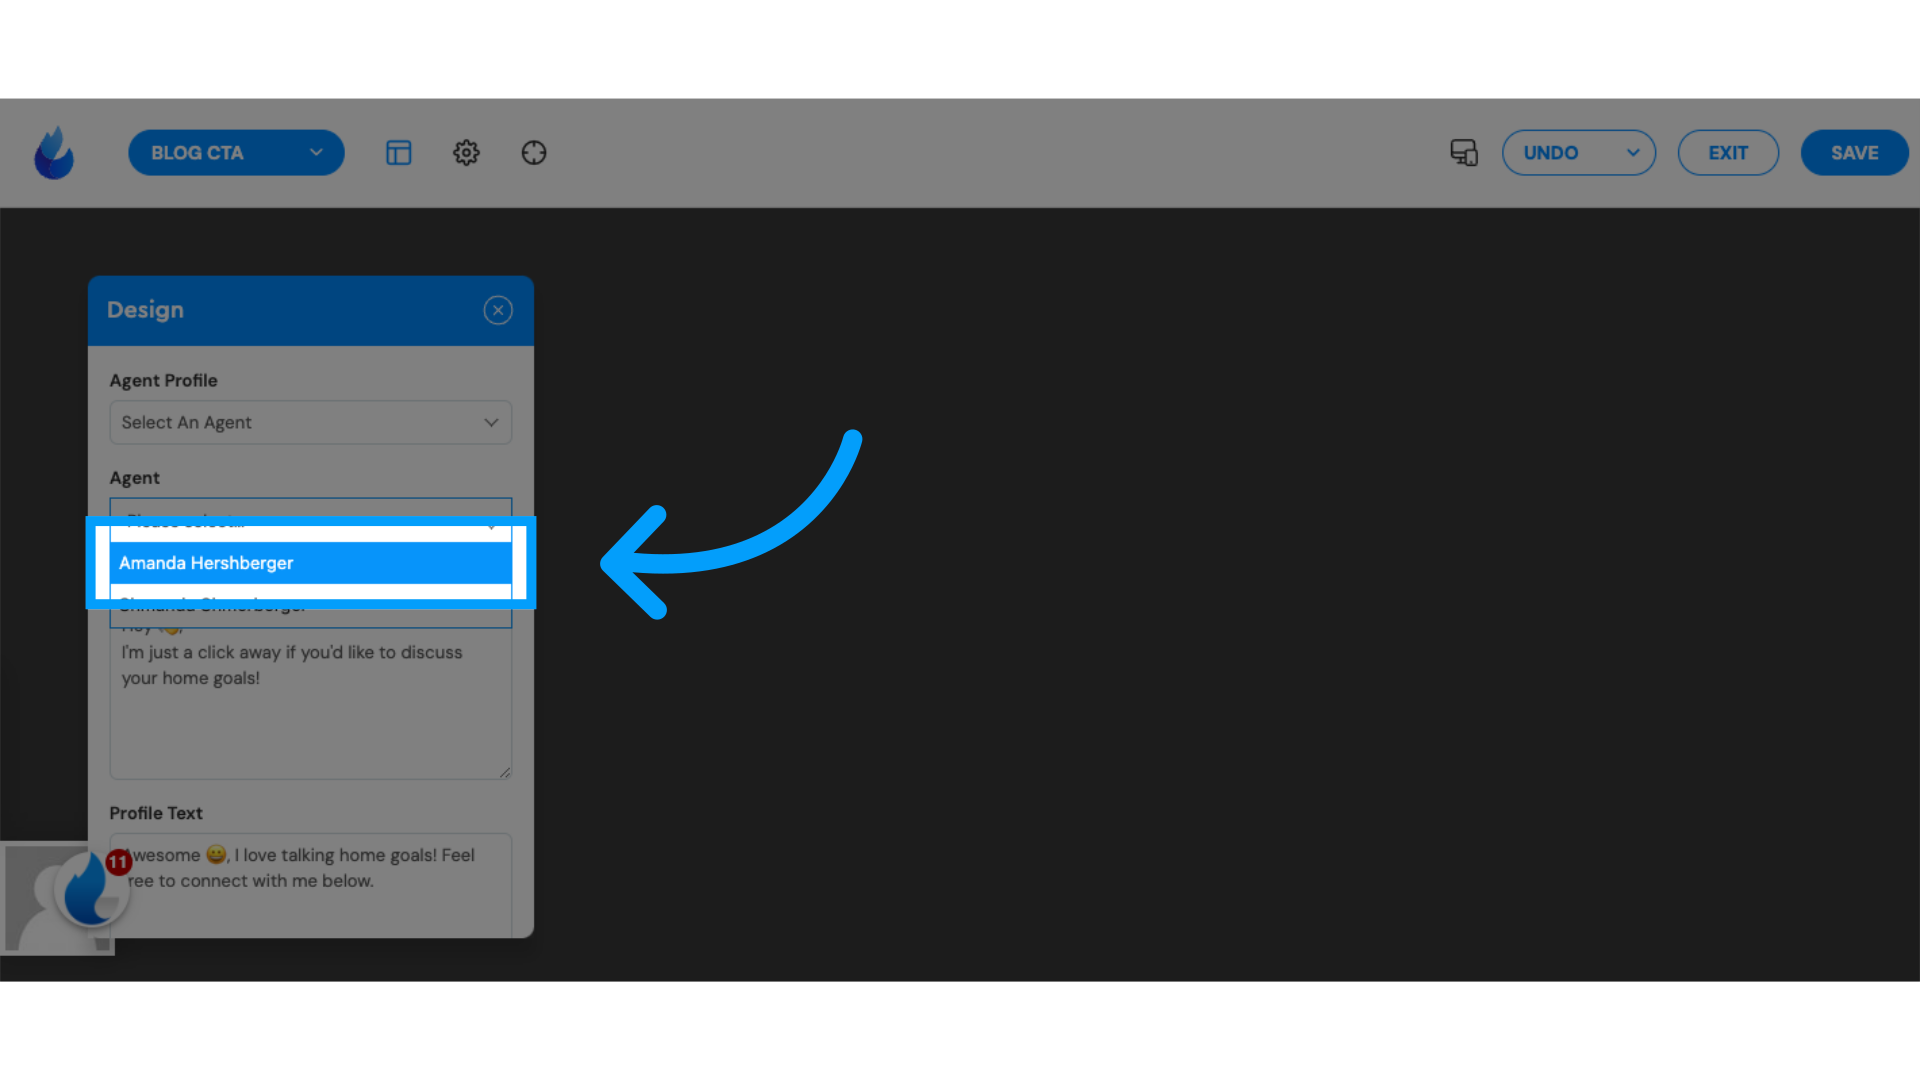
11. Click on the agent you want visitors to contact.
When you select an agent with a profile, this will pull in their contact info and headshot.
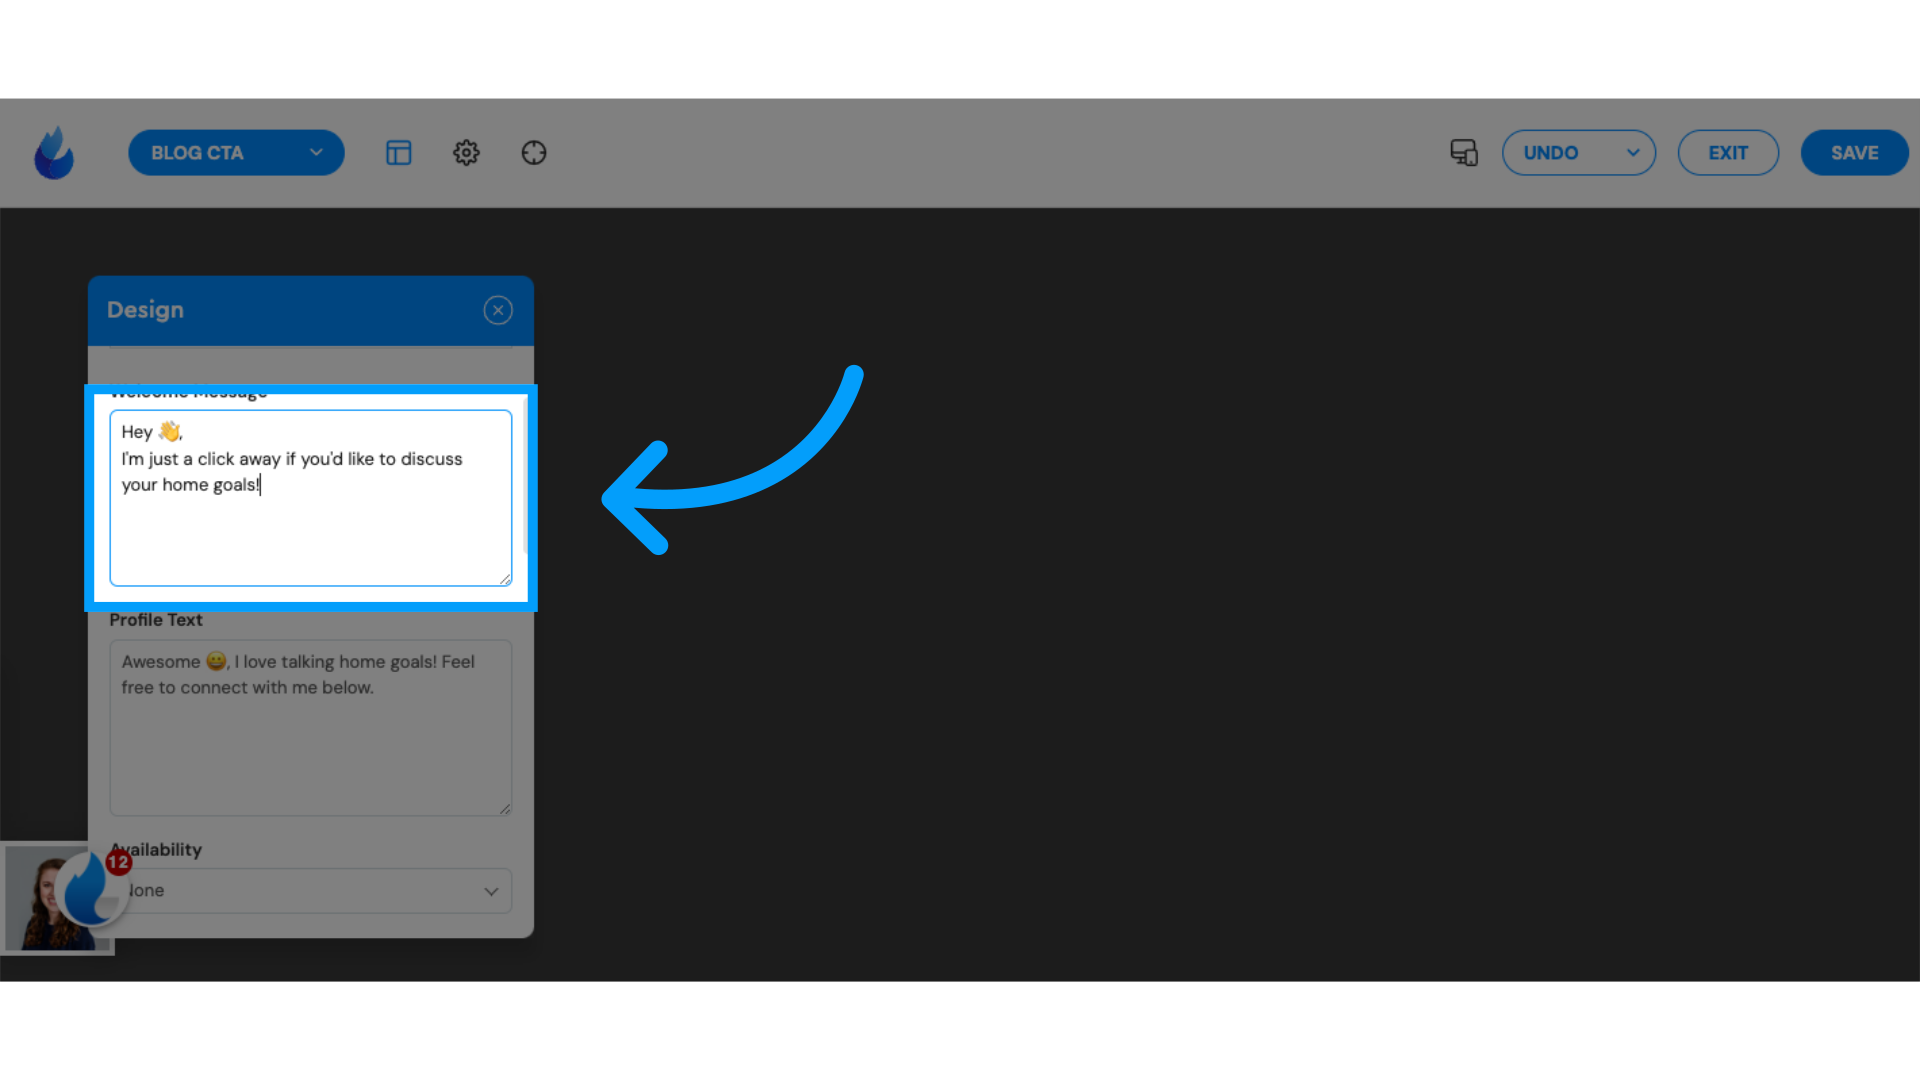
12. Click into the textbox.
Click into the text box to update the content visitors will see when they click on the pop-up.
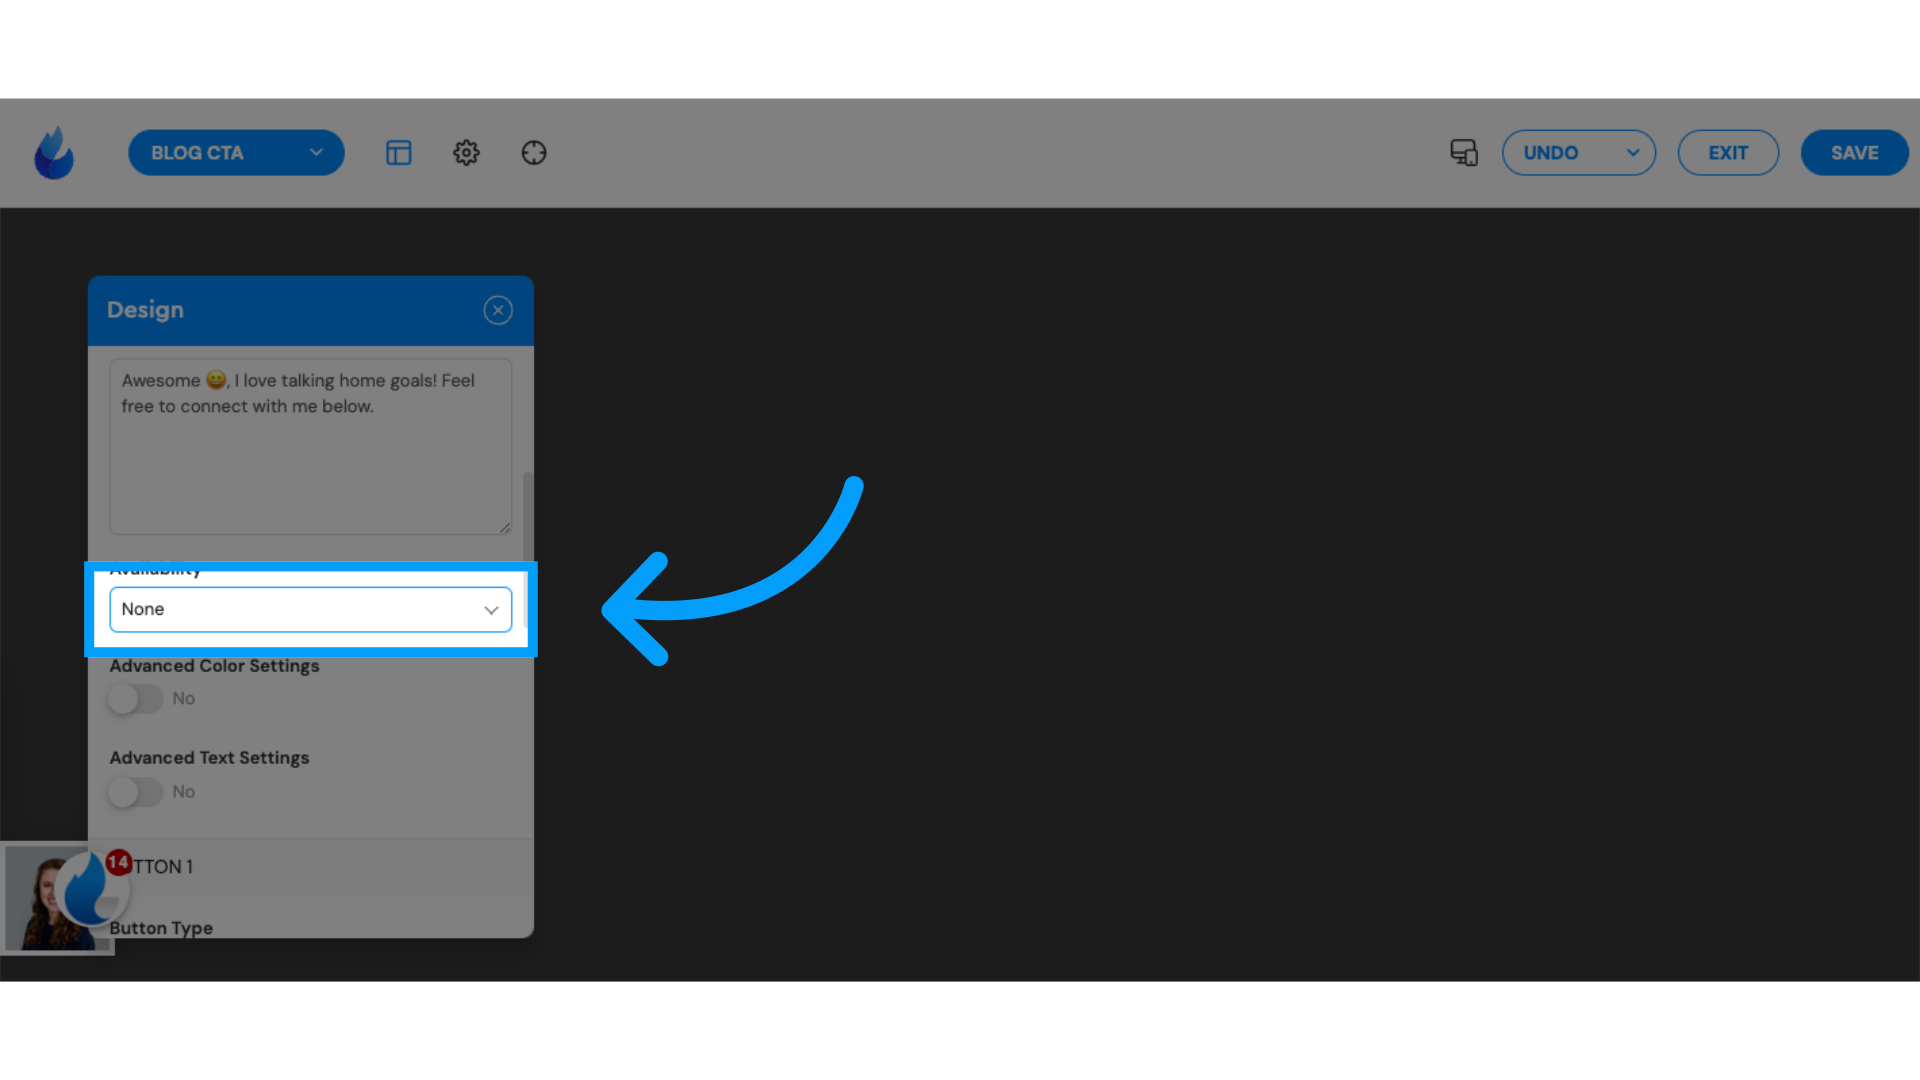
13. Click through the different editing sections.
Click through the different sections of the toolbar to make sure all the information is updated.
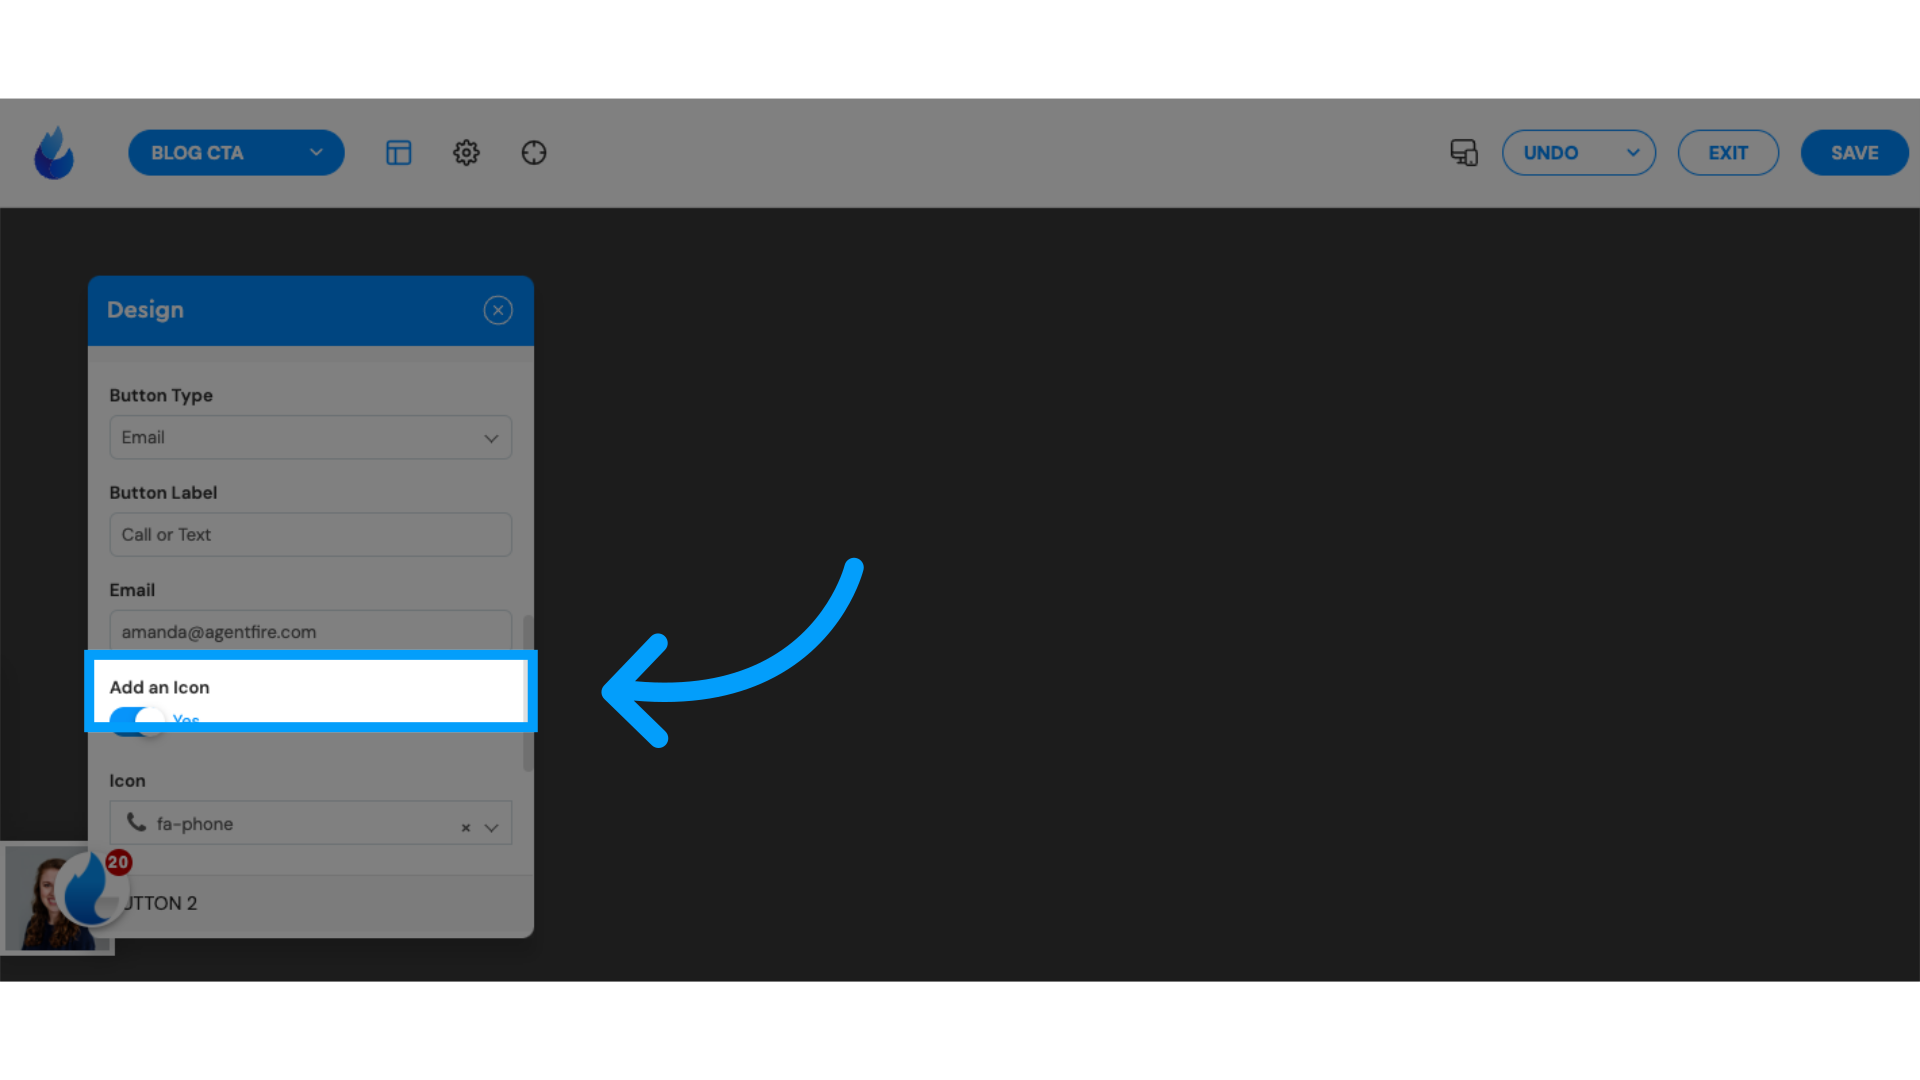
14. Click "Add an Icon"
You can update the icon shown by looking through the dropdown and choosing an icon that matches the action you selected.
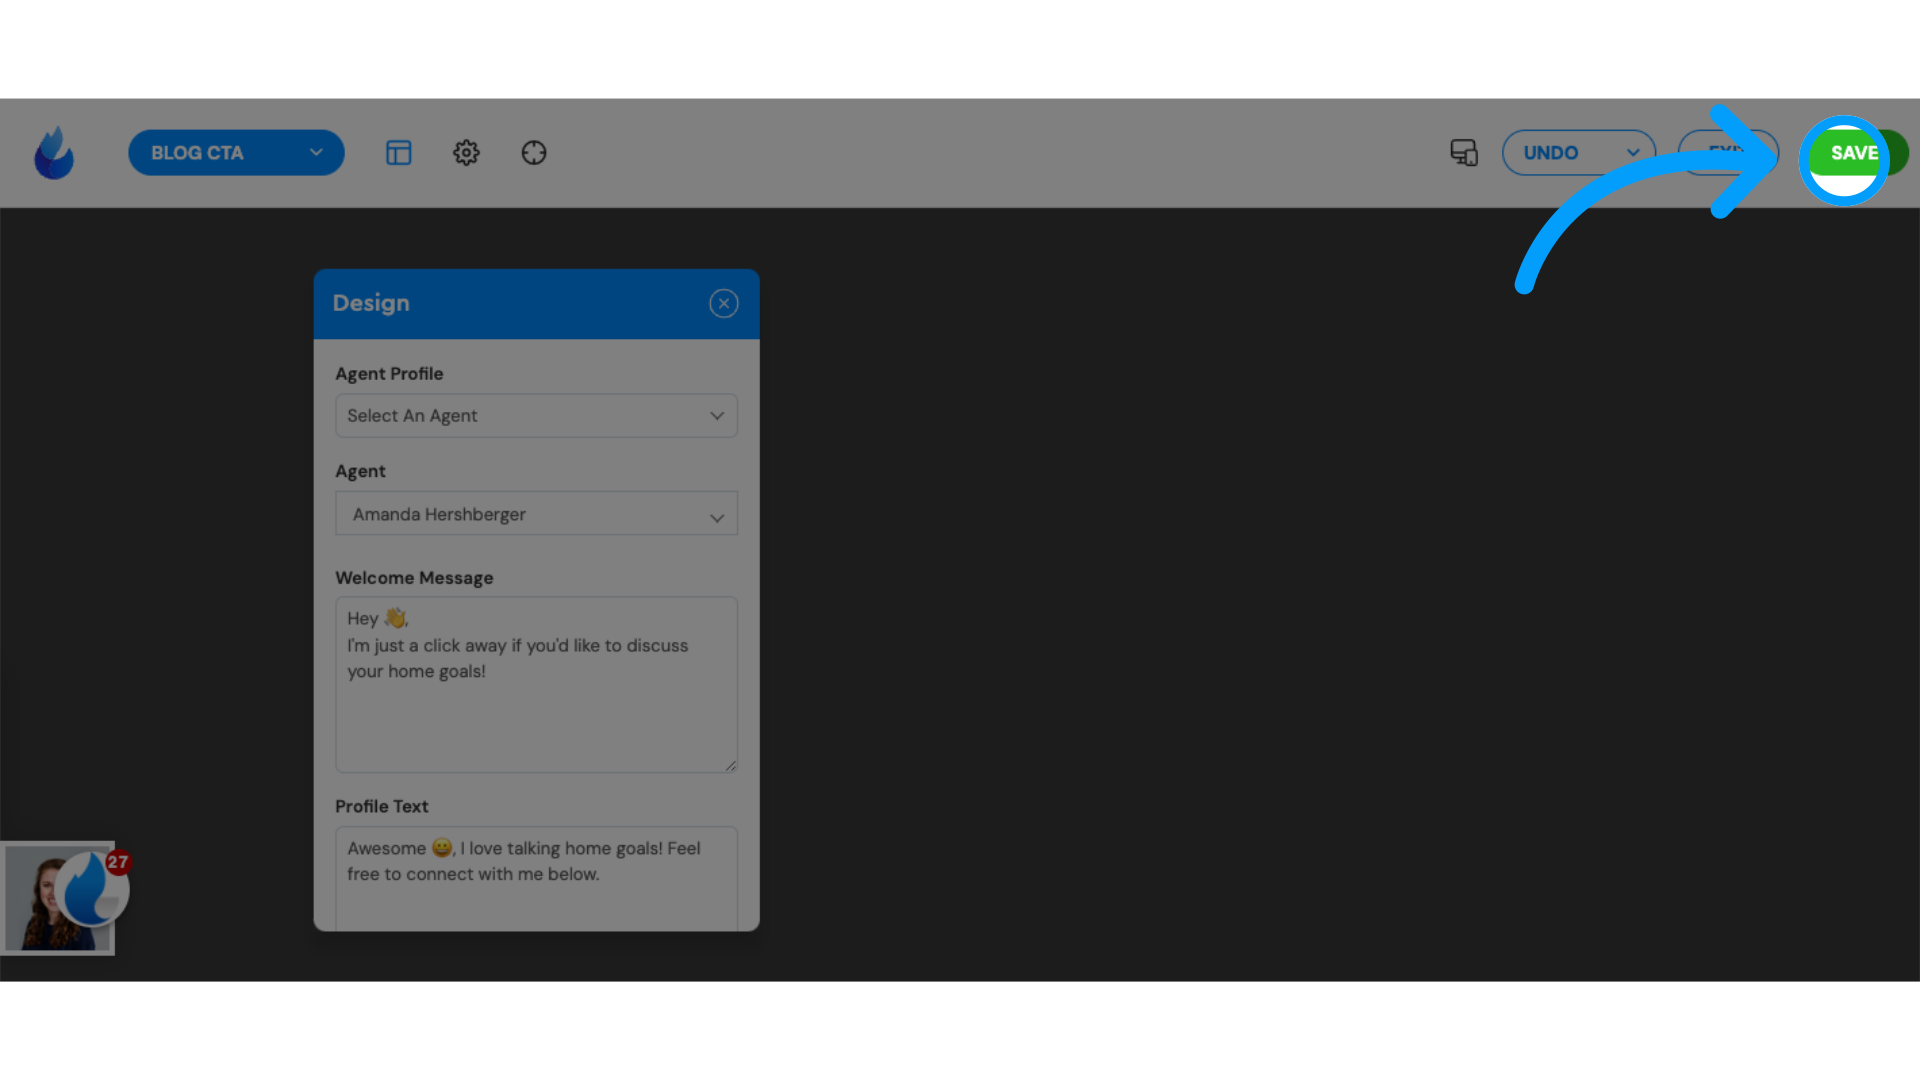
15. Click "SAVE"
The site does not auto-save so make sure you click the "save" button in the top right corner to save your work.
Now that your Engage CTA is create you can decide where you want it to show up on your site. Check out How to add an Engage CTA to a page.