CRM: How to Customize Tags on Your Lead Form
This guide will walk you through customizing the tags on your lead form.
This guide will walk you through customizing tags on a Lead Form. You can use these tags in your CRM to help you keep leads organized and customize automation settings through your CRM. First, you will log into the backend of your site by appending /wp-admin to your url.
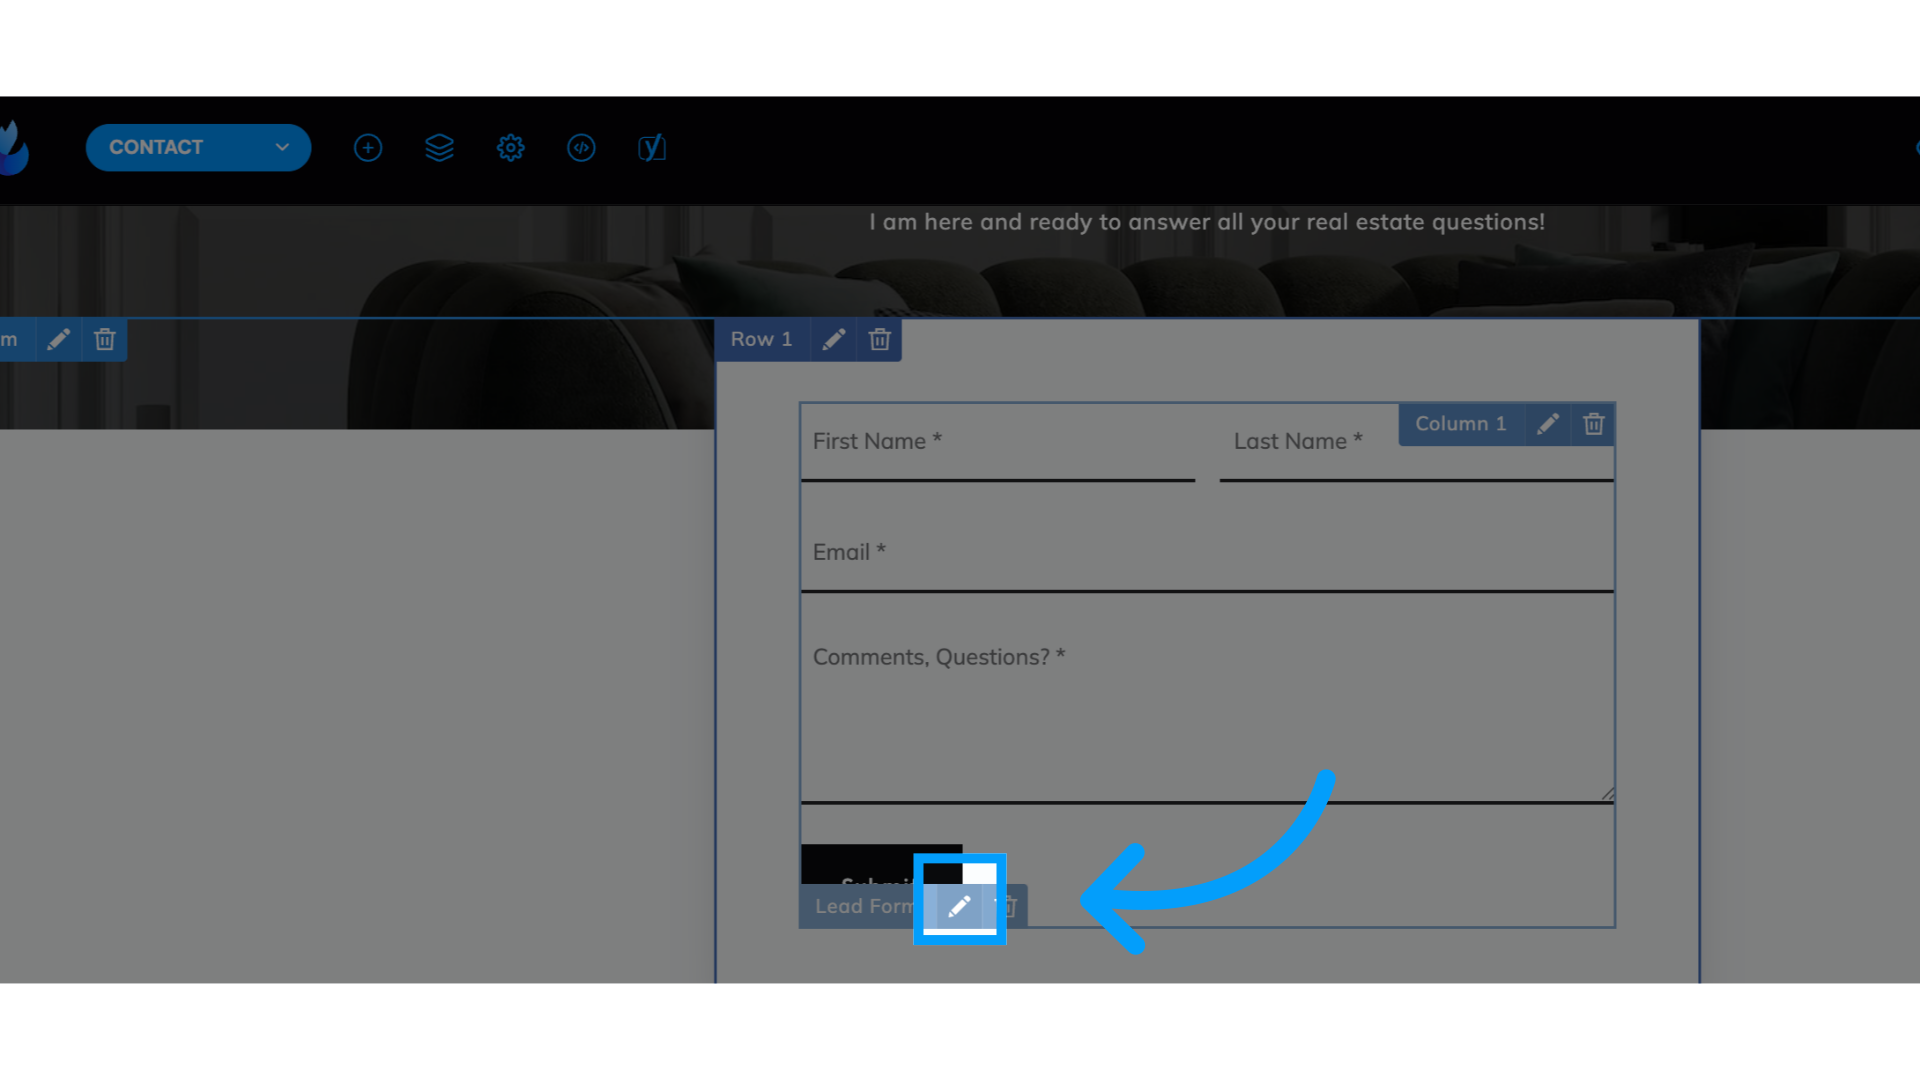
1. Access the Lead Form you'd like to customize
Click the pencil icon next to "Lead Form"
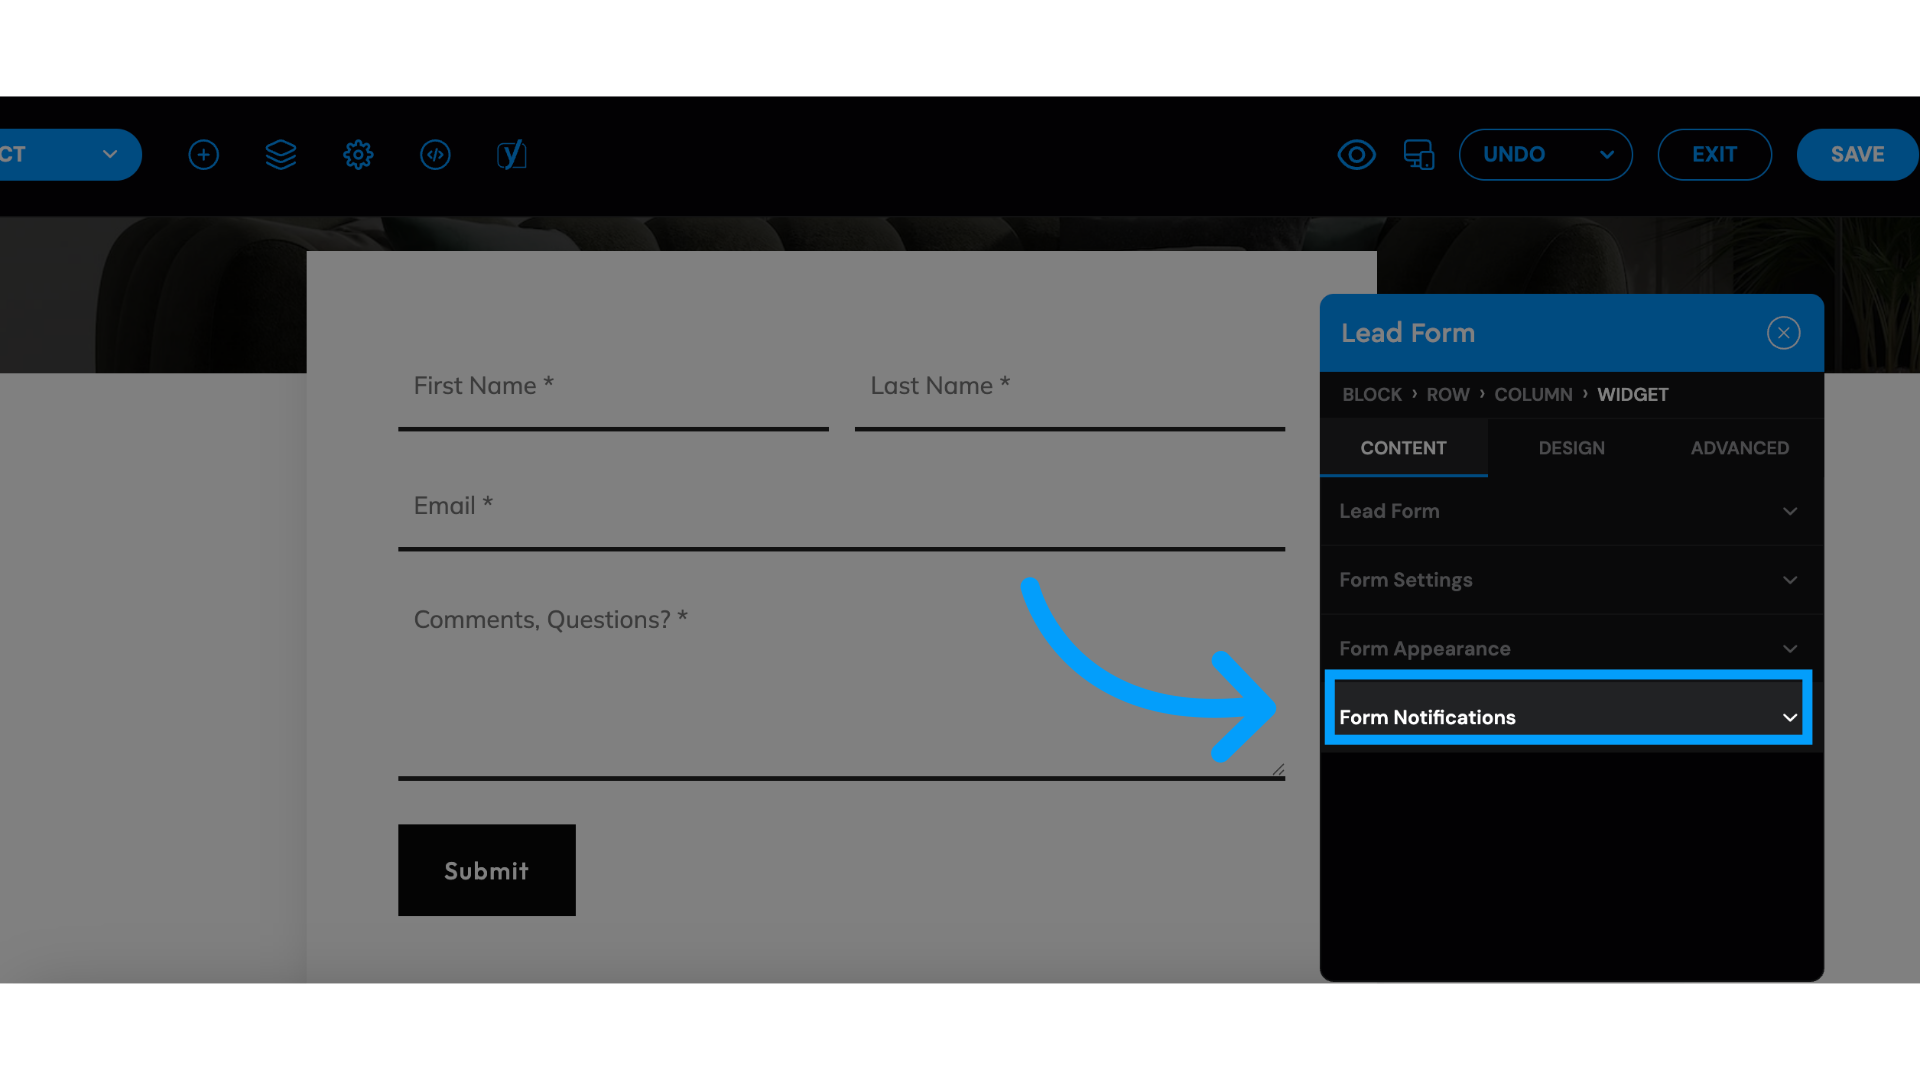
2. Click "Form Notifications"
Access the form notifications settings.
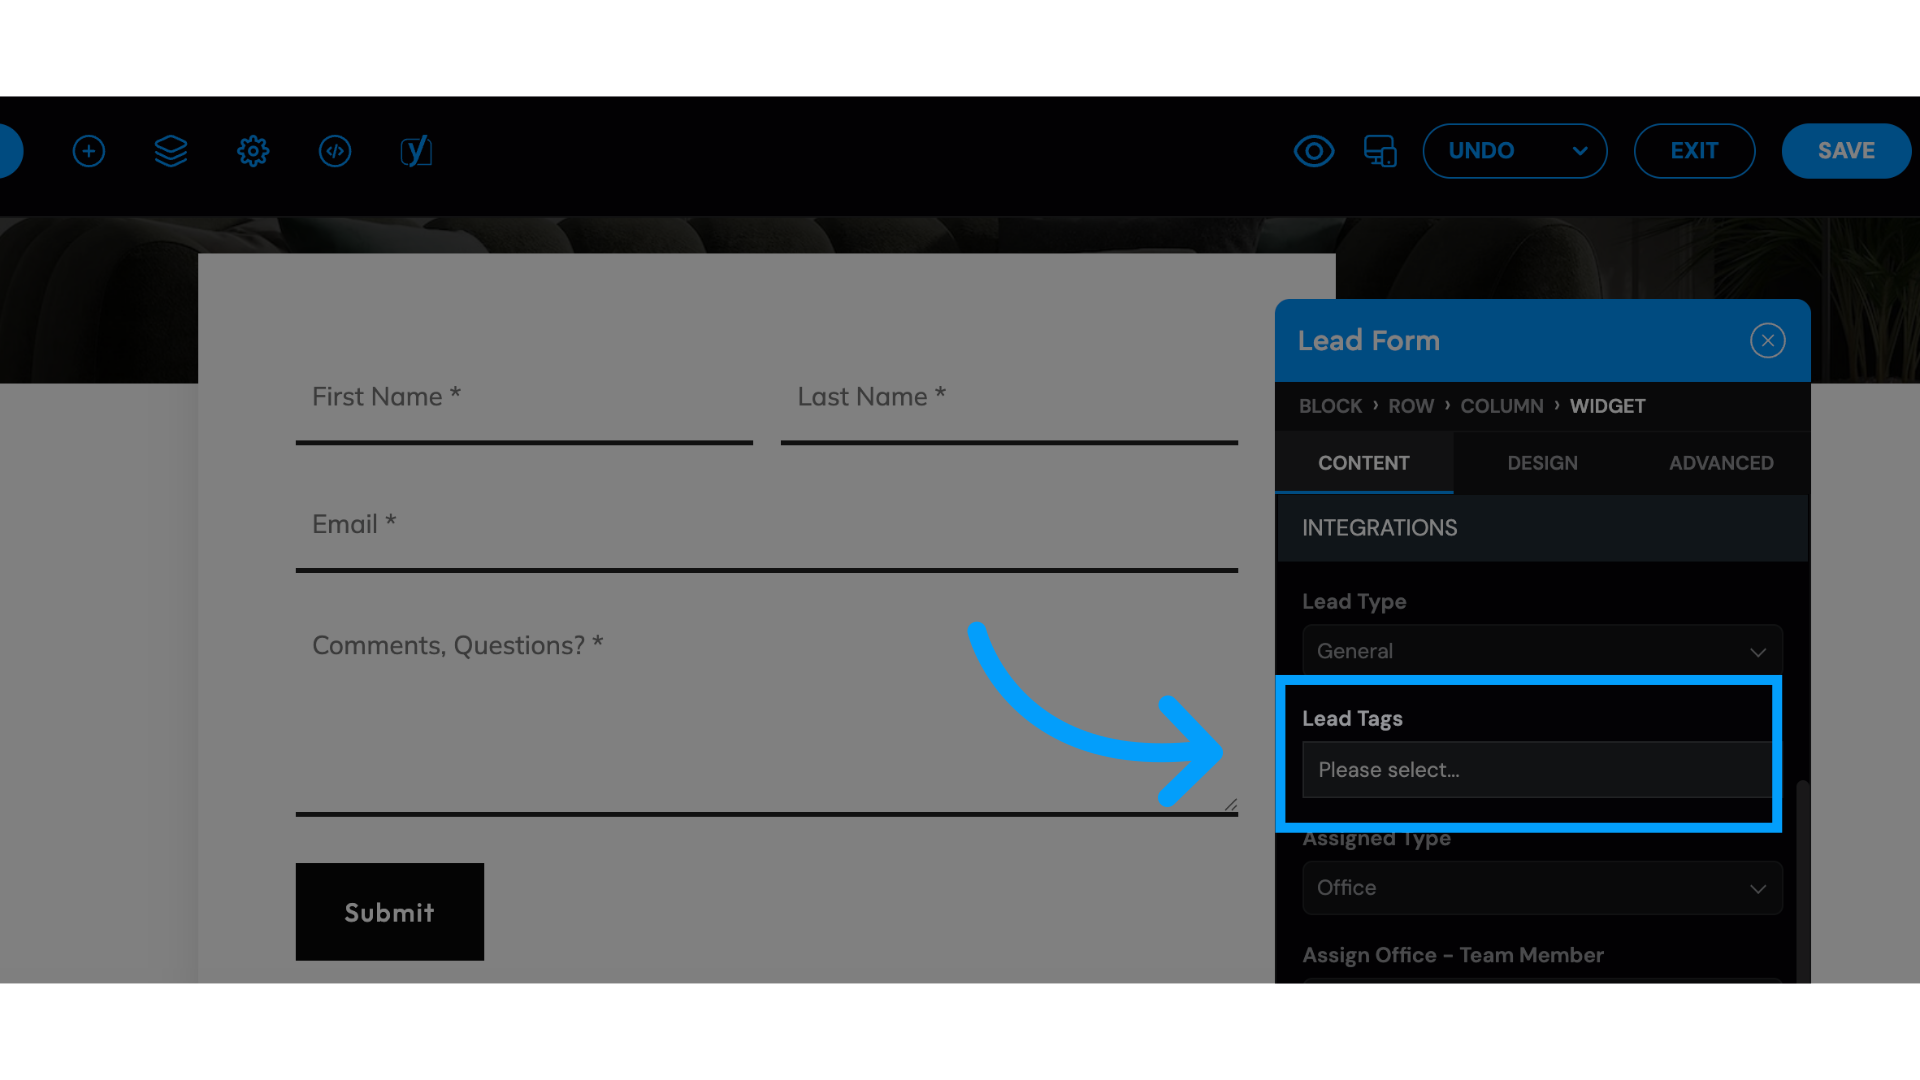
3. Locate "Lead Tags" in the Lead Form editor box
Select the desired option from the dropdown menu.
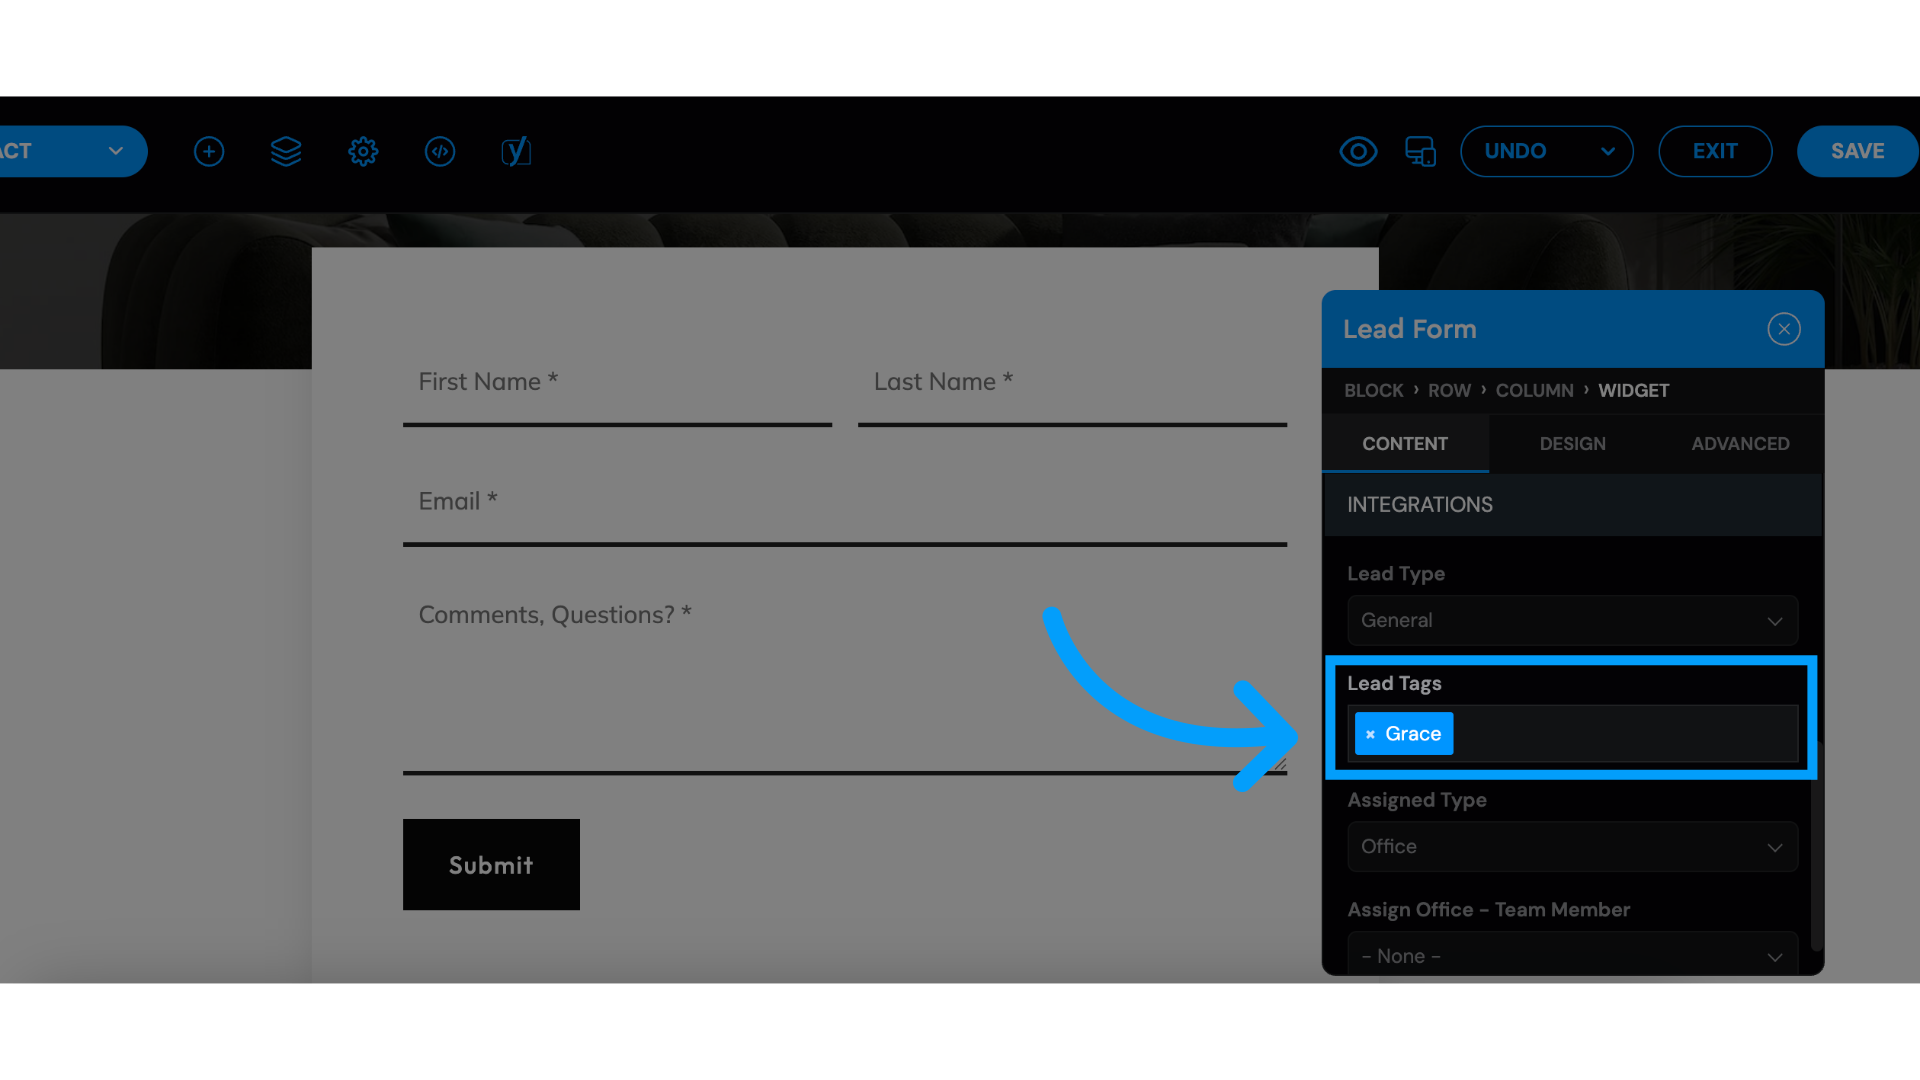
4. Type the desired tag and click enter
Type the desired tag and click enter. Suggestions: Agent Name, Buyer, Seller, Team Members
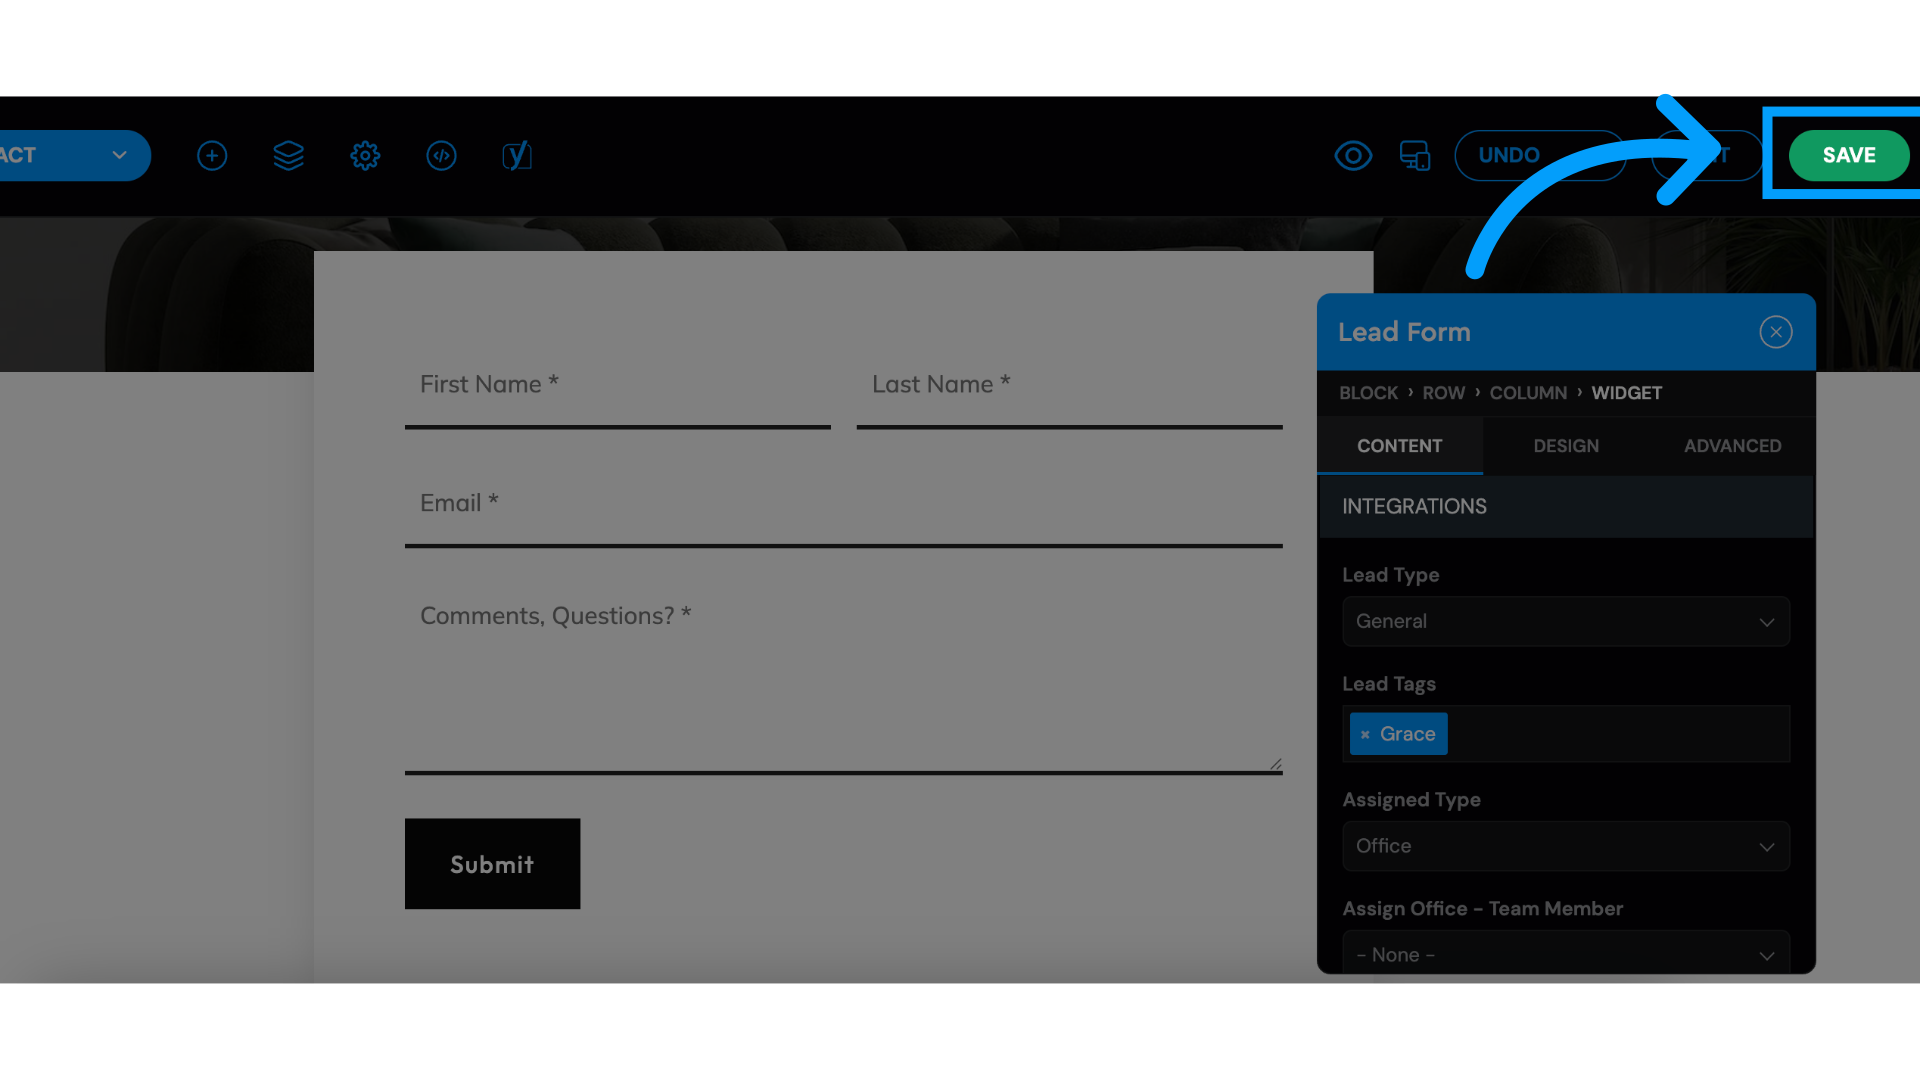
5. Click "SAVE"
Save your changes.
Depending on the CRM you are using these tags can help you set up automation inside your system. The tags will also appear in their Lead Manager Profile as well.
