
Table of Contents:
Changing the Logo and setting up an Office Profile
Connecting an Agent Profile Photo
Changing the Logo and Setting Up an Office Profile
Your team member overview pages include a filters view for office and agent sorting of your team on the page, which features a logo.
Your team members area includes a beautiful overview page which offers additional filtering and sorting capabilities for your agents and team. In the filters view is an optional logo which you can use to enhance the layout.
To make changes to this logo:
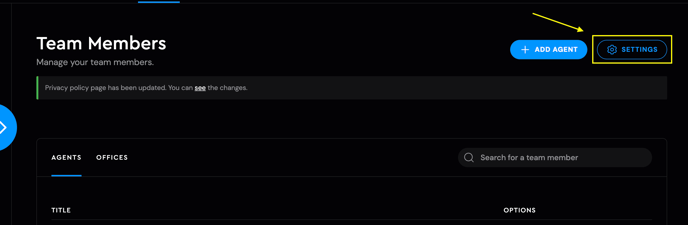
Visit Site Tools and then click on the Team Members option.

Go to Settings.
In your settings area is a place to set a logo. Click "Add Logo" or hover over an existing logo and press the X button to remove it.

To set your default office profile:
On the Team Member Settings page, navigate to the Office Tab

Here you can fill out all the office information and hit the Update button to save the changes.
The most common use case for setting up a default office profile is to have a general office profile displayed instead of a single agent.
Team Members: Displaying Reviews
The Team Member plugin optionally can display reviews from your clients automatically.
Displaying Reviews on your team member entry:
You may optionally display available reviews if you are making use of the AF Reviews plugin.
Open the Layers View and click Add a New Block

Select the Reviews Block or Reviews Slider depending on how you want the reviews to be displayed on the Profile Page.

Edit the title and subtitle as desired.

Choose the source (Google, Facebook, Zillow, or Custom added) and click save your changes. Choose Zillow from "Review Type" rather than the Source dropdown.

In accordance to Zillow regulations, we cannot combine Zillow reviews with other sources (Google, Facebook, Custom or Yelp) in the same section or slider.
Team Members: Connecting your agent photo
Your team member photo is set in your individual team member settings area.
To connect a team member photo to a profile you have created, simply navigate to your Team Member plugin area and click on the Actions button to open your Team Member settings.
Open your team member settings by pressing the Settings button.

Your team member photo is the first option shown in the panel. Click Add Photo or Change Photo to open your media library. You may select or upload a new photo for use with this team member profile.
Click Change Photo to open your media library:

You will see an option to pull from your Media Library or Upload Files. To update with a new photo click the Upload Files option.

our agent image will display to the left in your Team Member list, and will appear on the Team Member page. This image will also be referenced in plugins that make use of your team member profile information.

Be sure to consider configuring your agent attributes and your page settings while you are here!
For Best Results:
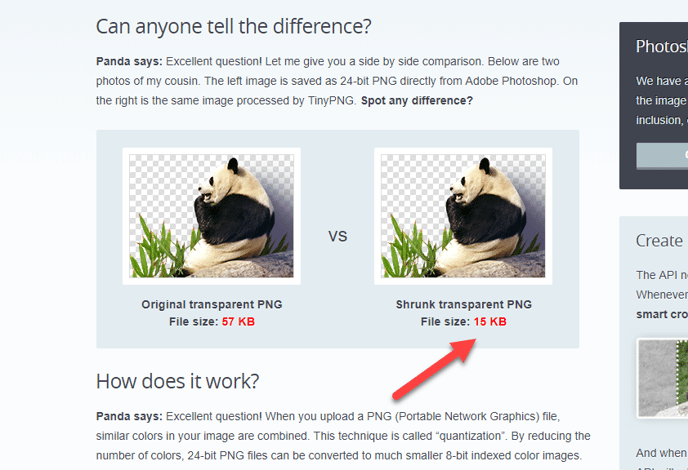
We recommend your image be cropped and optimized to 180px by 180px. You may utilize online optimization services like https://tinypng.com/ to compress and crop your agent image for optimum page loading performance, and image clarity.
Team Members: Configuring your Agent Attributes
Every team member on your staff is an expert in their field. Show off your skills by adding designations, specialties, and more.
Every team member on your staff has qualities that make them an expert in their field. Add attributes and specialty tags easily across your team member profiles.
Navigate to your Team Member Settings Panel:
Editing and adding new designations:
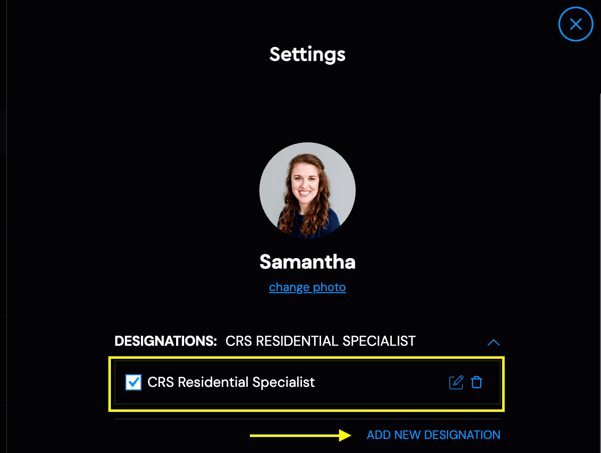
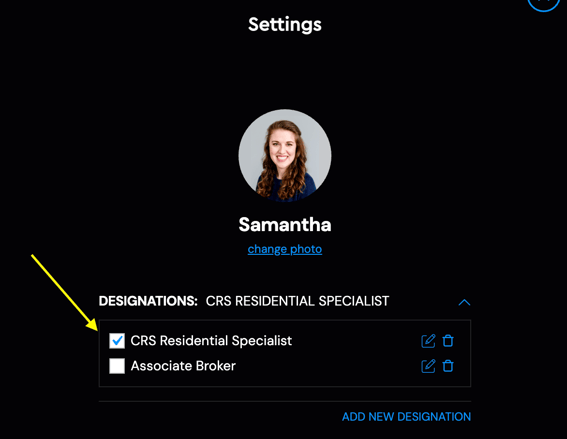
If there are existing designations in the list shown under designations, you may simply re-use an existing selection.
Click "Add New" designation.
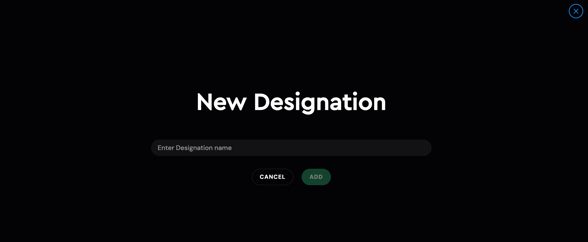
A modal window will open where you can type out the title of your choice. Click Add to include this designation in your list of available filters.
With your designation created, this will be available in all future and existing team members you create or edit later. You will need to ensure you have selected to use this filter in this team member profile after it has been created.
Click the checkmark to use your new designation:
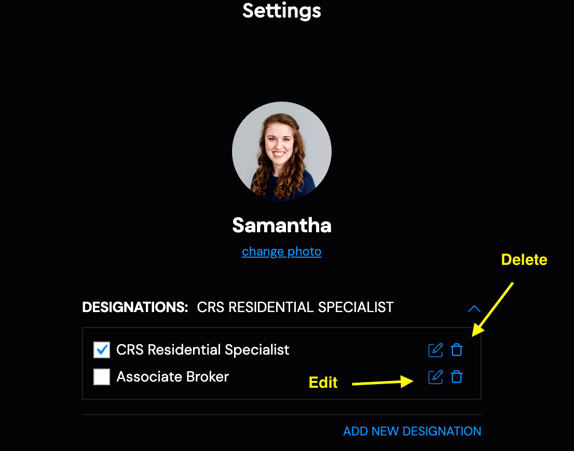
At any time, you may decide to either edit or delete a designation. It's important to note that if you delete a designation, any other team member profiles that used that designation will no longer have that designation selected.
You may edit or delete a designation as needed.
Editing and adding new specialties:
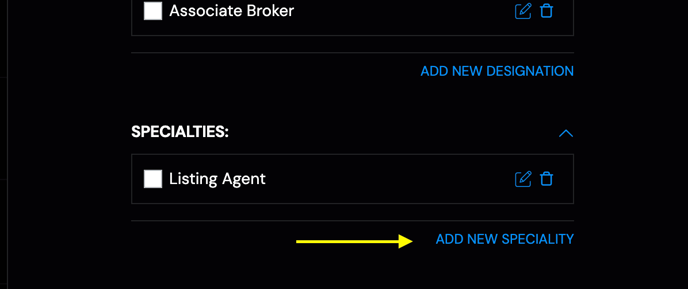
If there are existing specialties in the list shown under specialties, you may simply re-use an existing selection.
Click "Add New" specialty.
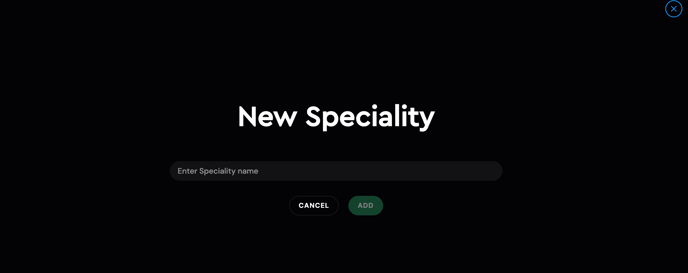
A modal window will open where you can type out the title of your choice. Click Add to include this specialty in your list of available filters.
With your specialty created, this will be available in all future and existing team members you create or edit later. You will need to ensure you have selected to use this filter in this team member profile after it has been created.
Click the checkmark to use your new specialty:
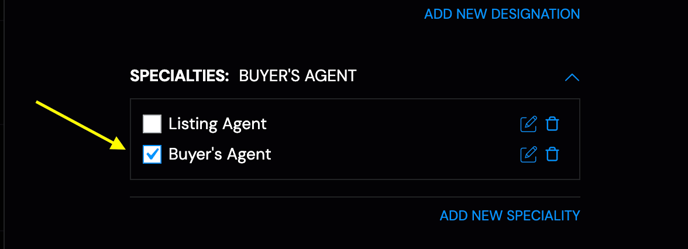
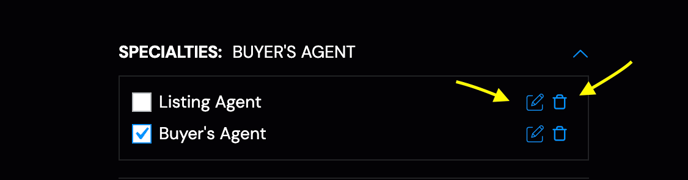
At any time, you may decide to either edit or delete a specialty . It's important to note that if you delete a specialty , any other team member profiles that used that designation will no longer have that specialty selected.
You may edit or delete a specialty as needed.
Editing and adding new Service Areas:
If there are existing service areas in the list shown under service areas, you may simply re-use an existing selection.
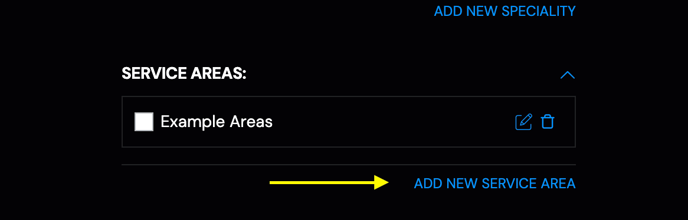
Click "Add New" service area.
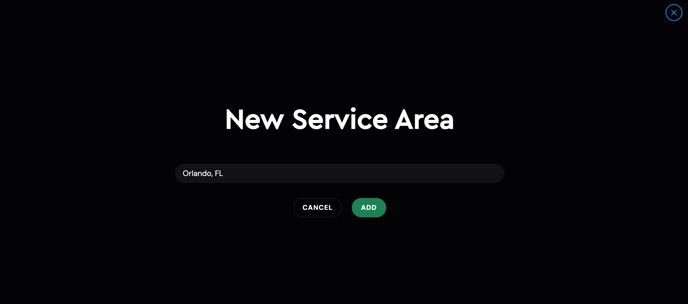
A modal window will open where you can type out the title of your choice. Click Add to include this service area in your list of available filters.
With your service area created, this will be available in all future and existing team members you create or edit later. You will need to ensure you have selected to use this filter in this team member profile after it has been created.
Click the checkmark to use your new service area:
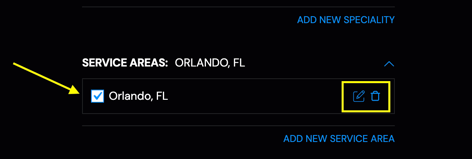
At any time, you may decide to either edit or delete a service area. It's important to note that if you delete a service area, any other team member profiles that used that designation will no longer have that service area selected.
You may edit or delete a service area as needed.