Lead Manager: Understanding your Lead Form notifications with Lead Manager
Built directly into your lead manager is a notifications system for your lead forms and have editable response templates.
Your notifications area included in the Lead Manager offers easy access to edit and tailor your Lead Forms notifications. You'll find easy access to edit your included email signature, content response formatting, and header/footer template settings for all of your Lead Forms, both standard and custom. Learn more about Lead Forms here.
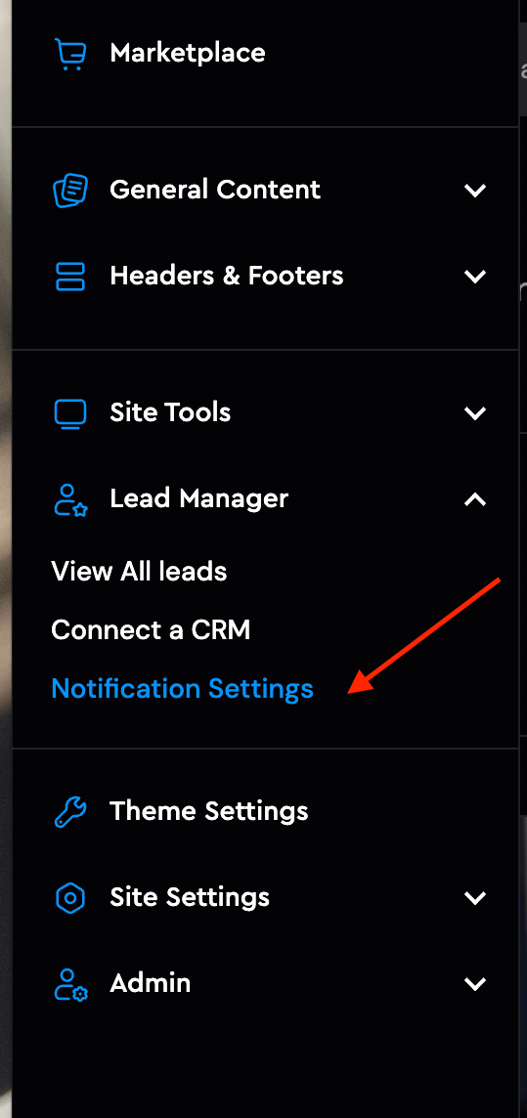
To Access your Notification Settings:
Open your left menu and navigate to:
AF Lead Manager > Notification Settings
Understanding your Notification Settings Options:
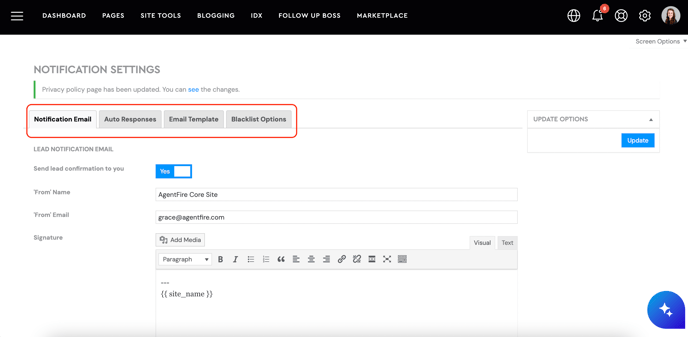
Engage & ConvertPages products offer Lead Forms as direct integrations. All forms have editable sending options, user notifications, and a global email template with an editable header and footer. We'll break down what each of these are, and how they operate below.
Editing Your Sending Options:
Your sending options panel allows you to edit and control the contact information shown in the user email notifications for your Lead Forms.
You may want to edit:
-
The name of the sender shown in the response
-
The email address for "reply to" and "from"
-
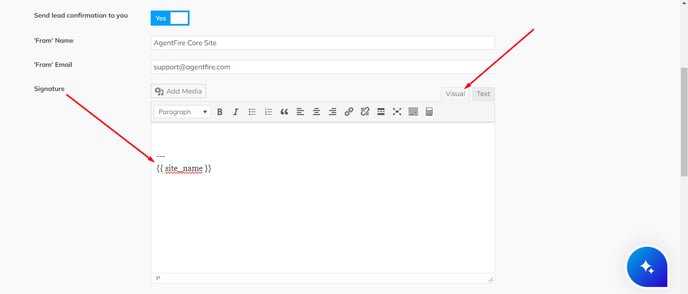
The email signature used via merge tag in your user notification templates.
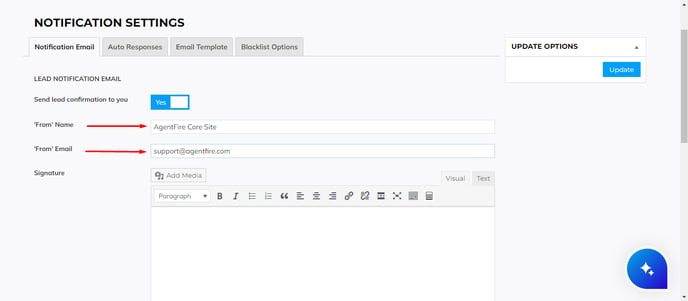
Changing the From Name and Email:
All lead forms that have a user notification set will receive the notification email with this from name and "reply to" email address. Set as desired for use with replies from leads. (Have a CRM workflow you'd rather use? Disable the notification in your lead form and use a CRM integration instead).
Editing your response signature:
By default, your email signature uses a merge tag with just your site name and email address. It is recommended that you create an appropriate email signature you'd like to utilize. Beware: When pasting custom html formatting, note that not all email clients like Outlook and Gmail render content the same. It's recommended that you use the visual editor for best overall results.
Controlling Admin Lead Notifications:
By default, the admin email address used in your websites' general settings will be set here for use with your Lead Forms notifications. You may edit the primary notification email address, or add additional CC's as notifications, separating by comma.

Editing Your User Notifications:
There are five standard Lead Forms types:
-
Contact Form
-
Newsletter Subscriptions
-
Schedule A Call
-
Request A Seller Guide
-
Request A Buyer Guide
Each of these notification templates are for general use with your Lead Forms incorporated into Engage and Lead Pages.
Additionally, Lead Forms allows for creation of Custom Forms, which can be given Custom Notification email responses.
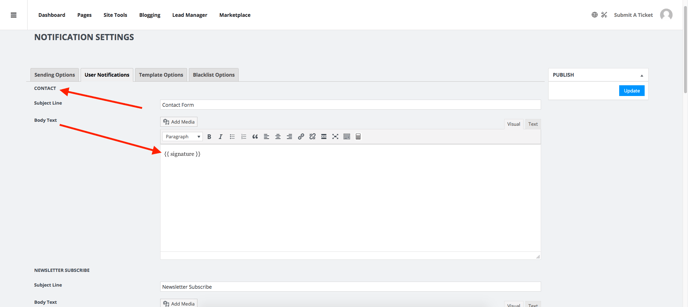
Editing the Contact Form Notification:
Your contact form notification is a default set of text to respond with when an end user submits a request through one of your Lead Forms using the Contact Form notification. This is typically used for general inquiries and direct user questions.
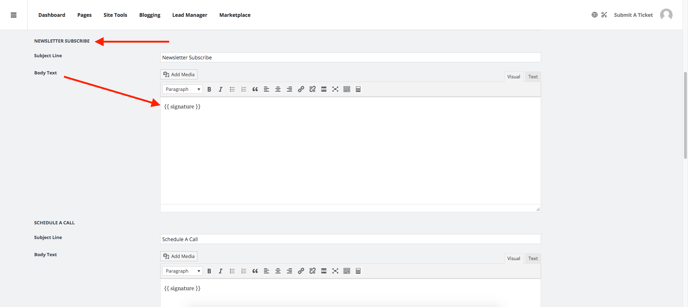
Editing the Newsletter Notification:
Your newsletter notification is a default set of text to respond with when an end user submits a request through one of your newsletter sign up forms, typically used in a Engage template. This form should not be used if your newsletter list (like mailchimp) already sends out a confirmation email.
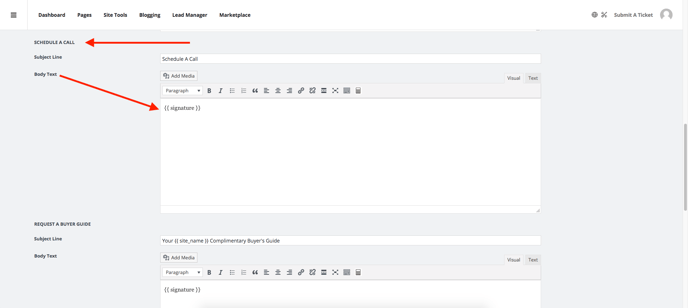
Editing the Schedule A Call Notification:
One of your more powerful tools available is the Schedule a Call Engage popup. Users who fill out this form can request a time to chat with you, and a notification email confirming you have received their request is recommended. Set default response text as needed for use with this call to action.
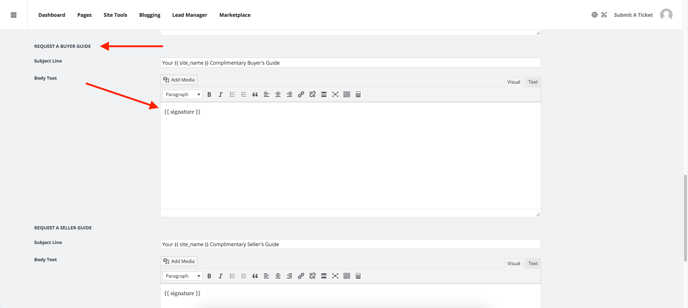
Editing the Request A Buyer Guide Notification:
This notification is typically not necessary, since the end user is redirected to the PDF automatically the moment they submit the form. You may elect to use a follow up notification here to provide your contact information and offer to answer any questions about a purchase they may have.
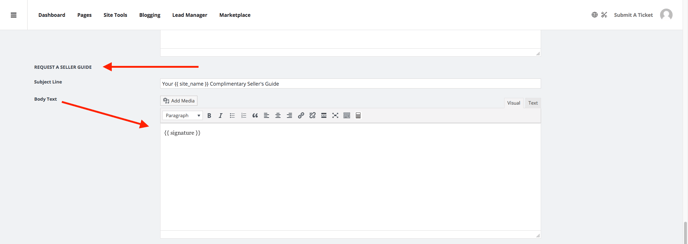
Editing the Request A Seller Guide Notification:
This notification is typically not necessary, since the end user is redirected to the PDF automatically the moment they submit the form. You may elect to use a follow up notification here to provide your contact information and offer to answer any questions about a property sale they may have.
Editing Custom Notifications:
At any time, additional custom notifications can be created for use with any Lead Form. You may elect to use a custom notification for an existing standard lead form, or create a custom Lead Form to use with this notification(s). Click "Add New" to create your new notification.

Editing Your Response Templates:
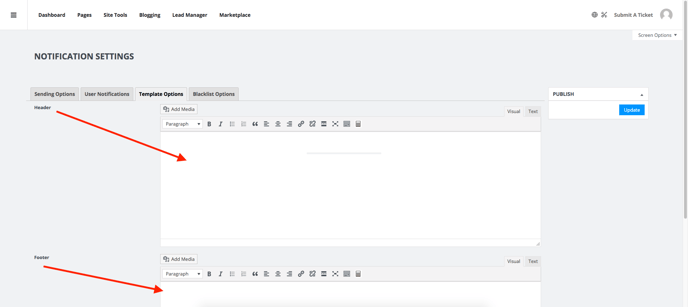
If you would like to include your image, logo, or other contact information into the templates of your response emails, you may click the Template Options tab to view and edit the Header and Footer of your emails in Visual or Text editing modes.
