Each of your CTA's have available settings for display contents, lead forms, confirmation messages, and notifications
Any time you create a new CTA, you'll want to make sure you take the time to set the following:
-
Design: Your CTA may need text adjustments and/or image adjustments
-
The Condition Trigger: Choose from exit intent, delay by milliseconds, or show on scroll percentage
-
The Appearance: This controls the manner in which the CTA is shown. CTA's can fade in, slide in or appear instantly.
-
The Lead Form: Specialty and standard forms are available. Each Form has settings available for the fields, social buttons, and button styling
-
The Notifications: If you are not using a CRM for your lead followup, you may want to add a user notification via email when this form is submitted.
-
The Tags: Add tags as needed for use with routing to your favorite CRMs
-
The Submit Action: Choose from a redirect to any url (like a thank you page), or a confirmation message of your choosing to display on screen after the form has been submitted.
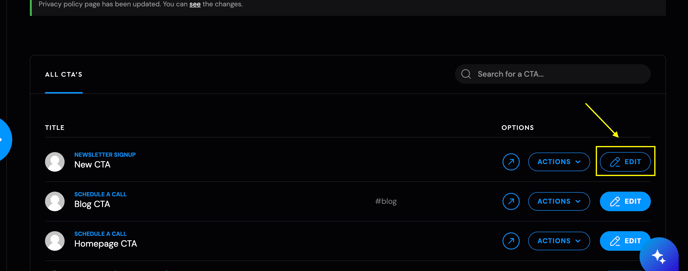
As you click on the edit CTA button, the AgentFire Editor will open.
As you enter the AgentFire Editor, you will notice up to 4 icons on the top left side: Design, Settings, Lead Form and Target. Let's cover each tab and their options.

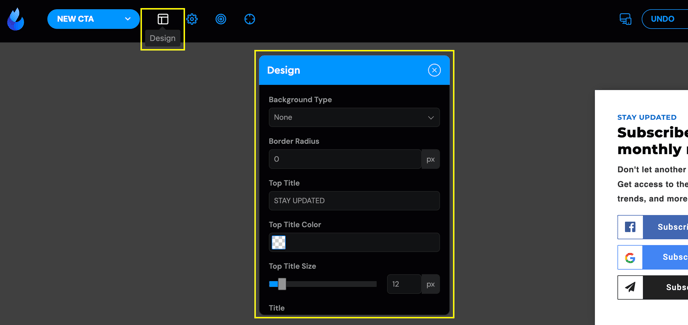
Design

Your CTA will have editable features, which include settings like an adjustable title, images, font sizes, colors and more. Adjust these as needed to your preferences.
Settings

The Trigger Type:
Choose how this CTA will be triggered on the page.
-
Show on scroll position: Show after the page is scrolled this % of the way down the page (enter the value to the Conditions Value tab example: 50 is 50%)
-
Show after delay: CTA will be displayed after a delay counted in milliseconds. (enter the value to the Conditions Value tab example: 8000 is 8 seconds)
-
Exit intent: CTA will be displayed when cursor exits the browser window
Show on scroll position: Show after the page is scrolled this % of the way down the page (enter the value to the Conditions Value tab example: 50 is 50%)
Show after delay: CTA will be displayed after a delay counted in milliseconds. (enter the value to the Conditions Value tab example: 8000 is 8 seconds)
Exit intent: CTA will be displayed when cursor exits the browser window
The Trigger Value:
Decide when this CTA will appear on the page. You can use a percentage for the scroll trigger type, or you can use milliseconds for the delay trigger type.
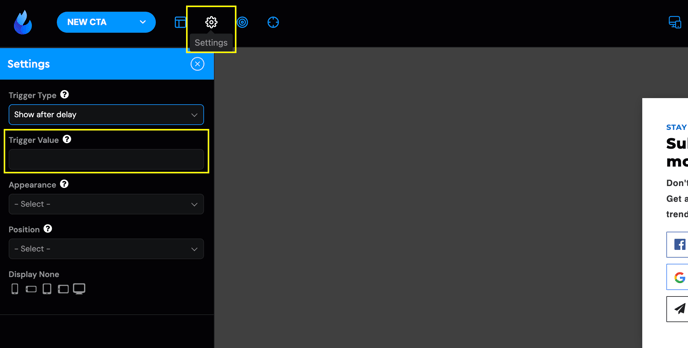
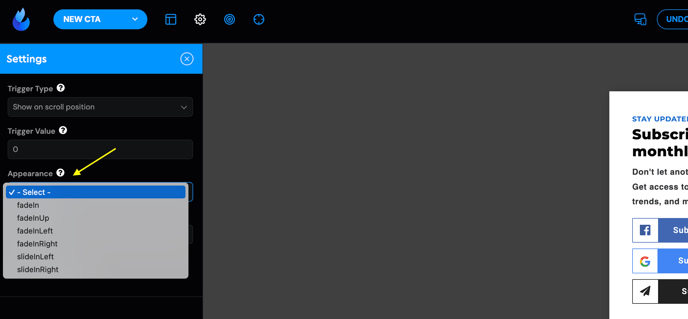
The Appearance:
Decide how this CTA will appear on the page. You may select from fade in, or slide in options.
Position:
You can control the CTA to appear on the left or right side of your page.

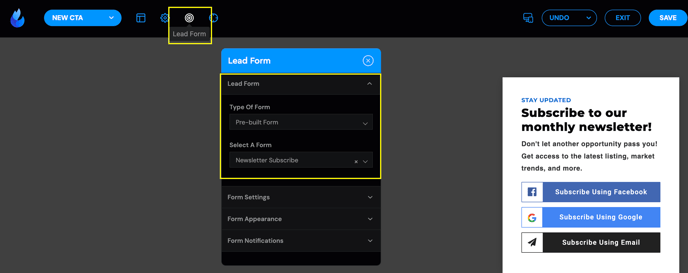
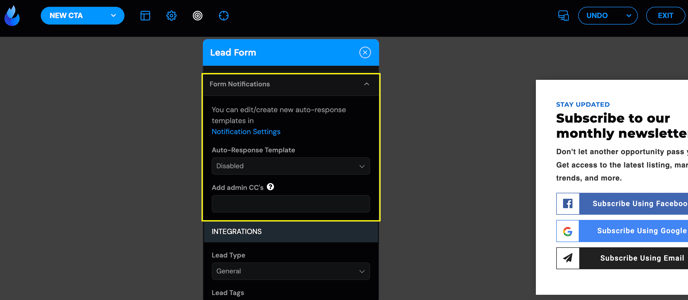
The Lead Form

Click on the Lead Form Box to view it's available settings.
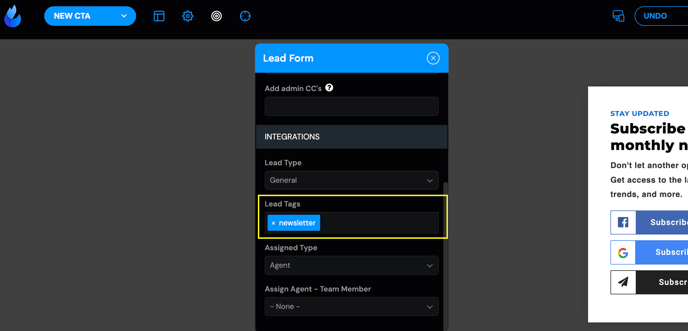
The Tags:
Tags are additional data that will be provided with your administrative lead notifications and included in the output for routing to a CRM. If you like to track your lead sources and plan to filter for buyers, sellers, or a specific page for tracking purposes, you may add tags with any text you need. You can find this option in the Form Notifications section in the Toolbar.
The Submit Action:
When a user submits your form included in your CTA, you will want to decide how this user will be notified that the form was submitted successfully. Choose from:
-
Redirect to a URL: This can be used to send users to a specific or generic thank you page, or to any other confirmation page, service, or outbound url that you like.
-
Show confirmation message: The CTA will replace the form body with the text you provide, and will allow the user to close it afterwards and return to what they were doing.
Redirect to a URL: This can be used to send users to a specific or generic thank you page, or to any other confirmation page, service, or outbound URL that you like.
Show confirmation message: The CTA will replace the form body with the text you provide and will allow the user to close it afterwards and return to what they were doing.

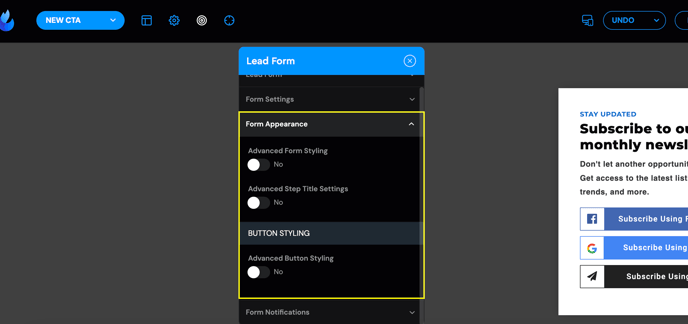
Appearance:
Enabling the Advanced Form/Button Styling allows you to customize their respective colors, borders, placeholders, etc.
Notifications:
Optionally add a user notification if your CTA requires one and you do not plan to use a CRM for the confirmation or follow ups used with this lead.
Also see: Editing your lead form notifications
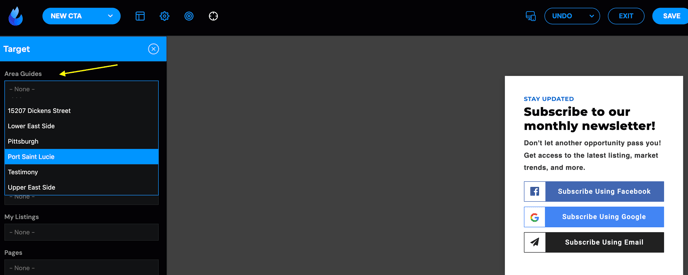
Target
Click on the Target icon to set the pages/posts where your CTA will appear.
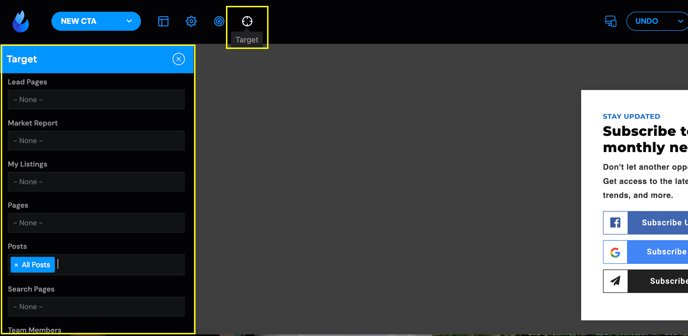
You can choose/target a specific Neighborhood Guide or all Neighborhood Guides, same rules applies to every all type of pages.