
Route leads and payload data to thousands of available compatible services through the Zapier.
Have a Zapier.com account and want to route your Home Valuation Leads directly to a 3rd party service through the platform?
Our Home Valuation system is compatible with Zapier's Webhooks API.
Learn more about how to use webhooks with Zapier with a handy Video Turorial:
Video Tutorial on Webhooks with Zapier
Beginning A Webhook Connection:

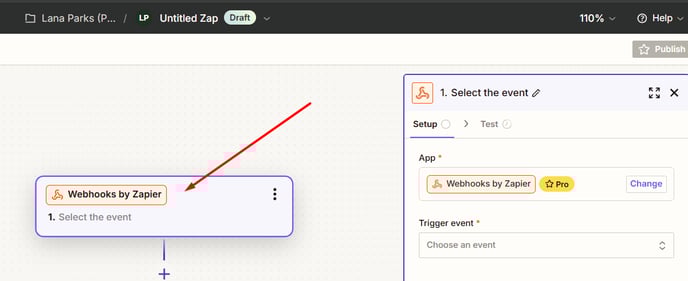
Login to your Zapier.com account, and click Add New Zap.
Create a new Zap.
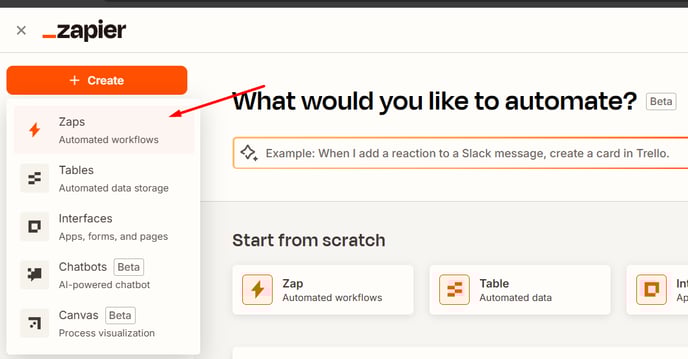
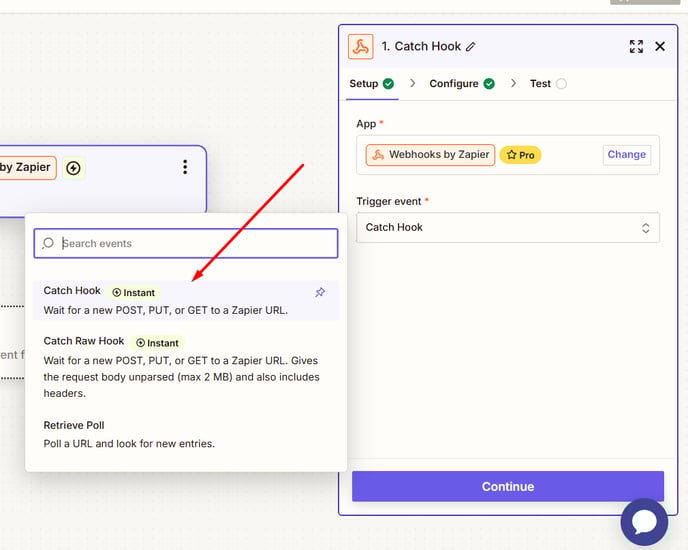
From the list of sources, choose webhooks
Click "Catch Hook" to create your hook.
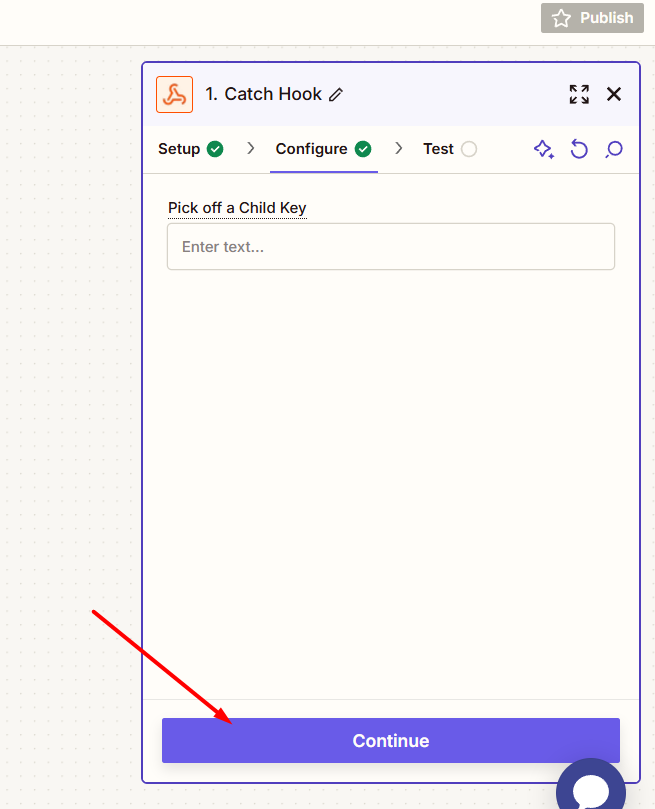
Choosing A child key is not necessary, select continue
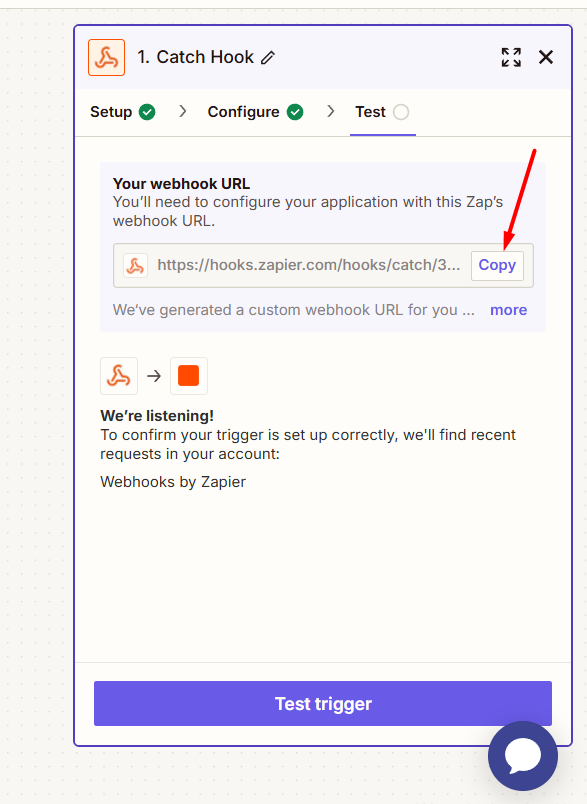
Your webhook will then be displayed. Copy this webhook to your clipboard, we'll be pasting it into the settings area of your home valuation tool, and submitting an example lead entry prior to moving to the next step in the Zapier.com zap.
Copy the webhook to your clipboard:
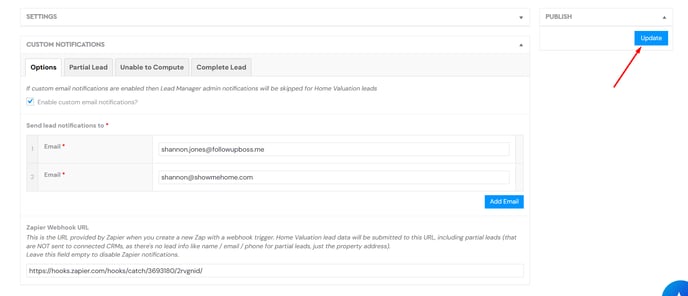
Placing The Webhook in your Home Valuation platform:

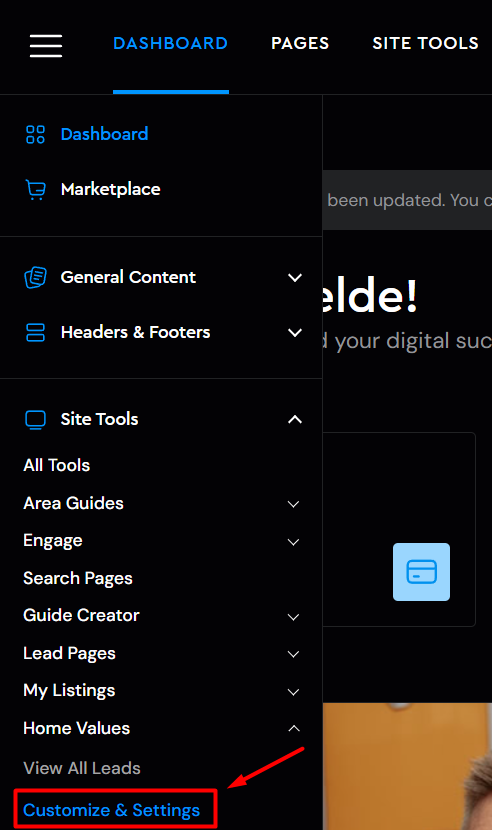
To place a webhook, we'll need to access the settings area of the home valuation plugin.
Navigate to:
Site Tools > Home Values > Customize & Settings
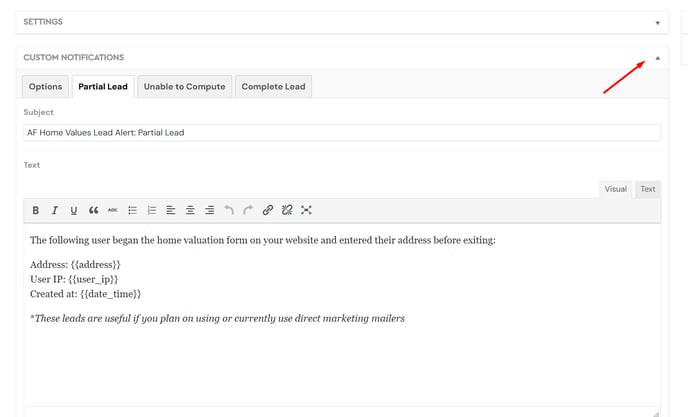
Expand the Custom Notifications module.
Place your webhook in the Zapier Webhooks URL entry point.
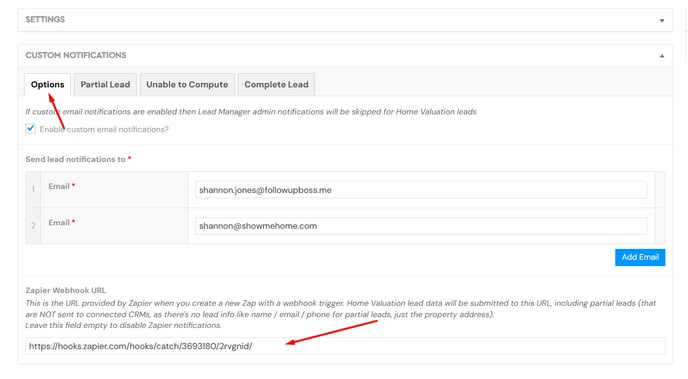
Save your changes.
In order to test your webhook, it will need a sample playload of data sent to it. On the front end of your site, visit your home valuation page and complete a request using the email option.
Submit a test entry on your home valuation page.
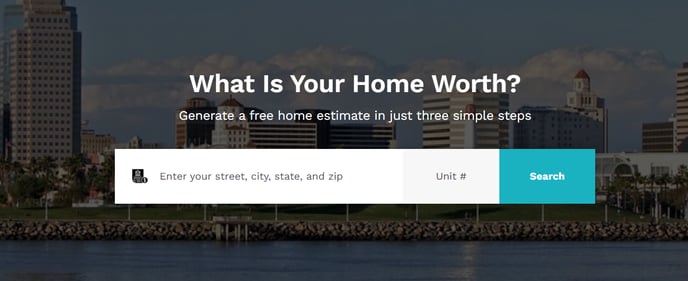
Now your webhook is ready to test!
Retrieving a payload for routing to a 3rd party product:

Once you have your webhook saved, it's time to give it a test.
Navigate back to your Zapier.com zap, and select "Test trigger". Then the record will appear in the setup window:
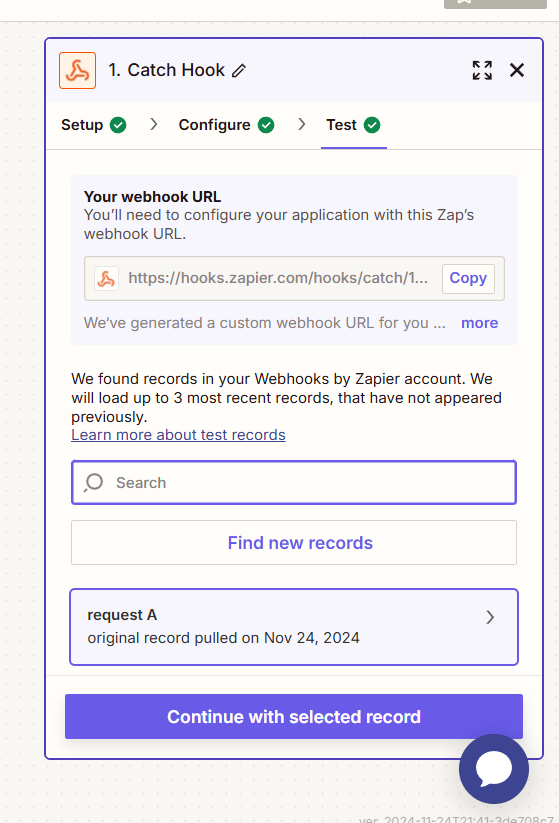
Click on 'Continue with selected record'.
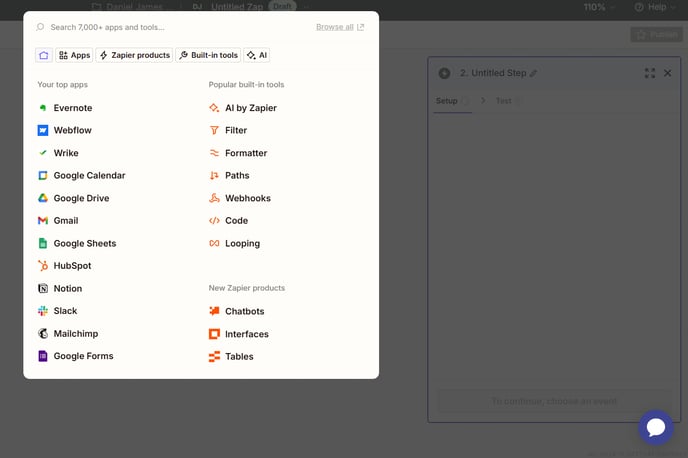
Shortly afterwards, you'll be prompted to connect your 3rd party service.
Go back to step 1 and click on Test to View your Hook to see the data that was received.
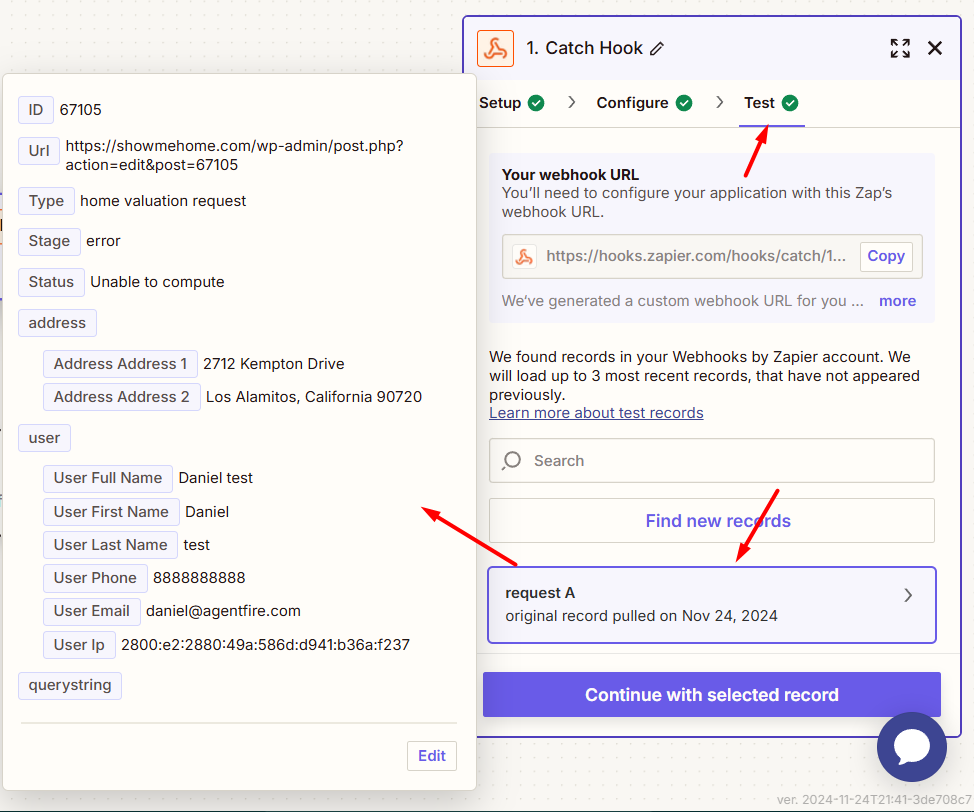
The Hook Fields will be displayed with a full lead capture entry. These data points are now available for selection within the Template area of your 3rd party service.
Clicking Continue with selected record will close out your Trigger and open your Action in the Zap. You may select from any supported 3rd party service, choose the action, and configure the template to complete your lead routing.
Tips with 3rd party services:

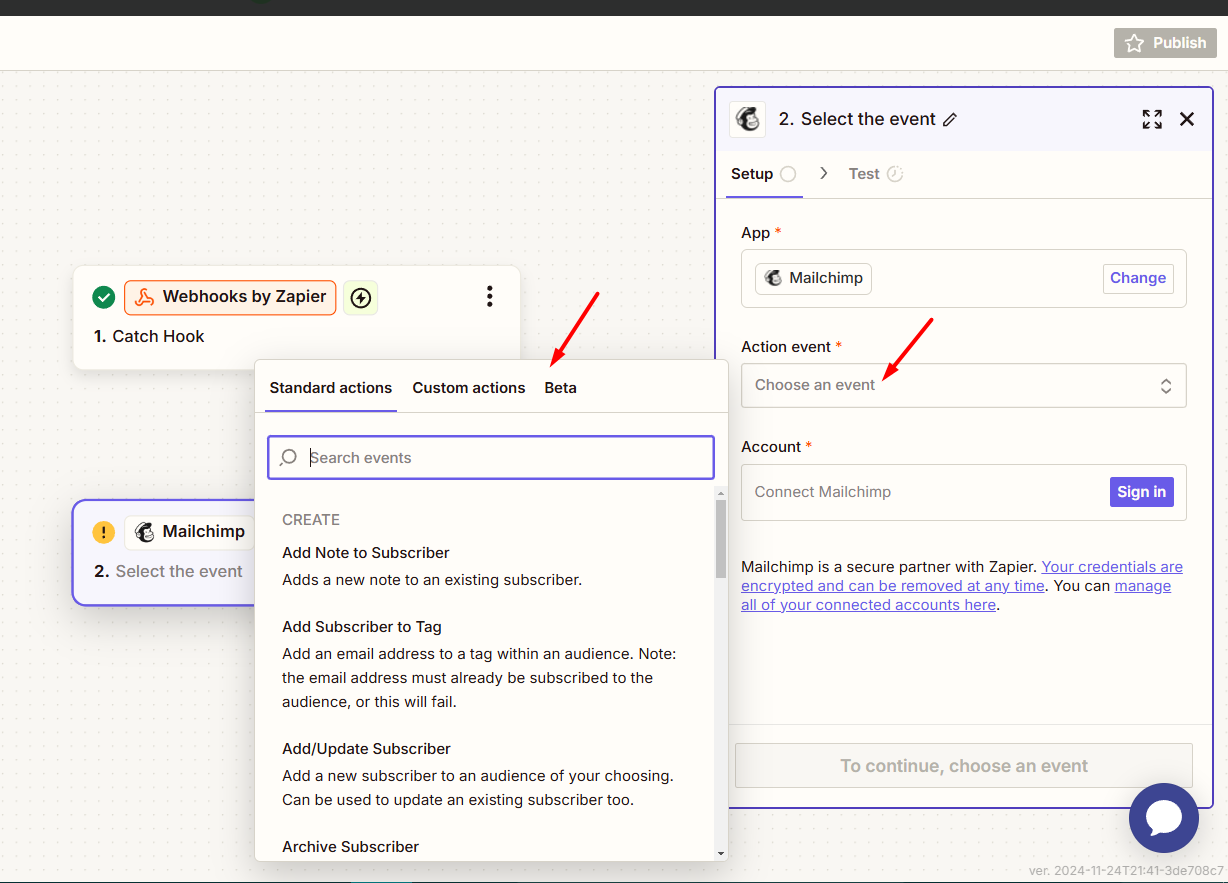
Not all 3rd party services operate the same way. Templates are unique to each service, as they represent the available data fields available from that provider. .
As an example, using Mailchimp - the action setup would require that you choose Mailchimp as your action.
You will then be prompted to connect/login to your selected service. This sometimes is enabled with the use of an API key, and your 3rd party service will provide instructions on how to generate one.
Connect your 3rd party service via login or API key as required.
The Template step is the most important. View your available template options, both required and optional fields.
A dropdown menu button allows you to reveal and select from any of the data points originally captured in your catch hook.
Once you have mapped all appropriate fields, you will be asked to test the step.
Verify that your lead was received in your 3rd party service. Congrats! You may enable your zap and lead routing is complete.
Further Education: