Learn how to create and edit your Areas, Neighborhoods, and Developments
Jump to:
Blocks:
Let's say you want to create a new Area. Go to Site Tools > Neighborhood Guides, and when you enter the dashboard for managing the areas, click on the 'Add New Area' button.
As you click there a small pop-up will appear in the center of your screen, where you will fill out some initial info on the area you want to create.
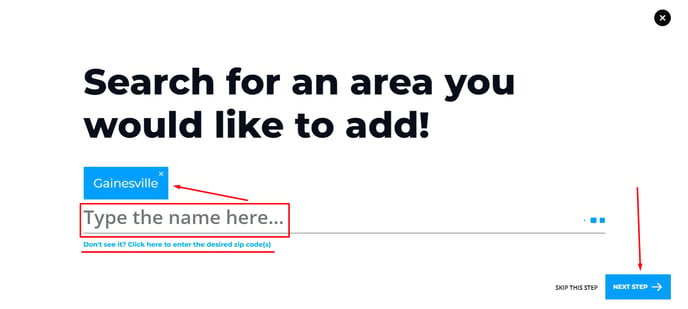
From there, you will be prompted to search the area. As you start typing, you will notice a few autocomplete suggestions will appear in a dropdown. This first field is the data feed from which the area will get all the demographic info, map, etc. You can find more info on this in the Data Feed section of this article.
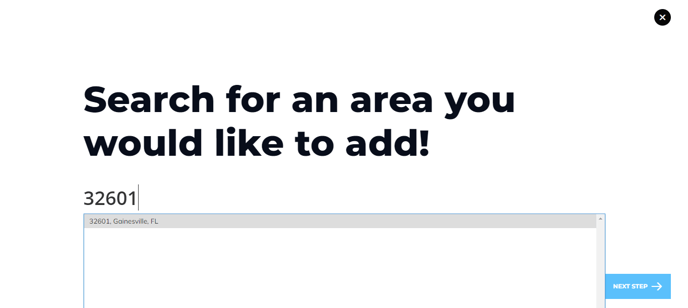
If you can't find the area with the method shown above, try with ZIP Code(s).
If you want to have your area named differently from the automated suggestion, you can do so on the second page.
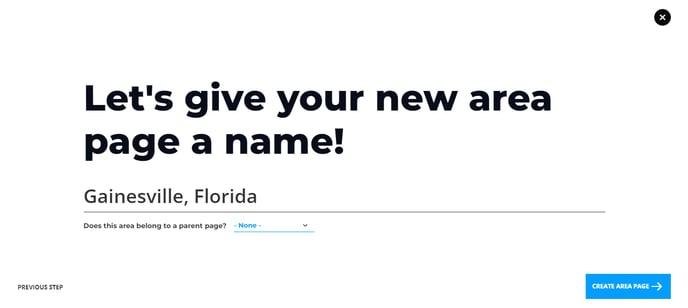
Select a Parent Area for the area you are creating. (Which will make this area a Second Level Area)
NOTE: Highly recommended to read this article about the difference between Parent (Top) Level Areas, and Second Level Areas.
When you are ready to move forward, click the Create This Area Page button.
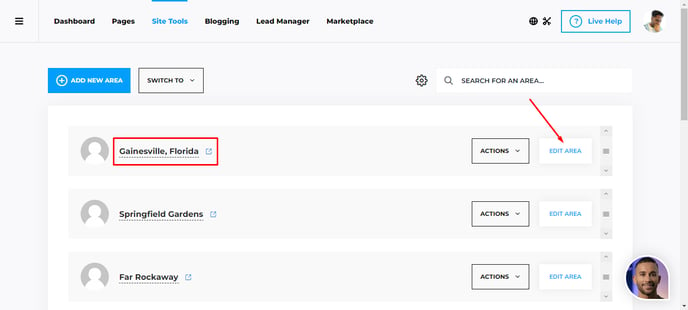
Then, you can go ahead and click on the Edit Area button, to enter the Editor.
As you enter the editor, you will have a live preview of the page as you edit.
There are four tabs in the Editor - Add Block, Layers View, Settings and Yoast SEO.
Let's cover the Content tab first
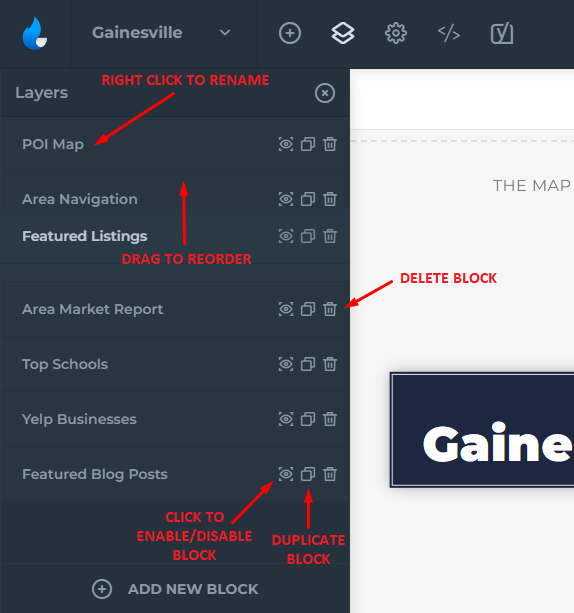
Layers View

Within the Layers View, you can build out your entire page. Our basic template starts out with:
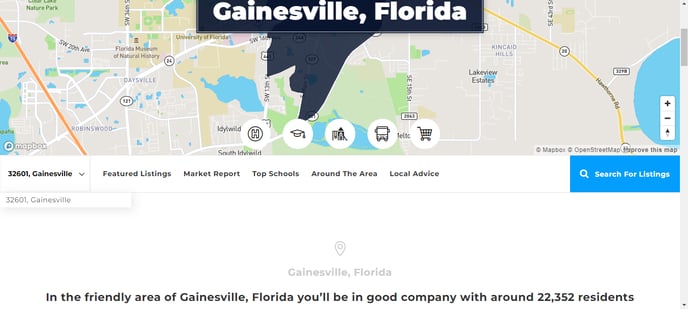
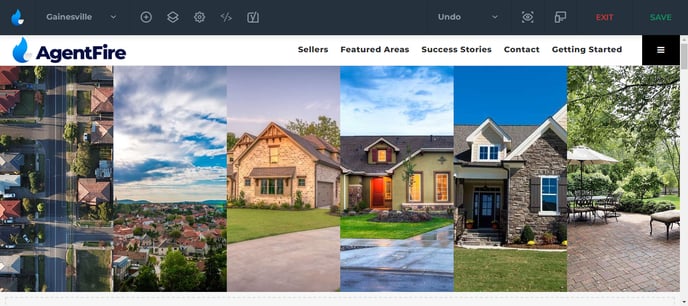
POI Map, to show off your local area along with locations/points of interest for Hospitals, Schools, Parks, Public Transit and Super Markets.
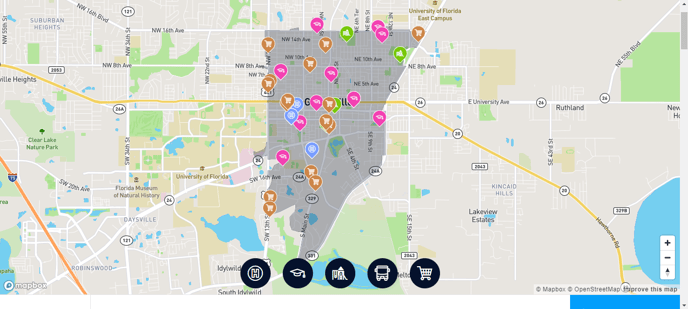
An Area Navigation block, to show off different Neighborhoods within your Area, along with Anchor links to drop down exactly to the category of the area your client needs to view!
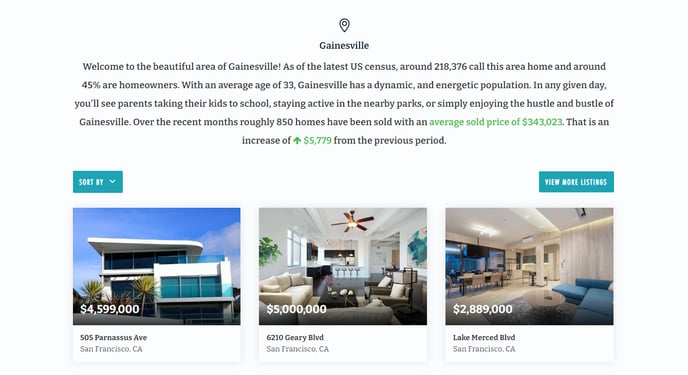
Featured Listings block with pre-generated content and market description.
Area Market Reports with market, sales and demographic data
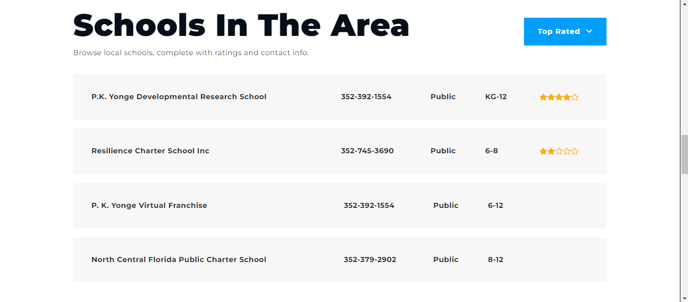
Top Schools in the area. Browse schools with complete ratings and contact info!
Yelp Businesses: Find the best rated local businesses in your area!

Featured Blog Posts so you can show off your written articles, or purchase blog articles and page content from our Marketplace!

Settings
You will see 4 dropdown tabs in Settings:
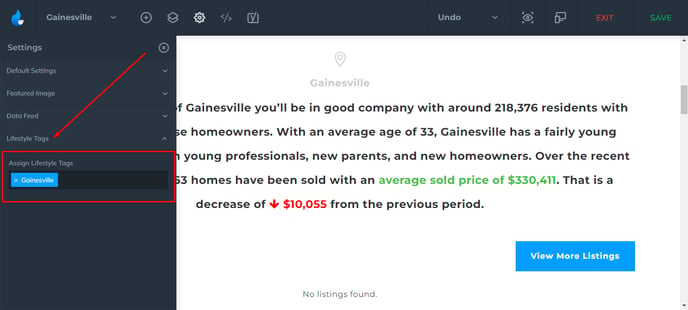
Default Settings, Featured Image, Data Feed and Lifestyle Tags.
In Default Settings, the Area Navigation (Legacy) is a sticky navigation that will follow you down the entire page! Click on the Anchor links or select a neighborhood to switch to!

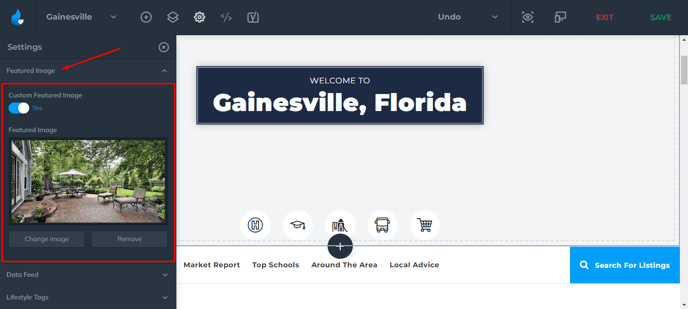
In the Featured Image tab, select a map or add a custom one by enabling Custom Featured Image to show on your Featured Areas section.
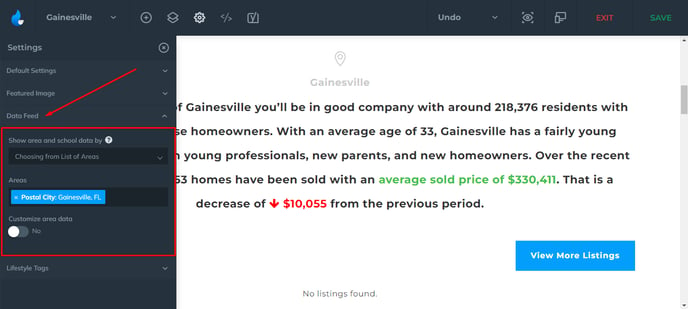
In the Data Feed tab, select the areas you'd like to show market data and school data by. Choose from a list of areas, Enter Zip codes or Show Amenities and Schools from the parent area.
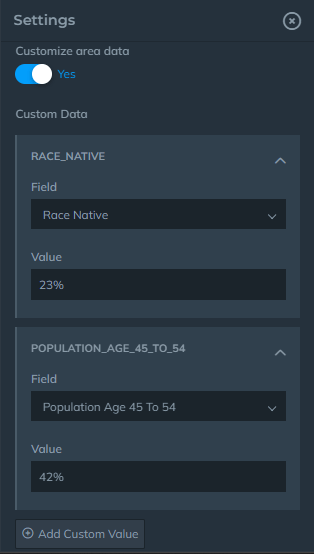
Enter Custom Data and show your potential clients all the data you can gather!
Assign Lifestyle Tags to your area!
Yoast SEO
Add SEO to your area page! Add any meta scripts to your head or body as well as your Facebook Pixel code.
POI MAP
Now let's cover each block and it's functions/features:
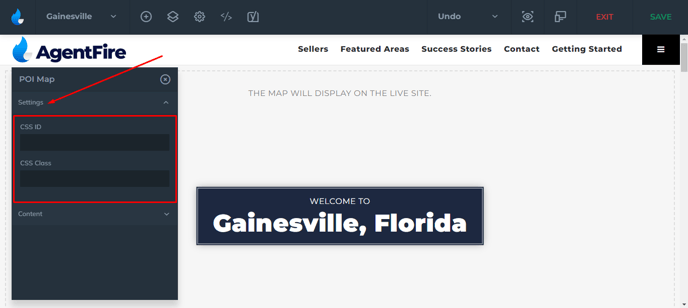
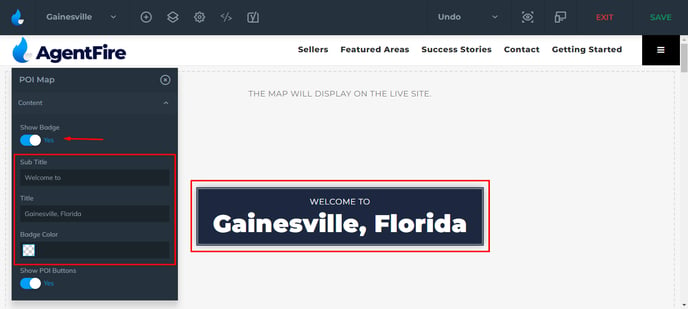
Content tab contains series of blocks which you can edit, rename, re-order, or disable. Our first block is the POI Map.
The Settings contain two fields, CSS ID and CSS Class.
Within the content you can add/remove/edit the badge, subtitle and title as well as change the color.
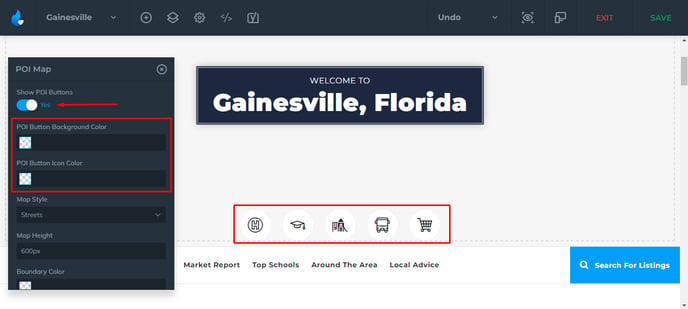
You can also do the same to the POI Buttons.
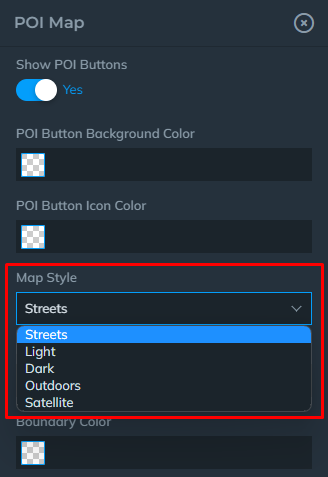
The Map can be viewed in different styles: Streets, Light, Dark, Outdoors, and Satellite.
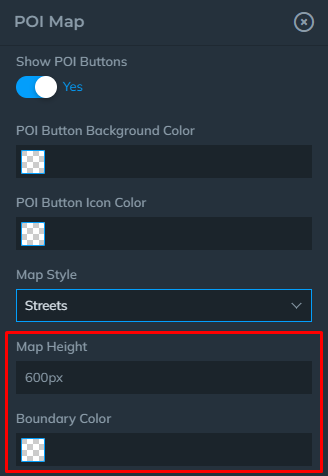
You can change the Map Height and the Boundary Color.
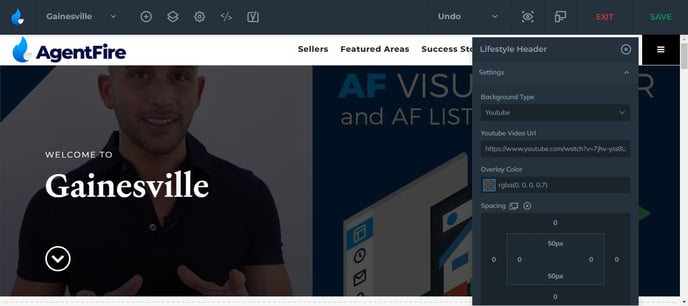
Lifestyle Header
Change your Background Type and select an item from the dropdown.
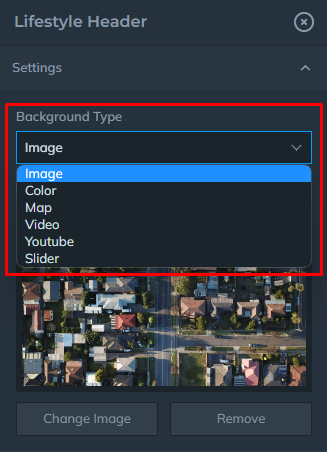
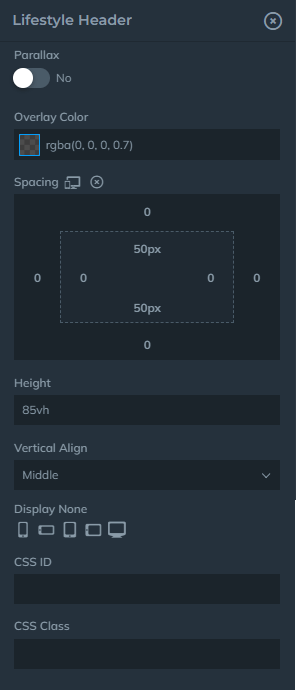
Image
Make your Image Parallax, add an Overlay Color, add Spacing to make your image unique, change the Height of the image, align the title of the image with Vertical Align and choose where not to display your image! Want to customize your header more? Add custom CSS classes.
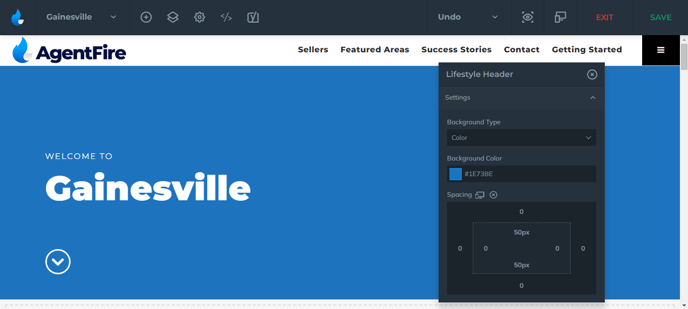
Color
Don't want an image? Add just a single Background Color!
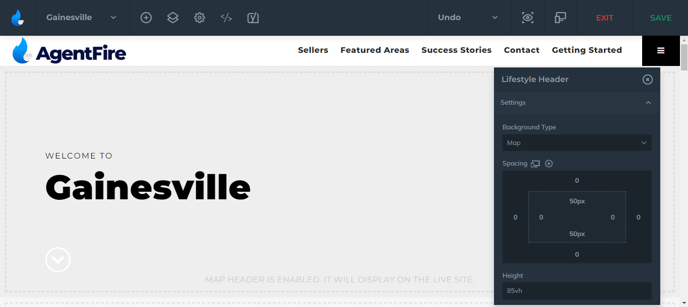
Map
Like the original look? Or just like the aspect of being of show your area on a map?
Have a video or a YouTube video you'd like to have as a header?
(It is highly recommended that videos be hosted off-site for better load speed)
Have more than one picture you'd like to show? Add a slider to your header! Or if you'd like to show them at the same time, Check out the Gallery Slider.
Select the Slides you want to show, Show/Hide Arrows or Dots, add a Fade Effect and Transition time to make your images slide quickly or slowly. And finally have it on Autoplay or select to turn it off!

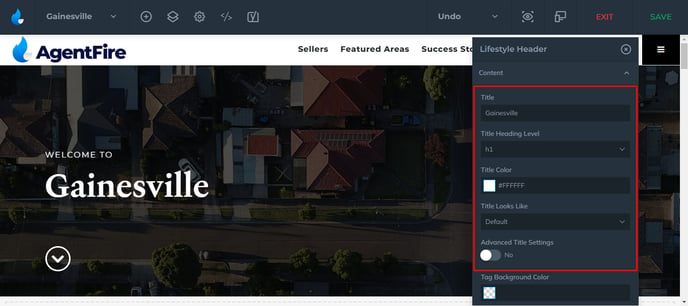
Content
Change the Title, Title Heading Level(h1, h2, h3, etc.), Title Looks like, Font Size for Small Devices, Medium Devices, etc. Line Height and Title Color.
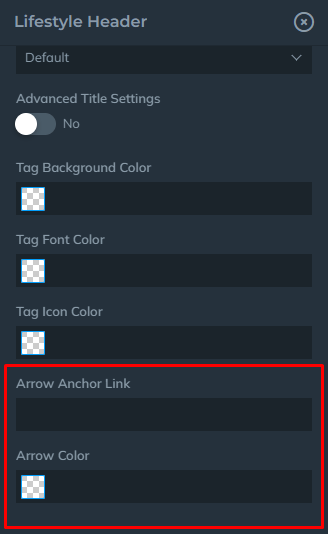
Change the Tag Background Color, the Tag Font Color and the Tag Icon Color.
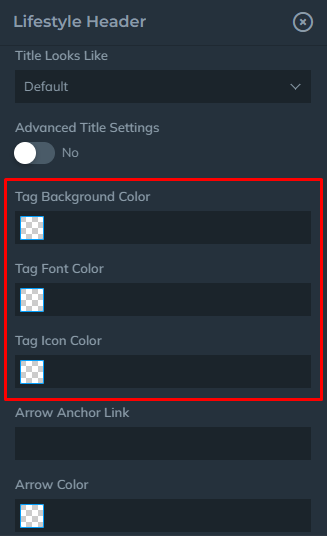
Change the Arrow Anchor Link as well as the Arrow Color.
Gallery Slider
Add up to 6 images to show on the slider and add more to show off your current, active or sold homes in your area!
Select to add the Featured Map on the slide, Create a space between the slides and change the height of the images!

Area Navigation
Settings
The new Area Navigation toolbar features a friendly UI with many features.
Let's start with the Settings:

You have the ability to set the bar as Sticky or not! Change the Background Color, Border Color, Text Color of the bar itself as well as changing the Search Button attributes as well.

Content
Within the content you have the ability to show or hide the assigned agent, show areas or area neighborhoods, show a search button or form and change the label for the button.
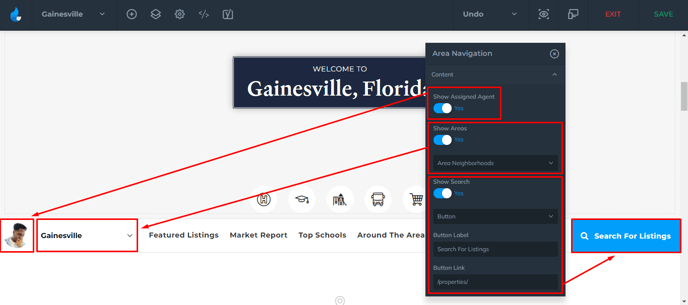
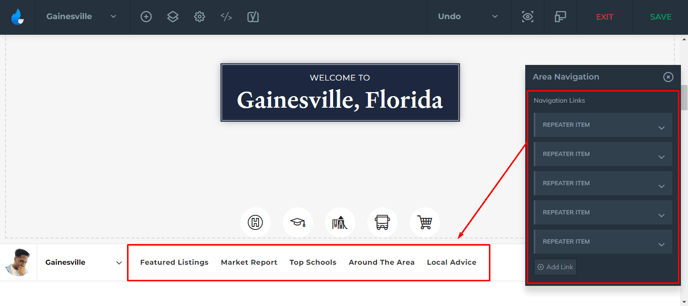
You're able to set your Navigation Links as well as organize them in any order you'd like.
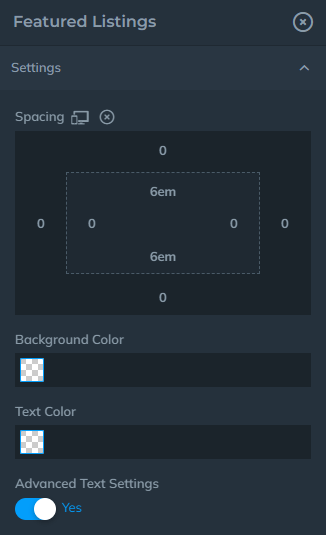
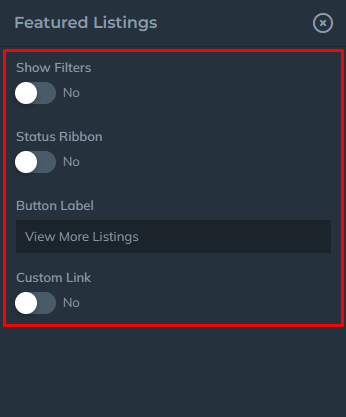
Featured Listings
Settings
Give your area some style and make it stand out from the rest. Change the spacing, background color, title and text color.
Style it more by turning on the Advanced Text Settings. Change the Font Size, Line Height, Weight and change the listing boxes!

Content
Don't like the Market Description? Use a Custom Description instead, or remove it entirely by using the 'Default' Header Type. Select the Source of your listings, the Areas you'd like to show or maybe just the Listings that are for sale!

Want to feature properties that you've sold with them being static? No problem!
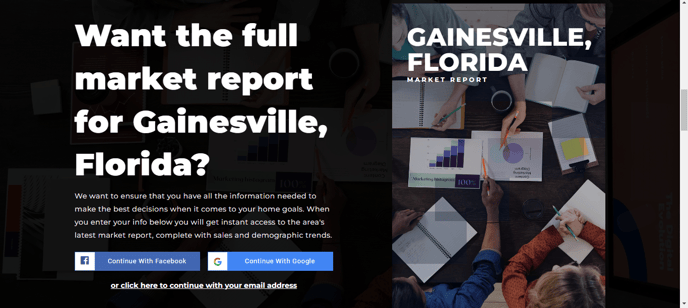
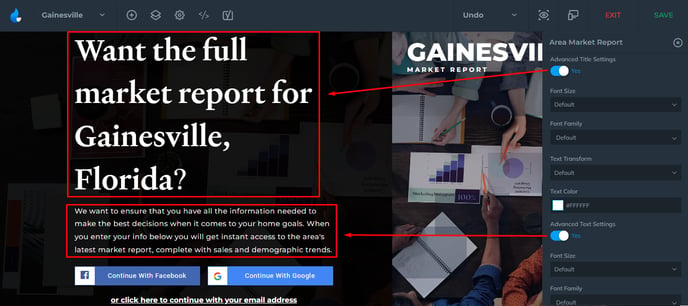
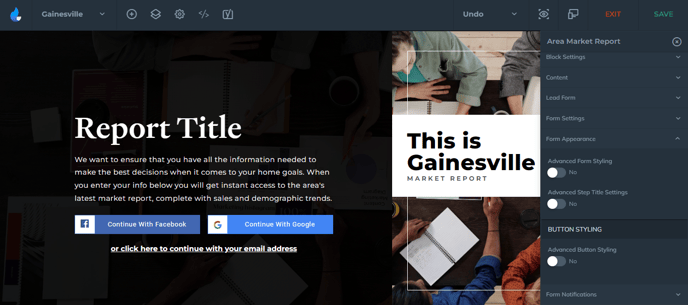
Area Market Report
The Area Market Report is a great feature that will allow you to provide your clients with numbers that other real estate brokers might not have or be as easily accessible to. Give your clients the numbers they want within seconds!
In this section we will discuss Block Settings, Content, how to set up your Lead Form, Form Settings, Form Appearance, and Form Notifications.
Block Settings
Change around the spacing and background type. Add your own background image and customize it more by adding an overlay, changing the font color and more!

Change the color of the text, font size, family and text transform to suit your needs!
Content
Set the title and write the best description for your area! Change the report cover to one of our 3 styles or add your own image! Change the title color and subtitle color as well changing the area name.

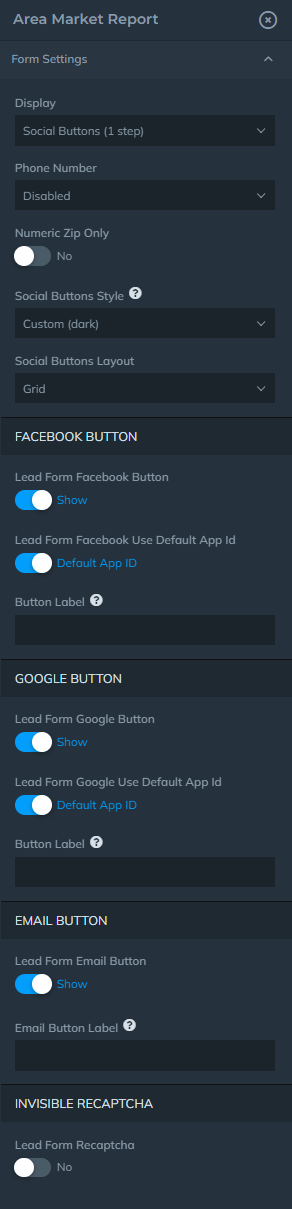
Lead Form
Select what type of form you'd like to show and select a form that your potential clients might use to view your detailed market report.

Form Settings
Set the display method of the form for your market reports, choose to show or hide the login buttons (Facebook or Google), hide the email button, add an invisible reCAPTCHA.
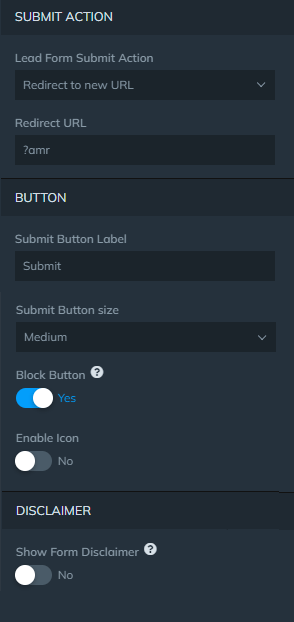
Change the action after the potential client submits the form and redirect them. Change the style of the button by changing the size.
Form Appearance
Change the form styling and button styling.
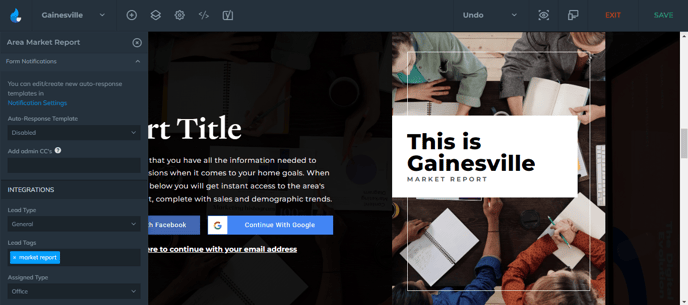
Form Notifications
Create notifications after users submit their information! Add A Lead Type, Tags or assigned type or Office/Member.
Top Schools
Settings
As with every block, we are able to change our spacing, background color, title and subtitle color and customize Schools In The Area block .

Content
Change the Title and Subtitle to match your needs.

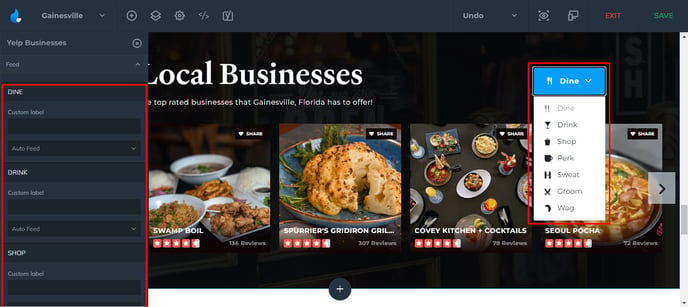
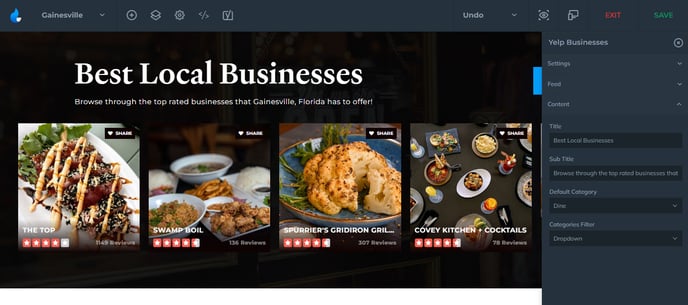
Yelp Businesses
Our new Yelp Business block allows you to show off the restaurants and local venues near you to help attract more users to your area!
Settings
Change the spacing, background type and image and add an overlay. You can also change the font size, family and text transform.

Feed
Select the feed you'd like to present. From Dine, Drink, Shop, Perk, Sweat, Groom or Wag. Then select If you'd like to Auto Feed, Custom Feed or Disable!
Content
As for the content, change the Title, Subtitle, pick the Default Category and change the Filter type to tabs!
Once you are happy with the Editing you've done don't forget to hit the SAVE button to leave the Editor.
Make sure to read through the Introduction Article about the Area Guides to get a good grasp about the rest of the features you can setup, such as assigning agents, adjusting SEO settings, and more.
Further Education:
Learn how to Add/Edit Areas, Neighborhoods, Developments, and also understand how to use all the features of the Area Guides: