
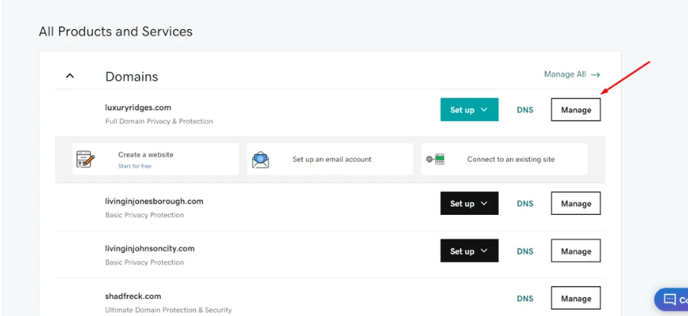
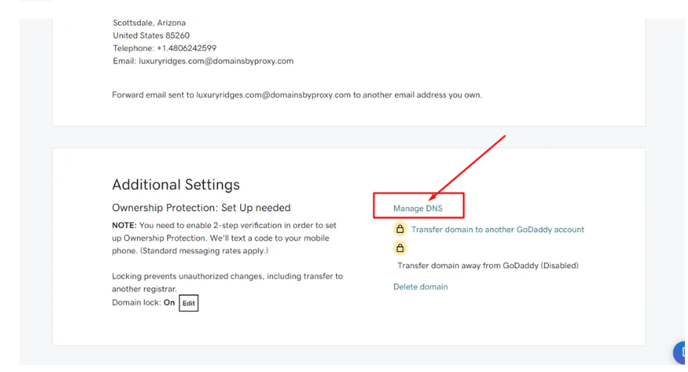
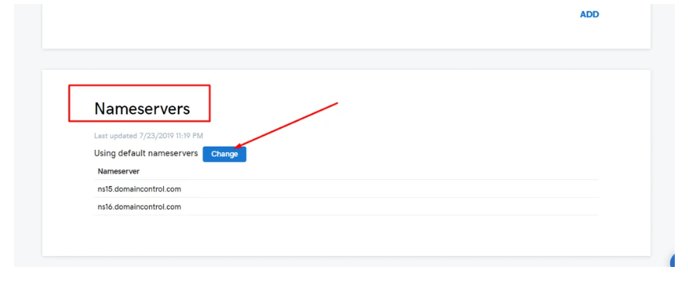
Changing nameserver records is not a hard task. After logging into your GoDaddy account, find the domain you are connecting to AgentFire, and click Manage. Select Manage DNS and then hit Change under Nameservers.
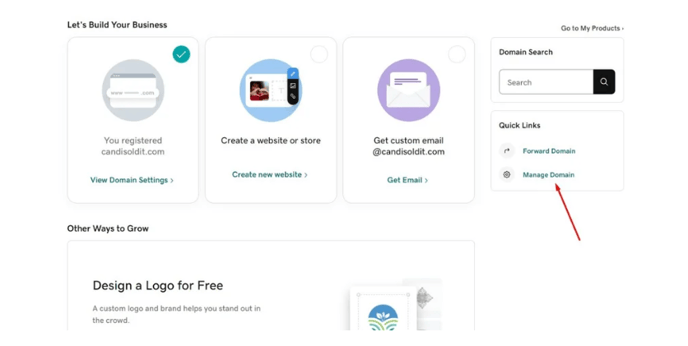
Some accounts have this extra step as well, in that case just click on Manage domains:
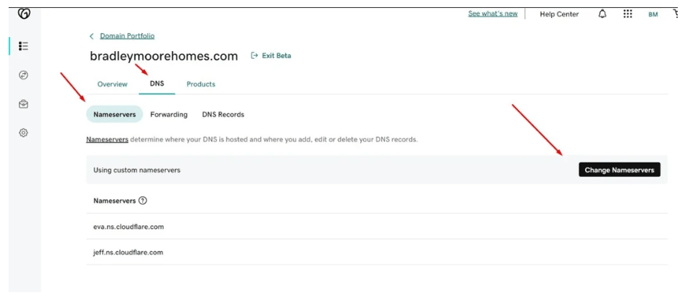
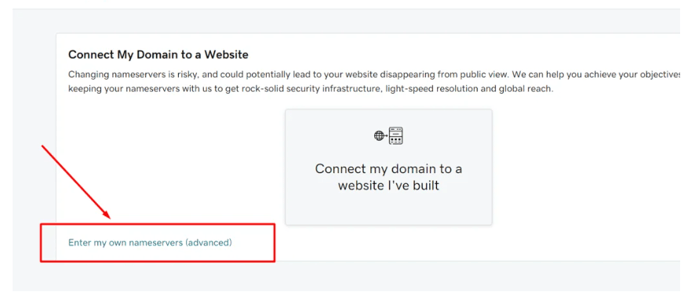
Select "Enter my own nameservers (advanced)" and add our nameservers:
eva.ns.cloudflare.com
jeff.ns.cloudflare.com

Make sure that you deleted ALL name servers that you have previous set and leave just ours there.
After selecting Save, check the box next to Yes, I consent to update Nameservers for {your domain}.

Note: If you find this to be a difficult task, you can always delegate access to our team. Please review the article below for instructions on delegating access to GoDaddy.
But Why do I need to point my nameservers to you?
Great question. There are two major reasons for this.
- We use a global CDN: Your website will be placed on our Cloudflare.com account, which refers to a geographically distributed group of servers that work together to provide fast delivery of your content. The CDN allows for quick transfer of all your pages, images and videos. Use of the CDN also helps protect your website from any malicious attack while boosting performance considerably, but requires that we control the DNS Zone File.
- DNS zone files can be confusing: The last thing we want is to put you in a position where you are in unfamiliar territory that can prove both frustrating and time-consuming to correct errors that can prevent your site or other related services from working properly. A DNS Zone file is all your DNS Records in one area(TTL, MX & CNAME for example).