Facebook Messenger's Platform offers a customer chat plugin to integrate your Messenger experience directly into your website.
Facebook chat! Simply the best way for your business to communicate in real time with your visitors.
Facebook has developed a Messenger Chat system (currently in beta) that makes it easy to integrate chat services on your listing pages.
IMPORTANT NOTES:
-
Facebook does sometimes make changes to their UI. Facebook provided instructions for configuring and white-listing chat on your site can be found here.
-
Use of the Facebook Messenger Chat system requires use of a Facebook business page. This is not available for connection to your personal Facebook profile.
-
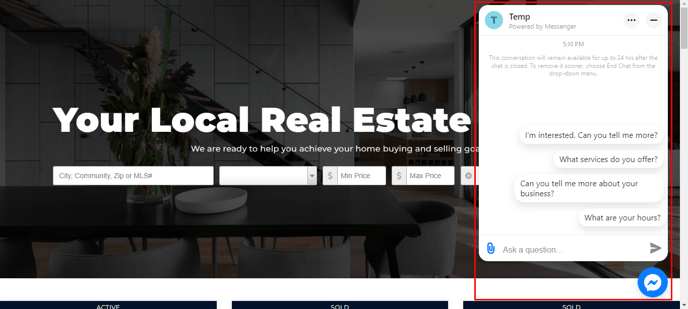
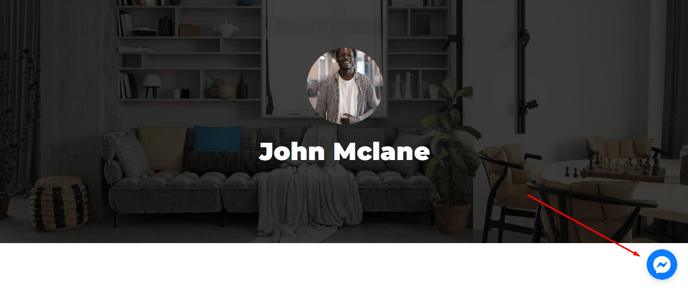
The Facebook Chat system when in use on your site will appear similarly to the example below.
Step 1
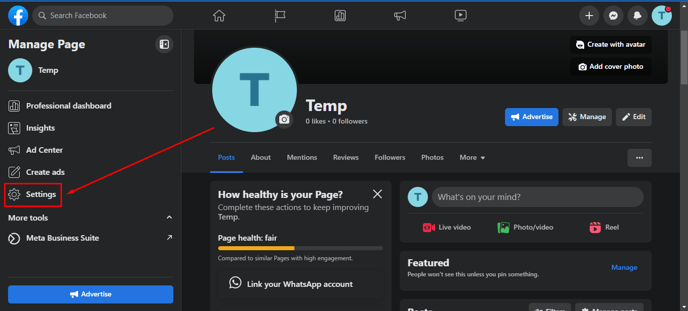
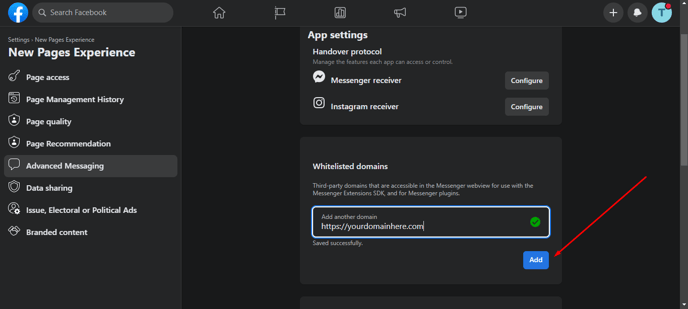
Whitelist your website domain in your Facebook Business account.
Go to Facebook Business page and click Settings in the side menu.
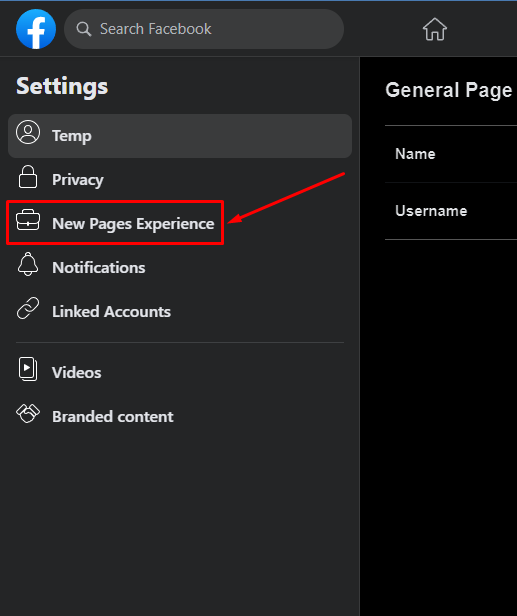
Select New Page Experience on the left.
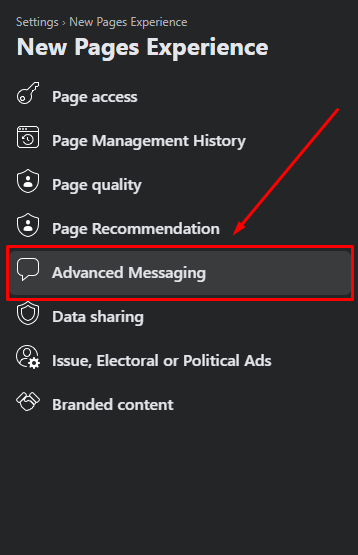
From here, click Advanced Messaging.
Scroll down to the Whitelisted domains section, then insert your site URL and click the Add button.
STEP 2:
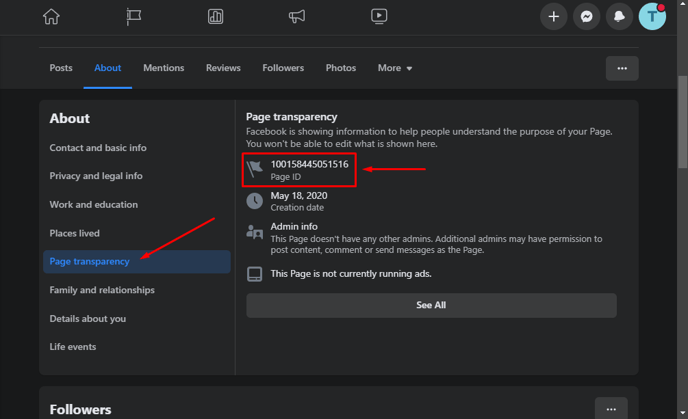
Obtain your Page ID from your Facebook Business page.
Navigate to your Facebook Business Page and click the About button.
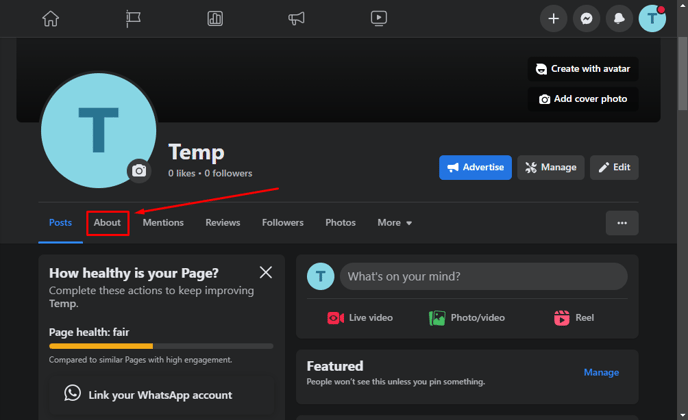
Select Page Transparency and Copy your page ID.
Step 3:
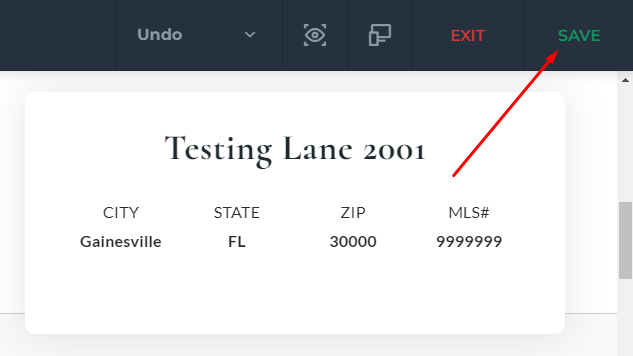
Navigate to a listing and visit the "Call to Action Tab" in the AF Editor.
Enter Page ID and (optional) edit Welcome Message.
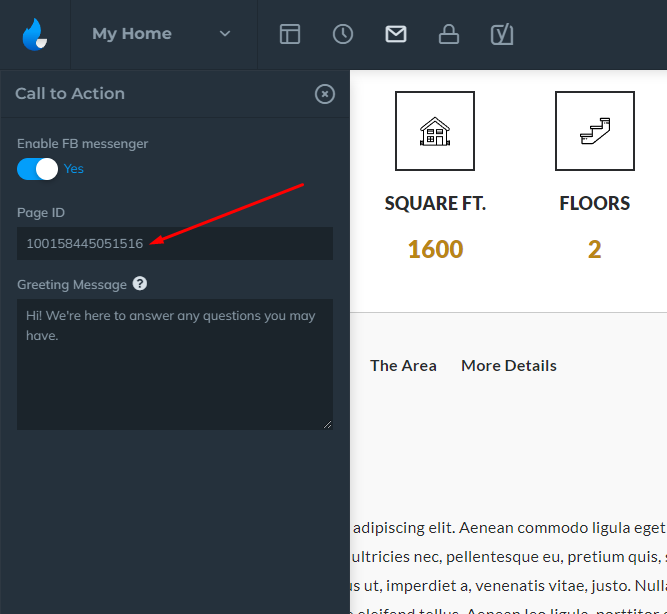
Be sure to save your work!
The Facebook chat button will appear in bottom right corner. (Team Member page example shown):
Continuing Education:
Learn how to navigate the AF editor, build your listing content, enable awesome features and more in our additional articles on the Listings V3 plugin.